8 9Assembly
Spring loaded pin
The Coil cable is directly wired into the coil and is not
removable. Any attempt to disconnect this cable will void
your warranty
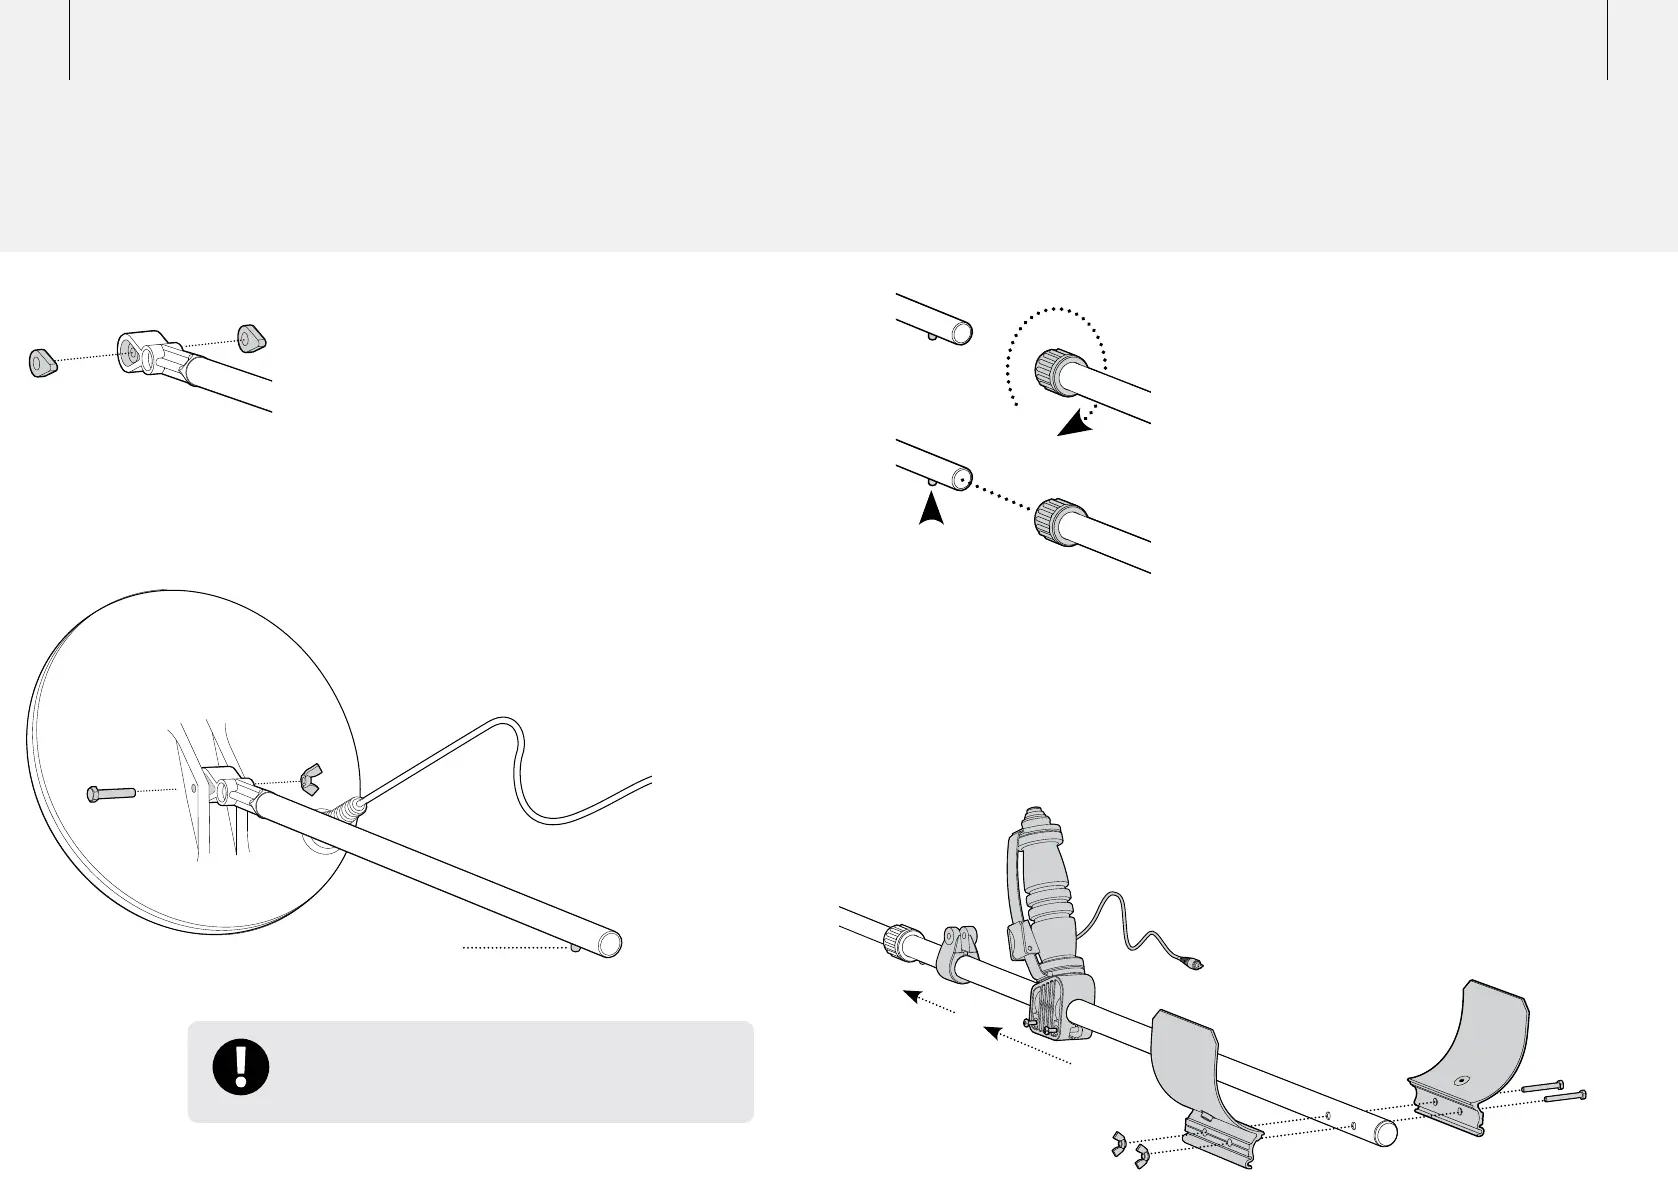
Attaching the Lower Shaft to
the Upper Shaft:
1 With the twistlock facing away from you, rotate the twistlock
of the upper shaft clockwise to ensure it is loosened, as
pictured left.
2 Compress the spring loaded pin of the lower shaft. Slide
the lower shaft into the upper shaft until the pin reaches an
adjustment hole. The pin will spring out and clip into place.
3 Rotate the twistlock counter-clockwise to clamp the lower
shaft and prevent movement.
Attaching the Handle to the Upper Shaft:
1 Slide the bungy cord clamp onto the upper shaft.
2 Slide the handle onto the upper shaft so that it angles away
from you, as shown below.
Attaching the Armrest to the Upper Shaft:
1 Place the two armrest halves on either side of the upper
shaft, aligning the armrest and upper shaft holes.
2 Insert the bolts through the armrest and upper shaft holes.
3 Loosely fasten the wing-nuts onto the bolts (these will be
tightened after the control box is attached).
Attaching the Coil to the Lower Shaft:
1 Plug the two rubber washers into the holes on either side of
the lower shaft.
2 Ensure that the spring loaded pin of the lower shaft is
pointing downwards. Slide the lower shaft into the bracket
on top of the coil.
3 Insert the bolt through the lower shaft and the bracket on
top of the coil. Fasten with the nut provided; being careful
not to damage the thread of the nut by over-tightening. This
may need to be loosened to adjust the coil to a comfortable
detecting angle.
Note: If the coil becomes loose over time the rubber washers
may need replacing.
 Loading...