40
A
UTO-RECORDING MODE - ADVANCED OPERATION
Place the camera on a tripod, and set the drive mode to
remote control (p. 38). Arrange the camera and subject to
compose the picture.
When setting up the camera, make sure the subject will
fall within the focus frames. Focus lock cannot be used
with the IR remote control. Focus area selection (p. 52)
and manual focus (p. 67) can be used.
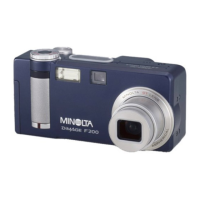
The optional IR Remote Control RC-3 allows remote camera operation up to 5m (16 ft.) away. The
remote control unit can also be used in movie and audio recording (p. 77). The remote control may
not operate with backlit subjects or under fluorescent light.
1
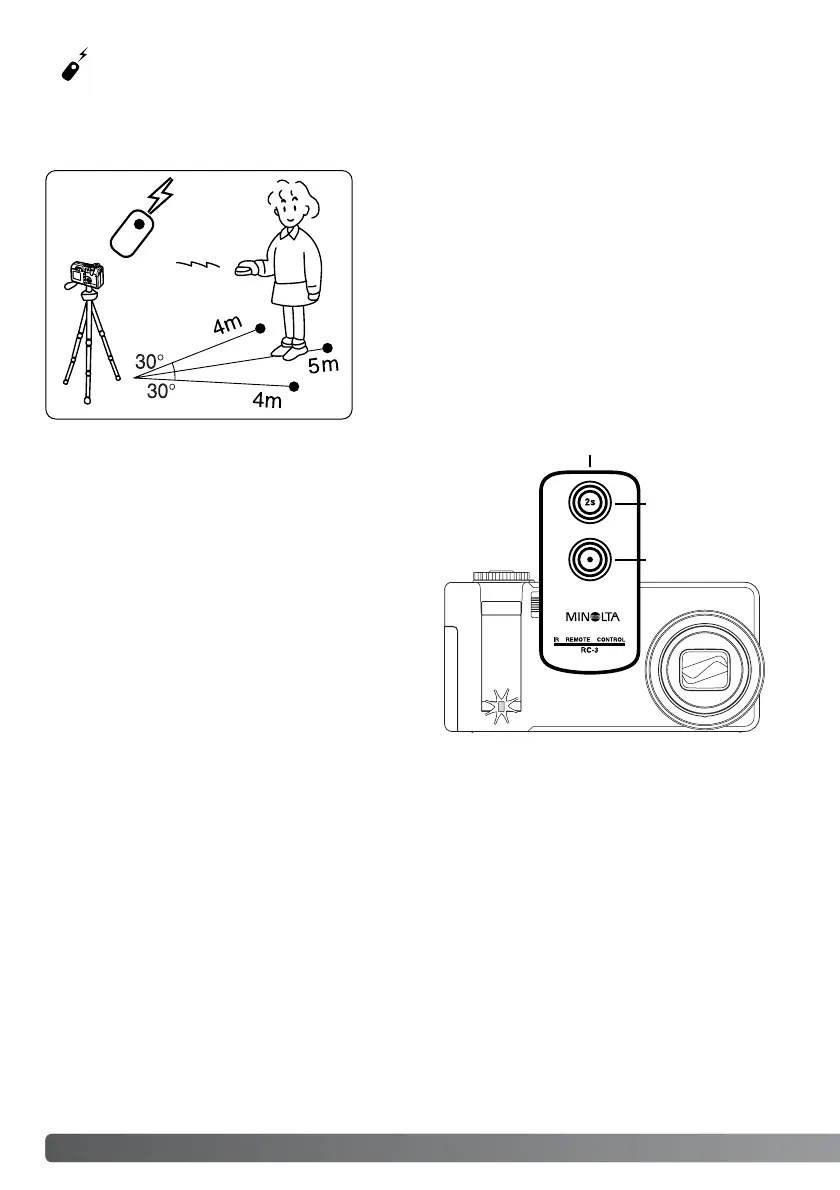
Point the emitter window of the remote control unit
toward the camera and press the release button or
the delay button to take the picture.
When the release button is pressed, the self-timer
lamp on the front of the camera (1) will blink once
before the picture is taken. When the delay button
is pressed, the self-timer lamp will blink for two
seconds before the picture is taken.
Emitter window
Delay button
Release button
Remote control (Sold separately)
 Loading...