3-7 Connection of the foot switch
Connect the foot switch (NO.) to the control box (NO.)
The foot switch is enclosed in the accessory box.
For the safety, please make sure
to carry the sewing machine head
by more than two people
.
Caution
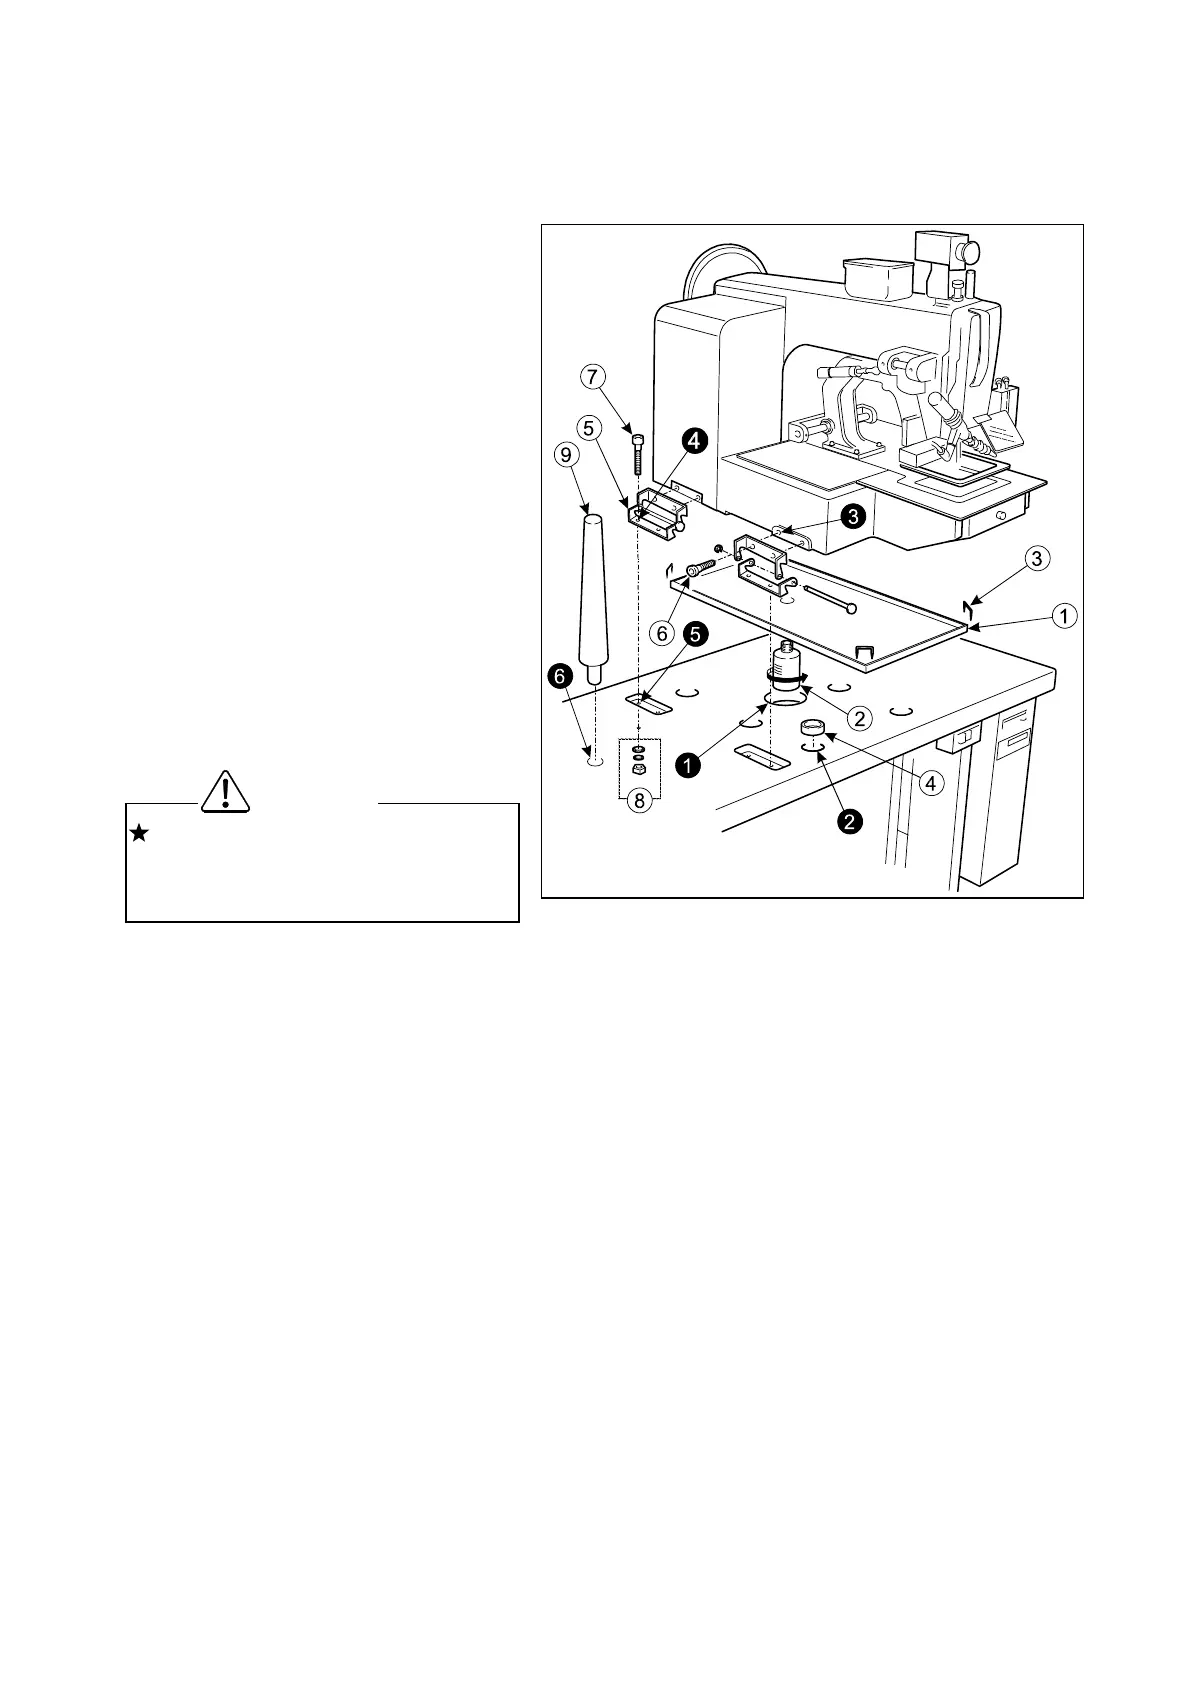
3-8 Installation of the oil pan
(1) Assemble the oil pan
(2) (NO.) and oil bottle (NO.),
which are enclosed in the
accessory box.
(3) Insert the oil bottle (NO.) into the
table top cut-out hole (NO.),
which has much shorter distance
from the bottle center to the front.
(4) Install the oil pan (NO.) parallel
with the table front edge.
(5) Fix the oil pan (NO.) at its four
corners on the table top with four
staples (NO.) en-closed in the
accessory box.
3-9 Installation of the sewing machine
head
(1) Make sure to hold the machine table with the caster stopper.
(2) Fit the rubber cushion pads (NO.) into the each hole (NO.) on the table top. The rubber
cushion pads (NO.) are enclosed in the accessory box.
(3) Put the sewing machine head on the table top and set the each leg to the each rubber
cushion pad (NO.)
(4) Attach two hinges (NO.) temporarily, make the set screws (NO.) fastening with the thread
holes (NO.) light, on the left side surface of the machine bed with the hexagonal socket
head set screws (NO.).
(5) At this time, take notice of the E-shaped snap ring must be come to the front.
(6) These parts are all enclosed in the accessory box.
(7) Fit the screw holes (NO.) of the hinges (NO.) to the bolt setting holes (NO.) on the table
top then, pass the bolt (NO.) through these holes and fasten the bolt (NO.) to fix the
hinges (NO.) with the flat washers, the spring washers and the nuts (NO.).
(8) Fasten firmly hexagonal socket head set screws (NO.) which set the hinges (NO.)
temporarily at above procedure (4) then, fix the hinges (NO.) perfectly.
(9) Insert the head (NO.) into the hole (NO.) on the table top.
5
 Loading...


