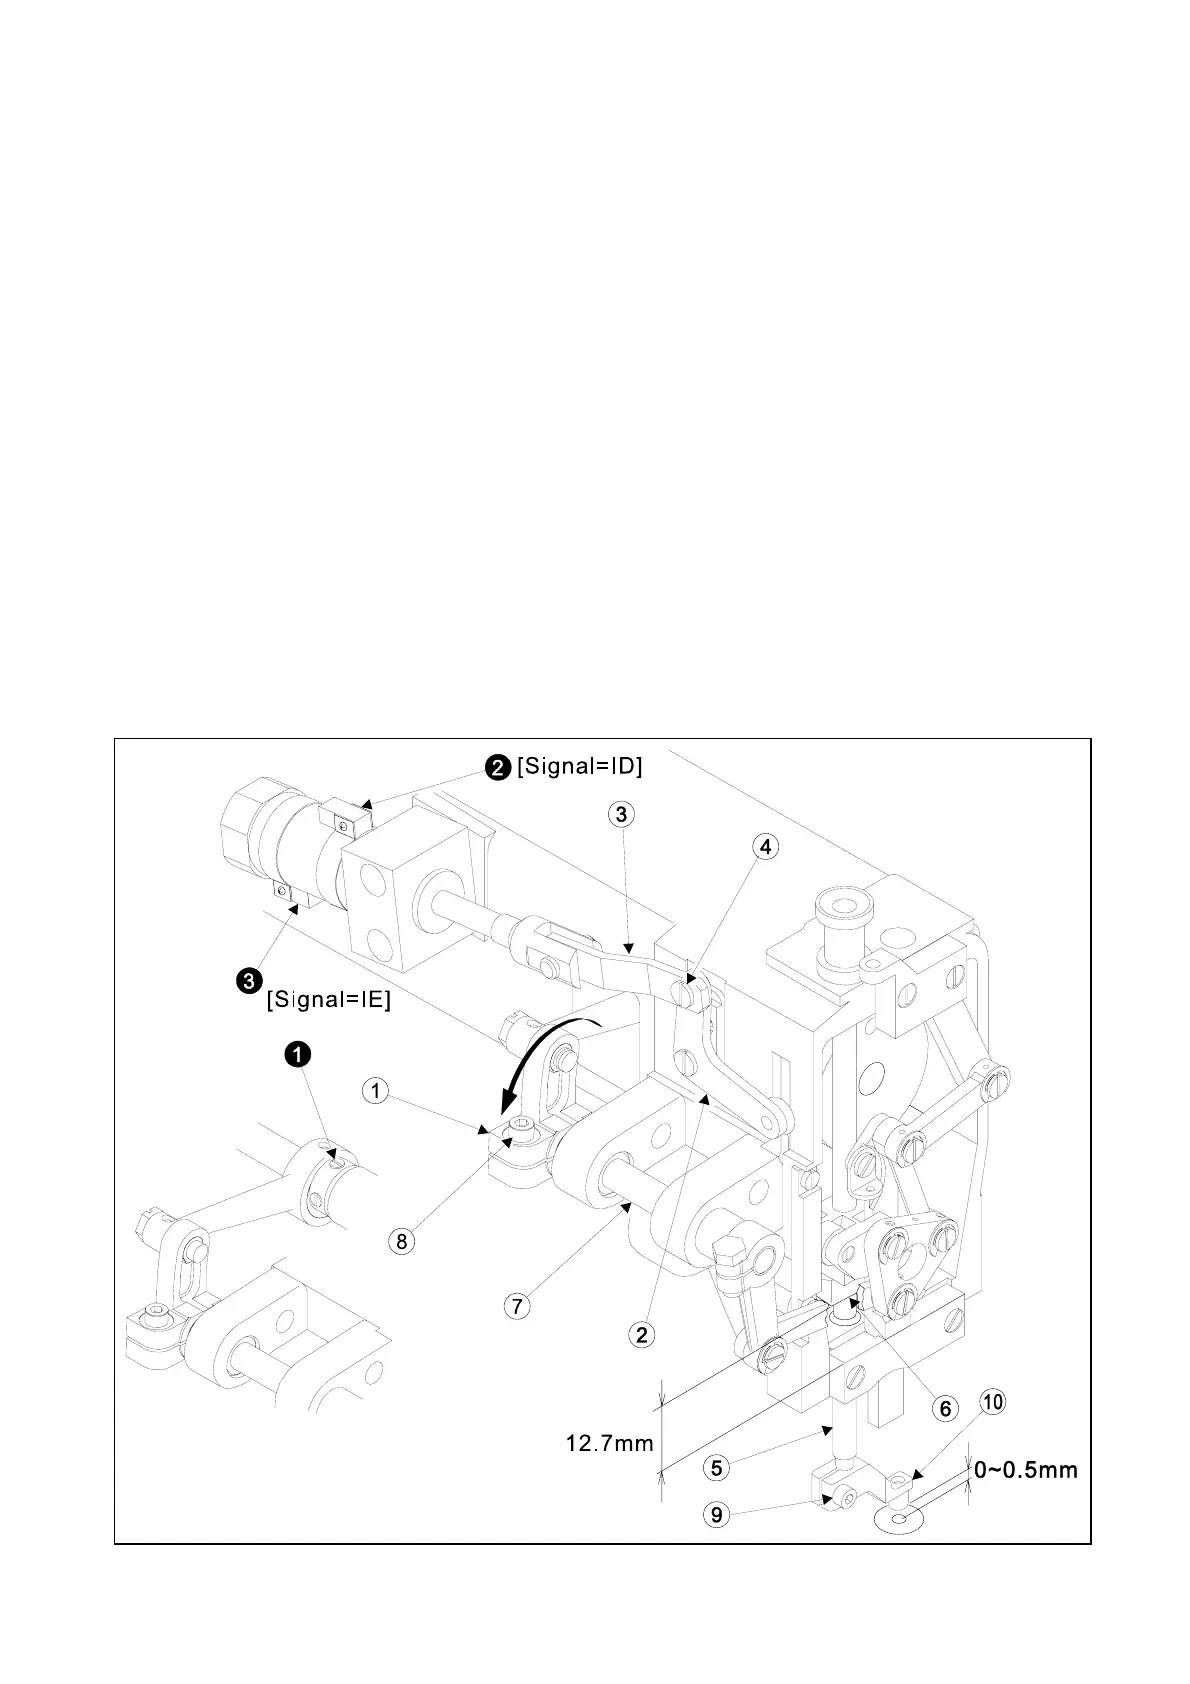
7-7 Adjustment of the presser foot
7-7-1 Adjustment of the driving shaft arm(front) and the presser foot
(1) Turn the power switch OFF
(2) Remove the side cover and the face cover.
(3) Turn the sewing machine pulley by hand and stop the driving shaft arm-rear(NO.) at its
maximum swing position in arrow direction.
(4) Disconnect the presser bar lifting link (NO.) from the presser lift plate (NO.) by removing
the hinge screw (NO.) .
(5) Lift up the presser bar (NO.) and the hand lift link (NO.).
(6) Insert the 12.7mm block
(7) Tighten the screw (NO.) of the driving shaft arm-front (NO.) without the axial clearance of
the driving shaft.
(8) After the adjustment, connect the presser bar lifting link (NO.) with the presser lift plate
(NO.) by setting the hinge screw (NO.) and put the face cover and the side cover back on
the original location.
(9) Loosen the screw (NO.) of the presser foot (NO.) and then, adjust the presser foot
position to be become the clearance between the bottom surface of the presser foot and the
surface of the sewing material 0~0.5 mm.
(10) Tighten the screw (NO.) of the presser foot with to come down to the center of the needle
hole of the presser foot.
7-7-2 Adjustment of the sensor of the presser foot cylinder
29
 Loading...


