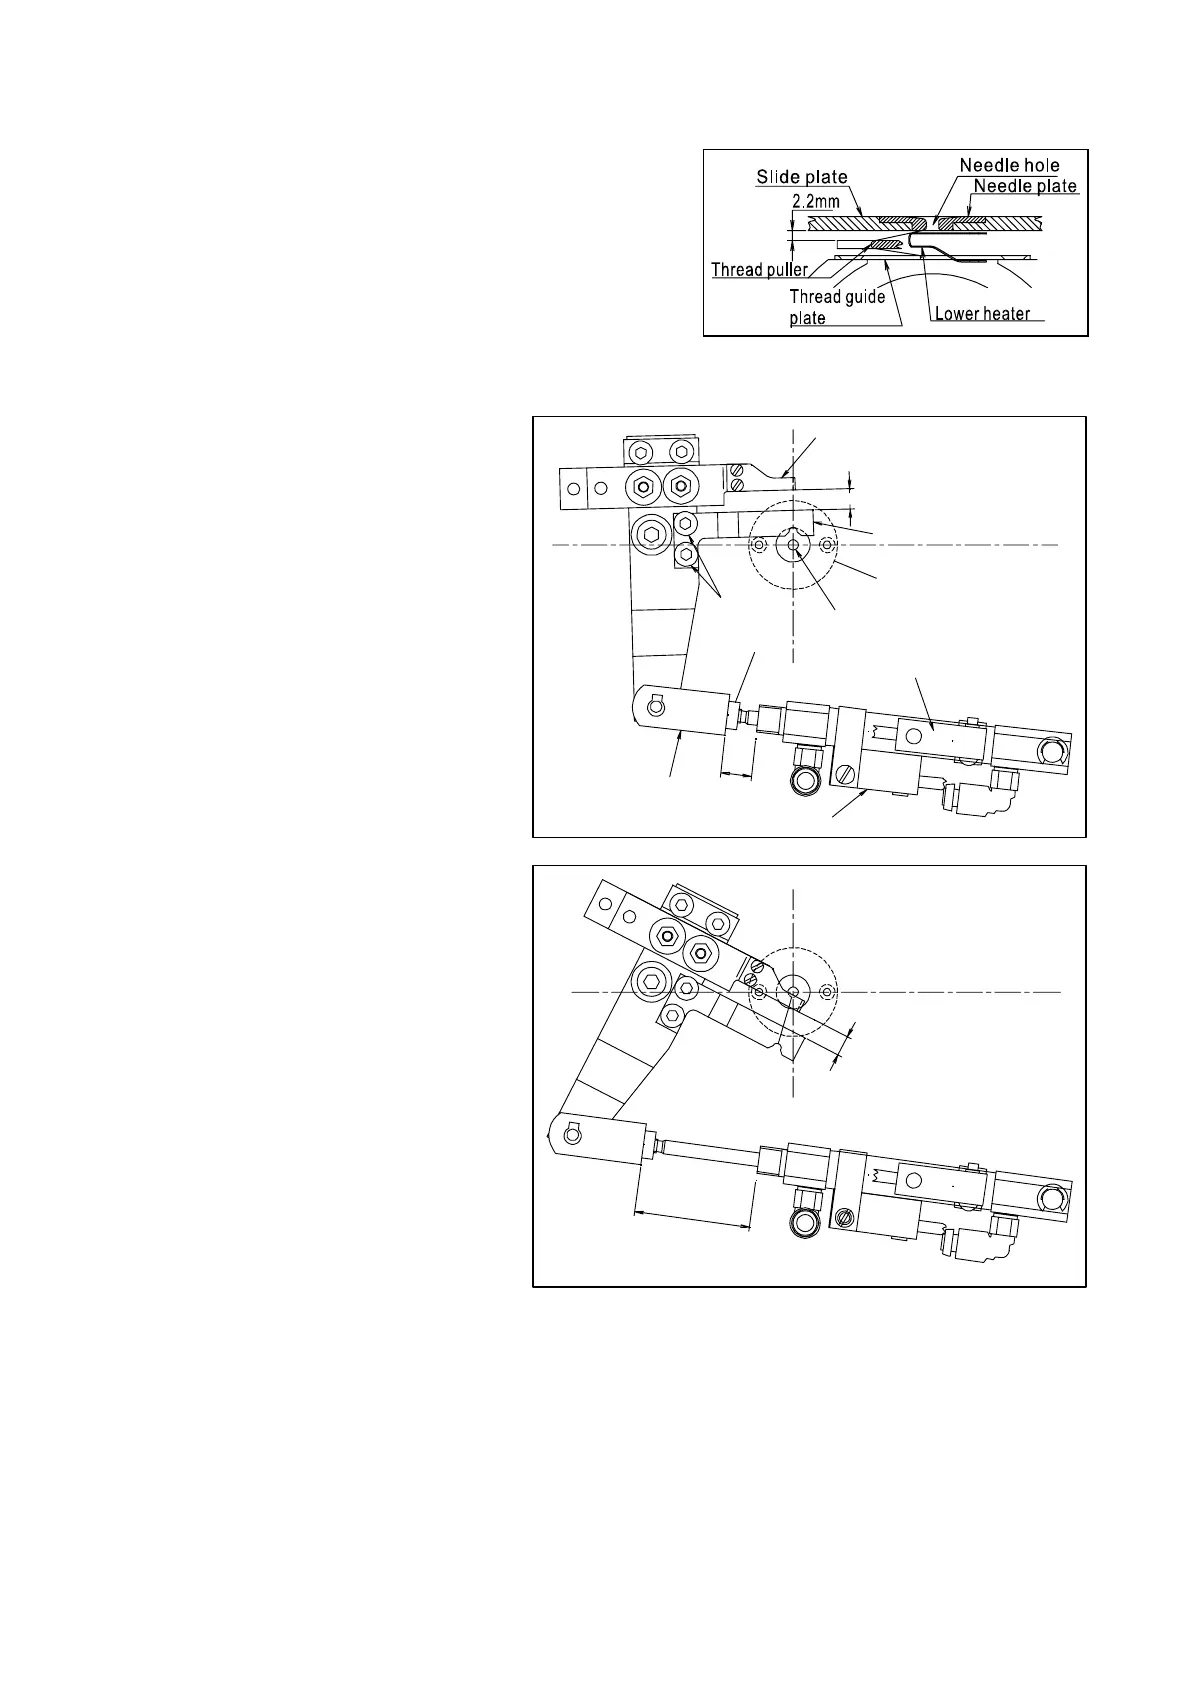
7-10 Adjustment of lower thread cut heater
34
The lower heater is in it’s initial position, when the
thread puller(NO.) is outside the area of needle hole
(NO.).
(1) Distance between thread puller(NO.) and lower
heater(NO.) should be about 6mm.
For correction of the lower heater(NO.), loosen the
screw(NO.) and change the position of the thread puller(NO.).
①
②
③
④
⑤
⑦
sensor (IG)
⑨
⑥
⑧
sensor(IF)
6mm
9mm
34mm
6mm
(2) The proper position of the lower
thread trimmer device is
obtained when the distance of
the cylinder and Y-shape
knuckle joint (NO.) is 9mm on
the withdrawing side of the
cylinder and is 34mm on the
extrusion side. For correction of
the distance, loosen the nut.
Proper height of the heater
(NO.) is where the heater is
very adjacent to the needle plate
(NO.) and also it does not
come in contact with any other
part.
For correction, bend the lower
heater.
(4) Height of the thread puller
(NO.) in the normal position
should be positioned 2.2mm
lower than the needle plate
(NO.).
For correction, bend the thread
puller(NO.).
(5) After this adjustment, check the
sensor IG(NO.) of the heater
cylinder should be ON and the
sensor IF(NO.) should be OFF
at the normal position.
 Loading...


