7-11
Chapter 7 ASSEMBLY OF BASIC ENGINE
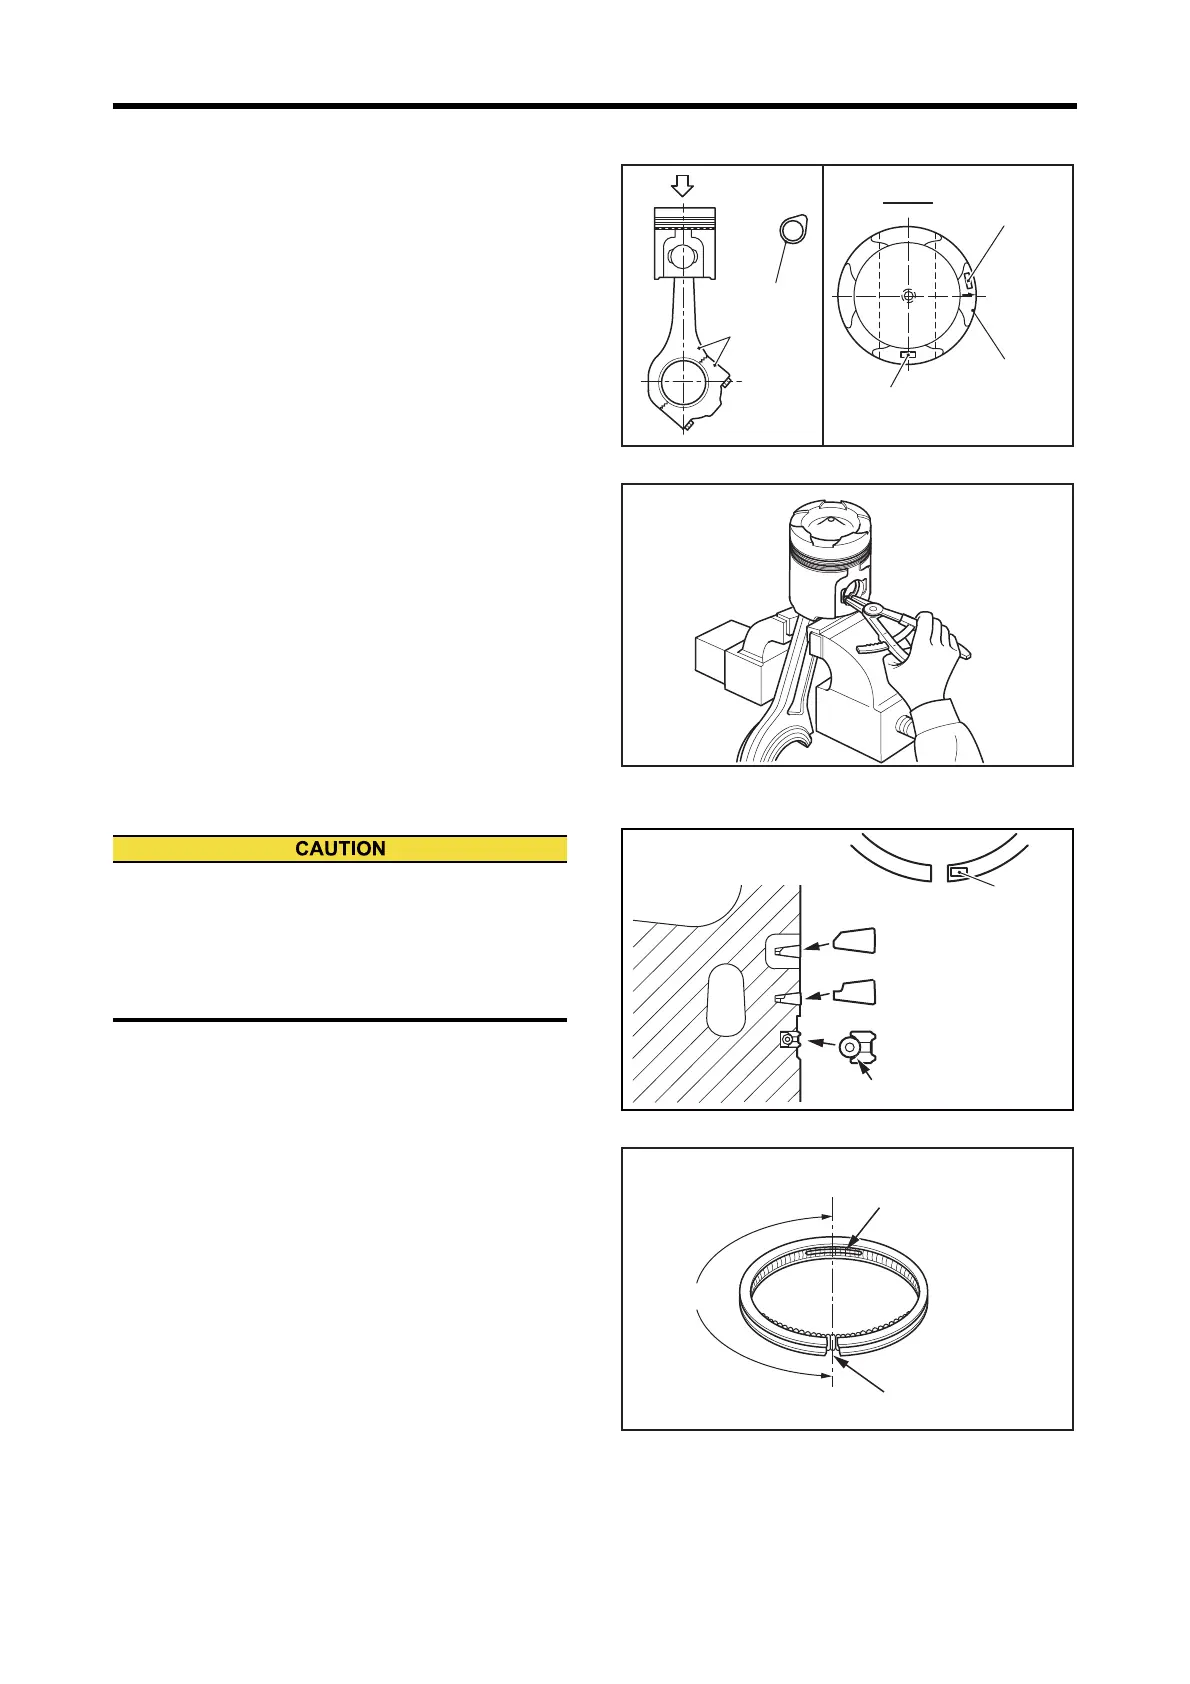
2.6 Piston and Connecting Rod - Assemble
(1) Apply engine oil to the piston pin, and assemble the
piston and the connecting rod. The orientation of piston
and connecting rod is shown in the illustration.
Note: The piston and piston pin are made for a clearance fit.
However, the piston pin is more easily inserted into the
piston if the piston is warmed up with a heater or with
hot water.
(2) Install the snap ring with ring pliers. Make sure that the
snap ring is fully inserted into the ring groove.
Assembling Orientation of Piston and Connecting Rod
Piston and Connecting Rod - Assemble
2.7 Piston Ring - Install
(1) Install the piston rings to piston with ring expander.
(2) Install the oil ring with its end gap 180° away from the
joint of the coil spring, as shown in the illustration.
Piston and Piston Ring - Install
Oil Ring and Coil Spring Assembling
CAM
A
Piston
weight
View A
Camshaft
Match mark
Direction
mark
(CAM↓)
ID mark
(Last 5 digits of PN)
A
Every piston ring has a top mark near the end gap.
Install piston rings with the marks facing upward.
Be careful not to install piston rings upside down. If
piston rings are assembled incorrectly, it results in
defects such as engine seizure.
Face up
the mark
Oil ring
Coil spring
Ring expander
P/N:37191-03200
No. 1 compression ring
No. 2 compression ring
Oil ring ends
Coil spring joint
180°

 Loading...