5-19
Chapter 5 DISASSEMBLY OF BASIC ENGINE
4.5.2 Removing the Piston With Pushing-up the Con-
necting Rod Big End
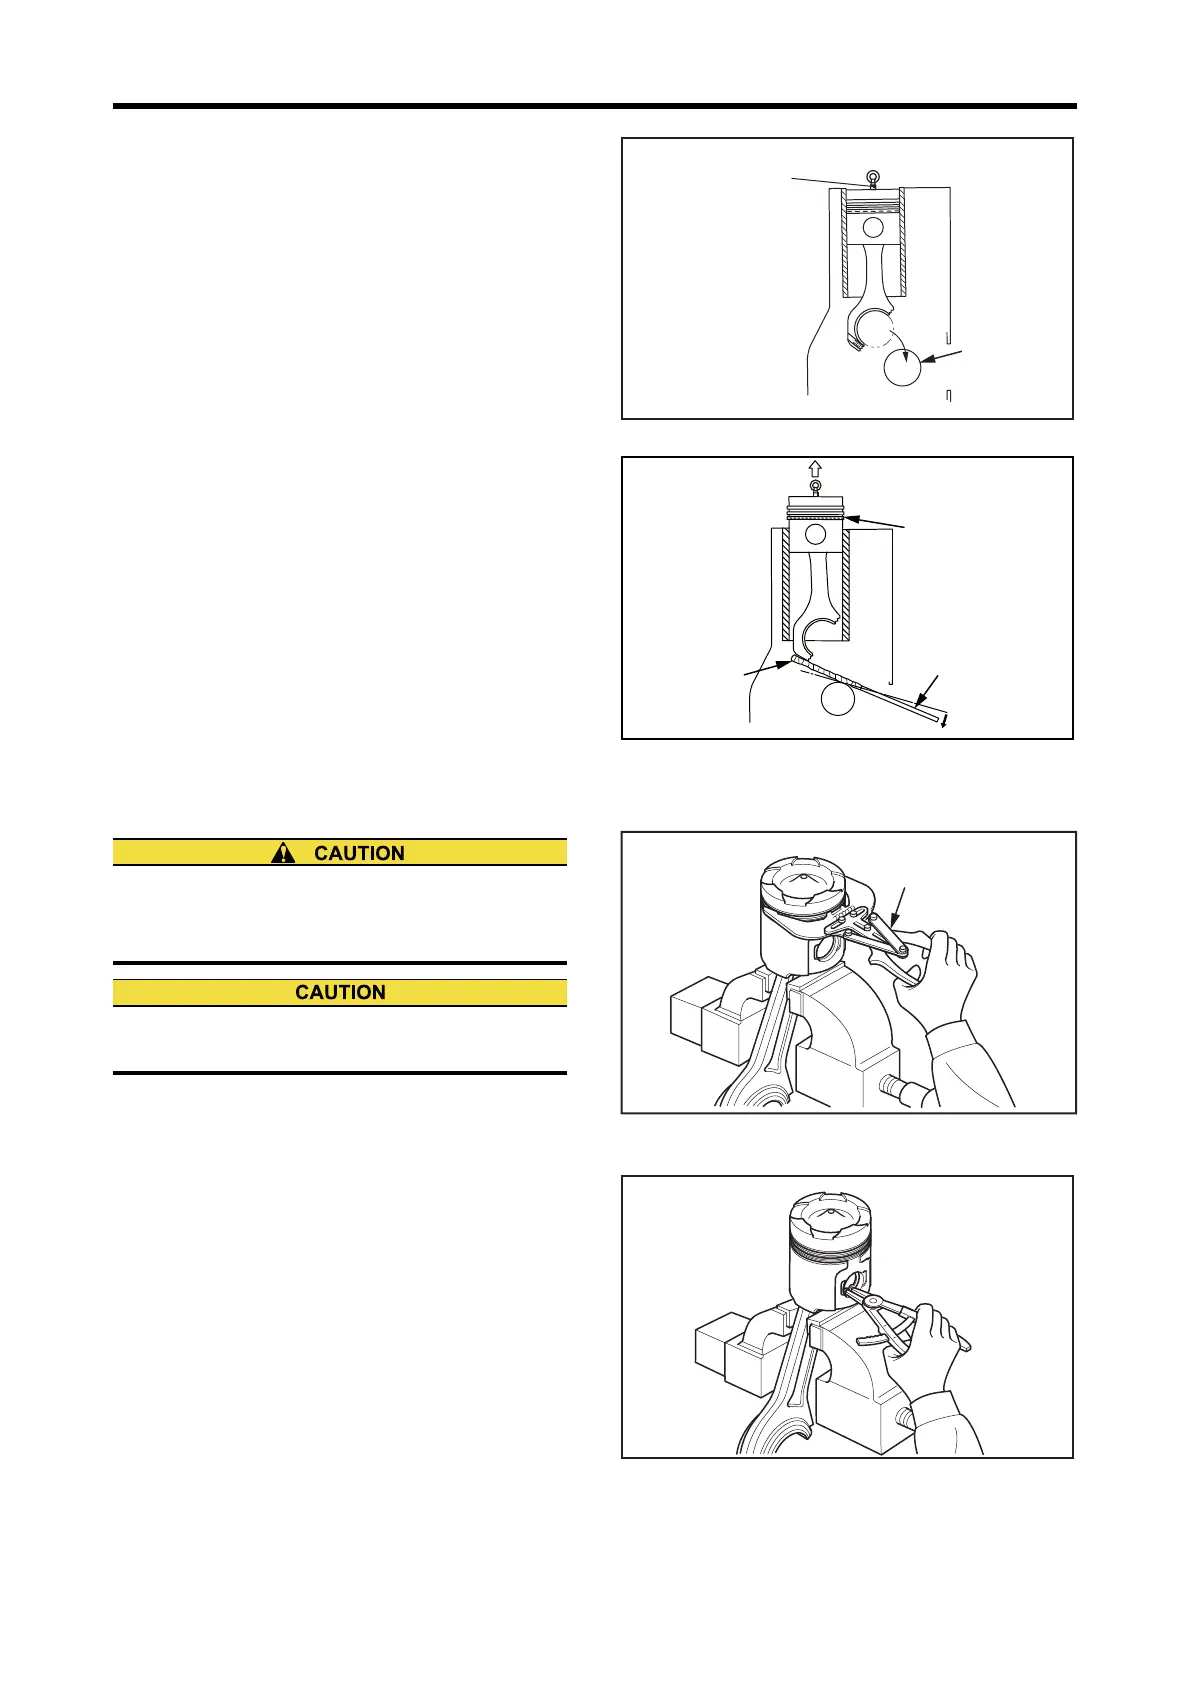
(1) Remove the connecting rod cap and rotate the crank-
shaft to bring the piston to the top dead center position.
(2) Install the eye bolt to the threaded hole on the piston
top, and support the piston to prevent it from falling
down.
(3) Rotate the crankshaft carefully until the crankpin is dis-
placed from the connecting rod and the lower bolt hole
can be seen trough the inspection window.
(4) Insert a bar wrapped with cloth, and push up the bottom
of connecting rod carefully, with the crankpin as a ful-
crum.
Note: Protect the crankpin and connecting rod big end with
cloth or rubber to prevent them from damage with the
bar.
(5) Push-up the connecting rod and piston while adjusting
the supporting position.
When the oil ring is slid out of the cylinder liner, care-
fully put the piston on the top face of cylinder liner.
(6) Lift the piston with eye bolt on the piston top, and pull-
out the piston from cylinder liner.
Crankshaft - Rotate
Connecting Rod Big End - Push-up
4.6 Piston Ring - Remove
Hold the piston and connecting rod in a vise, and remove
the piston rings with ring expander.
Piston Ring - Remove
4.7 Piston Pin and Piston - Remove
(1) Remove the snap ring with ring pliers.
(2) Place a piece of wood to piston pin end and lightly tap
with hammer to remove the piston pin, and separate the
piston from connecting rod.
Note:(a) Do not tap the piston pin directly with hammer.
(b) If the piston is stubborn, heat the piston with heater
or in hot water.
Piston Pin and Piston - Remove
Crankpin
Eyebolt
P/N:37591-02500
(M10×1.25 mm)
Piston & connecting rod
assembly weight:
approx 26 kg [57 lb.] (S6R)
approx 21 kg [46 lb.] (S6R2)
Oil ring
Wrap in cloth
Turning bar
When removing the piston ring, be careful not to be
pinched your hand between the piston and connecting
rod by piston swing.
A free swing of piston and its bump to connecting rod
may result in piston damage.
Ring expander
P/N:37191-03200

 Loading...