Setting the projector posture
You can select the posture of the projector. Set
COOLING CONDITION in the INSTALLATION 1 menu
according to the posture.
Important:
• Inconsistencybetweentheprojectorpostureand
the menu settings may cause breakdown or failure
of the projector or the lamp.
• WhenyouusetheprojectorintheHIGHALTITUDE
mode, the selectable projector posture is floor
installation (0°) and ceiling installation (180°) only.
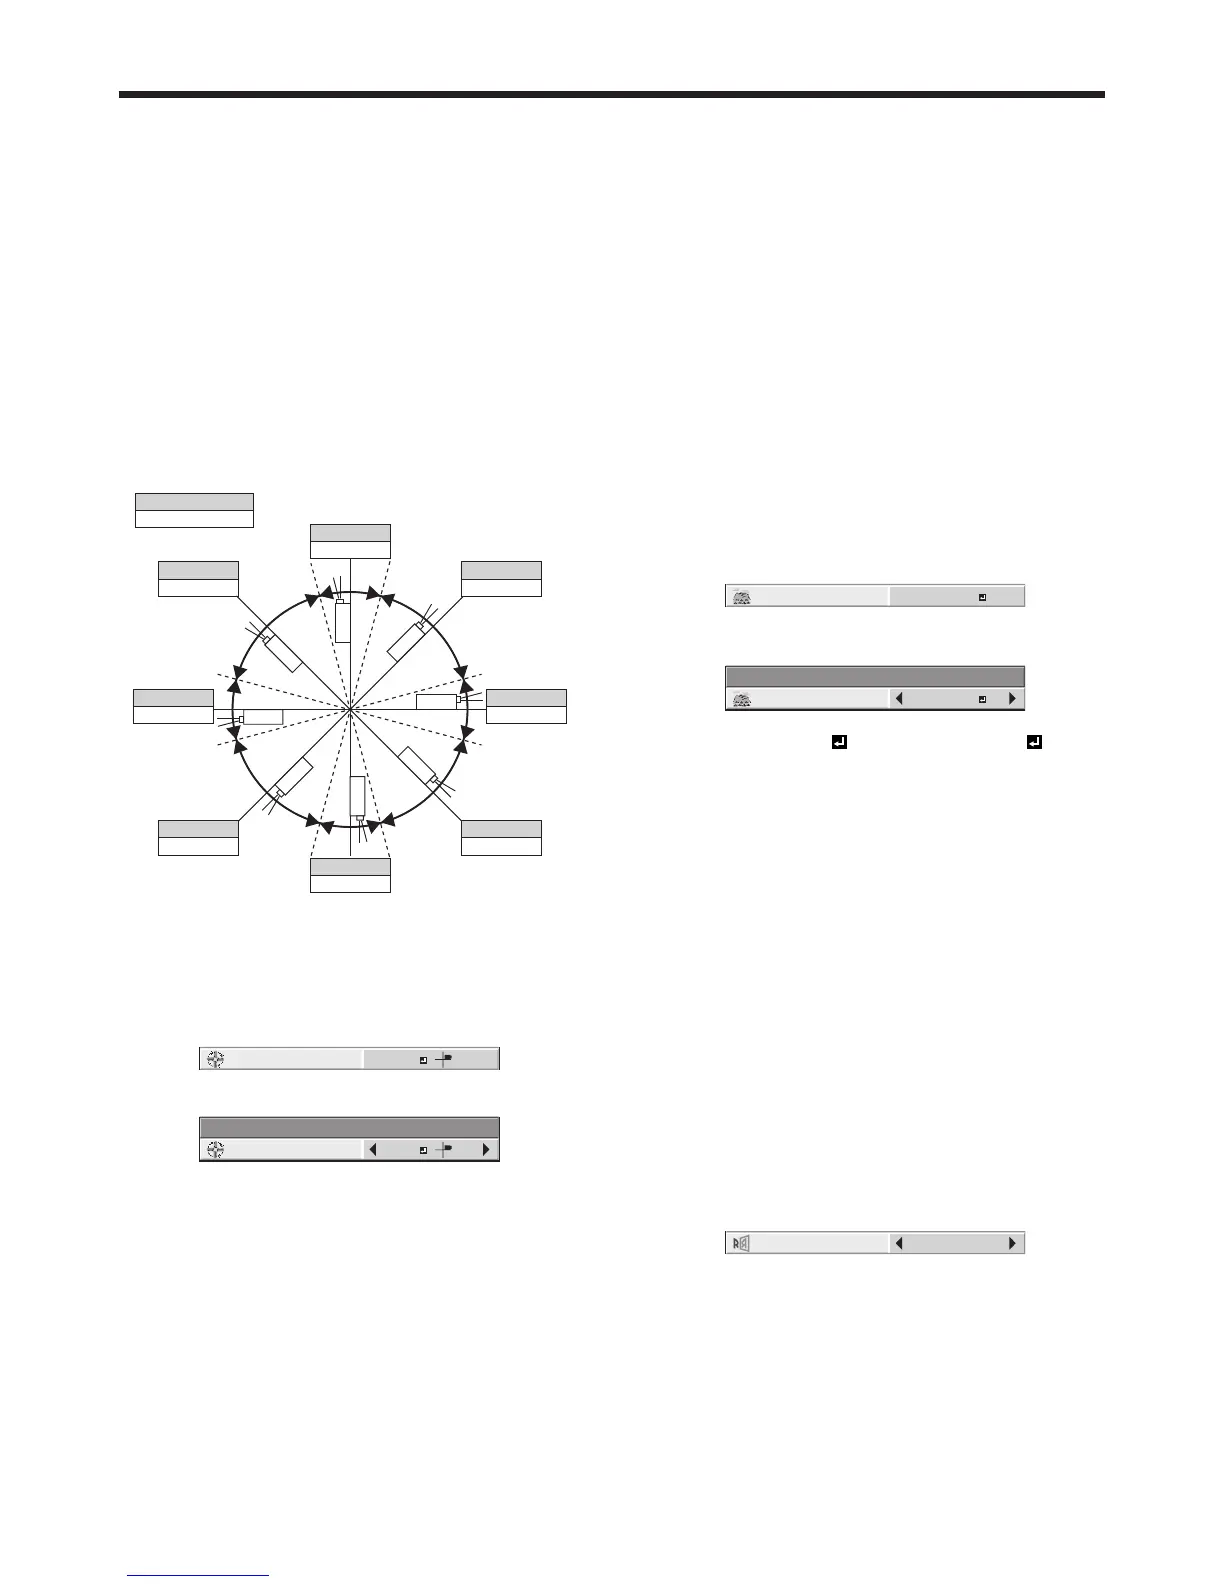
Setting the projection angle
• SetCOOLING CONDITION in the INSTALLATION
1 menu referring to the figure below. The default
setting is 0°.
Straight up
Straight down
Ceiling installation Floor installation
90
˚ ±
15
˚
90°
270˚ ± 15˚
270°
45
˚ ±
30
˚
45°
135˚ ± 30˚
135°
315˚ ± 30˚
315°
225˚ ± 30˚
225°
0
˚ ±
15
˚
0°
180˚ ± 15˚
180°
Angle range
Projection angle setting
(See page 32 for menu setting.)
1. Display the INSTALLATION 1 menu.
2. Select COOLING CONDITION by pressing the or
button.
3. Press the ENTER button.
COOLING CONDITION
COOLING CONDITION
0°
4. Select the angle by pressing the or button.
5. Press the ENTER button.
Important:
• Ifthesettingvalueselectedinthemenuis
inconsistent with the actual projection angle, the
cooling condition setting dialog appears. In this
case, select the projection angle using the or
button and then press the ENTER button.
Setting HIGH ALTITUDE MODE
• SetHIGHALTITUDEMODEintheINSTALLATION
1 menu according to the altitude at which you use
the projector. The default setting is STANDARD.
• SelectSTANDARDwhenusingtheprojectoratan
altitude from 0 to 2000 meters.
• SelectHIGHALTITUDEwhenusingtheprojectorat
an altitude from 2000 to 2700 meters.
Important:
• IfyouselectSTANDARDwhenusingtheprojector
at an altitude higher than 2000 meters, the
projector may break down or fail.
• WhenyouusetheprojectorintheHIGHALTITUDE
mode, only floor installation and ceiling installation
are allowed.
(See page 32 for menu setting.)
1. Display the INSTALLATION 1 menu.
2. Select HIGH ALTITUDE MODE by pressing the
or button.
HIGH ALTITUDE MODE
STANDARD
3. Press the ENTER button.
HIGH ALTITUDE MODE
HIGH ALTITUDE MODE
STANDARD
4. Select STANDARD or HIGH ALTITUDE by
pressing the or button.
5. Press the ENTER button.
Setting IMAGE REVERSE
• SetIMAGEREVERSEintheINSTALLATION1menu
according to the orientation of the projector. The
default setting is OFF.
• SelectOFFforthecombinationofoorinstallation
and front projection.
• SelectMIRRORINVERTforthecombinationof
ceiling installation and front projection.
• SelectMIRRORforthecombinationofoor
installation and rear projection.
• SelectINVERTforthecombinationofceiling
installation and rear projection.
(See page 32 for menu setting.)
1. Display the INSTALLATION 1 menu.
2. Select IMAGE REVERSE by pressing the or
button.
3. Select OFF, MIRROR, INVERT or MIRROR INVERT
by pressing the or button.
Setting up your projector (continued)
 Loading...