EasyManua.ls Logo

Mitutoyo EH Series - User Manual

Mitutoyo EH Series
76 pages
Print Icon
To Next Page IconTo Next Page
Loading...
No. 99MBC109B3
Date of publication: February 1, 2019
(
1
)
User's Manual
- Instructions for use -
Linear Gage Counter
EH Series
EH-101P
EH-102P
EH-102Z
EH-102S
EH-102D
Read this User's Manual thoroughly before operating
the instrument. After reading, retain it close at hand for
future reference.
This English language version of the User's Manual
contains the original instructions.
*99MBC109B*

Questions and Answers

  • A
    April PetersAug 5, 2025
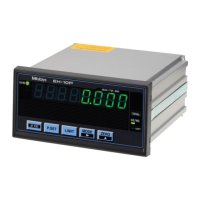
    Why is the counter value incorrect on my Mitutoyo EH?
    • C
      Charles MillerAug 5, 2025
      If the Mitutoyo Cash Counter displays an incorrect counter value, it might be due to several reasons. First, the parameters might not be correctly set for the type of Linear Gage. Another potential cause is that Peak mode (MAX or MIN is lit) is active; if so, cancel Peak mode. Also, check if the HOLD signal (UNIT is blinking) is being input via the external input. Finally, verify that calculation with a constant function is not active; if it is, cancel it by setting parameter number 41 to 0.
  • J
    James BlakeAug 13, 2025
    What to do if I cannot establish RS-232C communication with my Mitutoyo Cash Counter?
    • D
      Dominic RileyAug 13, 2025
      If you cannot establish RS-232C communication with your Mitutoyo Cash Counter, verify the RS-232C connecting cable is properly connected. Ensure that RS-232C mode is active by setting parameter number 24 to 0. Check the command or HOLD trigger setting (parameter number 28) to ensure it is appropriate. Finally, confirm that the communication conditions are set correctly.
  • R
    richardreeseAug 20, 2025
    Why can't I execute Zero setting on my Mitutoyo EH?
    • L
      lauralopezAug 20, 2025
      If you cannot execute Zero setting on your Mitutoyo Cash Counter, it may be because Peak mode is active. Cancel Peak mode to resolve this issue.
  • K
    Kenneth HodgesAug 27, 2025
    What does Error 10 Red indicator on Mitutoyo Cash Counter mean?
    • J
      Joseph SmithAug 27, 2025
      If the Mitutoyo Cash Counter displays Error 10 with a red indicator, it signifies an abnormal power voltage. Connect the device to the specified voltage to resolve this issue.

Summary

Conventions Used in This Document

Safety Reminder Conventions

Describes safety warning symbols and wording for potential hazards.

Prohibited and Mandatory Actions Conventions

Explains symbols and wording for prohibited and mandatory actions.

Referential Information Conventions

Details conventions for referential information and locations within the document.

Safety Precautions

Precautions for Use

Provides guidance on safe and proper use of the product, including handling.

Product Applications and Handling

Defines the product's intended applications and general handling advice.

Installation Environment

Maintenance

Power Source

Electromagnetic Compatibility (EMC)

Export Control Compliance

Notes on Export to EU Member Countries

Disposal of Products outside the European Union

Disposal of Old Electrical & Electronic Equipment

China RoHS Compliance Information

Warranty

Disclaimer

About This Document

Document Map Positioning

Explains the placement of this manual within the overall document structure.

Manuals for Counters

Lists related manuals for Counter devices.

Manuals for Linear Gages

Lists related manuals for Linear Gage devices.

Intended Readers and Purpose

Defines the target audience and the manual's objective.

How to Read This Document

To Measure

Guides on preparing for measurements and parameter setup.

Operation Key Names

Explains the notation for operation key names.

Terms and Definitions

Provides definitions for key terms and components.

1 Overview

1.1 Major Functions

Details the main functions common to 1-axis and 2-axis models and unique to 2-axis models.

1.2 Supported Linear Gages

Lists supported Linear Gages and their features.

1.3 Part Names and Functions

Front Side of the Main Body

Identifies and describes the components on the front panel of the Counter.

Rear Side of the Main Body

Identifies and describes the connectors and switches on the rear panel.

1.4 Operation Flow

2 Setup

2.1 Unpacking

Instructions for checking the contents of the product package.

2.2 Mounting

Details on physically installing the Counter, including panel and desk mounting.

2.3 Connections

Guides on connecting power sources and external equipment via various interfaces.

2.4 Operation Check

Procedure to verify correct cable connections and basic functionality.

3 Setting Parameters

3.1 Procedure for Setting Parameters

Step-by-step guide on entering the parameter setting mode and configuring settings.

3.2 Basic Parameters

Explains fundamental parameters essential for measurement and their default values.

3.3 Advanced Parameters

Covers parameters for display, functions, and external output configuration.

3.4 Display Mode Details (2-axis Models)

Explains the internal structure and display modes for 2-axis models.

3.5 CEL-Specific Parameters

Details parameters that are set individually for each CEL (counter).

3.6 Overview of Setting Parameters

Provides a flowchart illustrating the parameter setting process.

4 Basic Operations

4.1 Switching Display A and B (2-Axis Models)

How to select and switch between Display A and Display B for 2-axis models.

4.2 Switching Displayed BANK (2-Axis Models)

Method for switching between BANK1 and BANK2 for 2-axis models.

4.3 Zero Setting

Procedure to set the current counter value to zero for each CEL.

4.4 Preset

How to set an arbitrary value as a preset datum for the counter.

4.5 Peak Mode Setting

Explains how to display maximum, minimum, and TIR values during measurement.

4.6 Tolerance Value Setting

Guides on setting 3-step and 5-step tolerance judgment values.

4.7 Optional Constant Value Setting

Procedure to specify internal counters and set multiplication factors.

4.8 Registering, Reading Out, and Clearing Memory

Instructions for managing data stored in the counter's memory.

5 External Input;Output Function

5.1 Digimatic Output Function

Enables printing measurement data using a Digimatic Mini-Processor.

5.2 USB Communication Function

Allows data transfer to a PC via USB when using SENSORPAK.

5.3 RS-232 C Communication Function

Enables data transfer and remote operation via RS-232C to PC or PLC.

5.4 RS LINK Function

Allows control of multiple counters using the RS LINK connection.

5.5 I;O Connector Terminal Function

Details the interface for outputting results and receiving external signals.

6 Troubleshooting

6.1 Troubleshooting

Provides a table of common problems, their causes, and solutions.

6.2 Error Messages and Cancellation

Explains error codes, their meanings, and methods for error cancellation.

7 Specifications

7.1 Basic Specifications

Lists key technical specifications like model numbers, power, and dimensions.

7.2 External Dimensions Drawing

Provides a diagram showing the physical dimensions of the Counter models.

7.3 Options

Lists available optional accessories for the Counter.

Service Network

Revision History

Mitutoyo EH Series Specifications

General IconGeneral
BrandMitutoyo
ModelEH Series
CategoryCash Counter
LanguageEnglish

Related product manuals