8
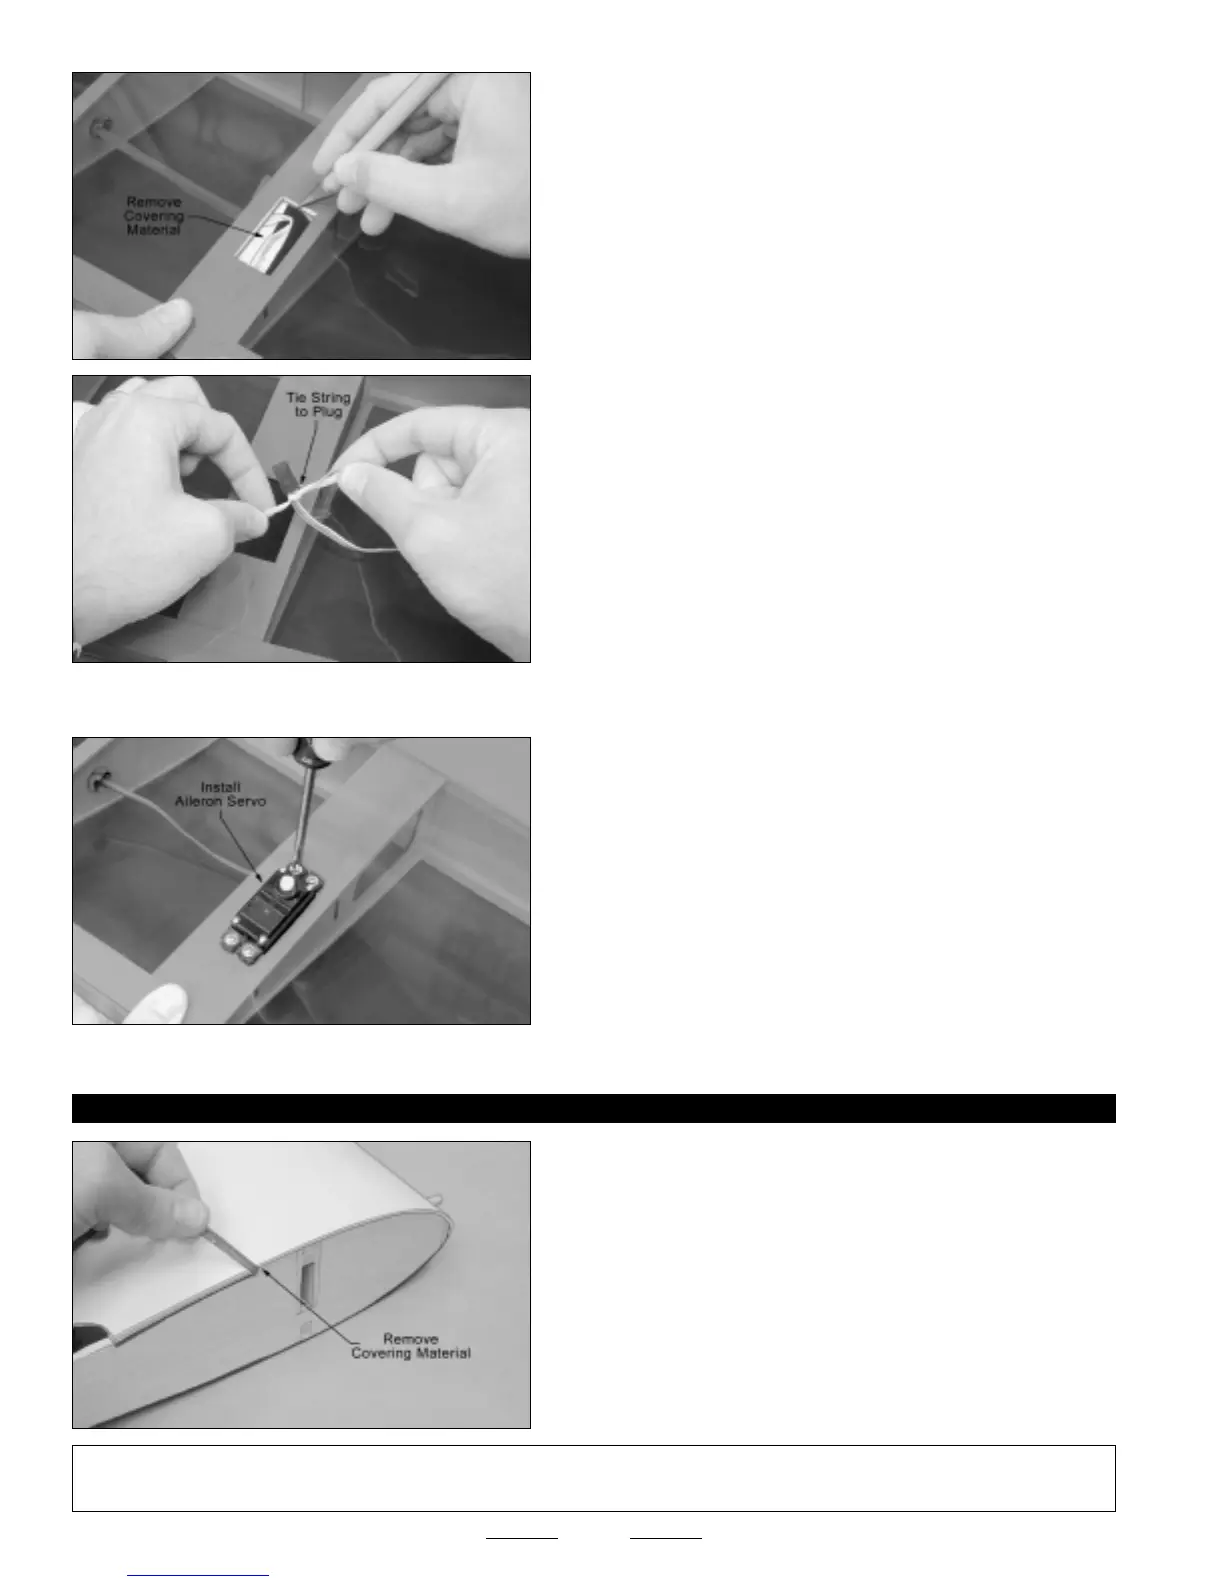
❑ Tie the end of the length of preinstalled string in the servo mounting
hole to the servo extension plug and use it to pull the servo extension
lead through the wing panel.
❑ Using a modeling knife, cut away and remove the covering material
from over the aileron servo mounting hole in the bottom of the wing
panel. The hole is located 13-1/2" out from the root rib and 3-1/4" in
front of the trailing edge.
❑ Set the servo into place, making sure that the servo output shaft is
toward the leading edge of the wing panel.
❑ Install the aileron servo, making sure to drill 1/16" diameter pilot holes
for the mounting screws.
❑ Repeat the previous procedures to install the aileron servo into the second wing panel.
STEP 2: ALIGNING THE WING PANELS
❑ Using a modeling knife, cut away and remove the excess covering
material that overlaps onto the root ribs of each wing panel, leaving
about 1/16" overlapped so it does not pull away.
✦✦
✦✦
✦IMPORTANT
✦✦
✦✦
✦ It's very important to the integrity of the wing center-section joint that you remove as much covering material
from the root ribs as possible. Do not omit this procedure or the wing center-section joint may fail during flight.
Continued On Next Page
☛☛
☛☛
☛
☞
Tie the end of the string to the servo extension plug at the servo mounting hole, then pull the string from the other end to guide
the servo extension lead out through the top of the wing panel.