19
8-504.11
MICRO-PROCESSOR OPERATION
Transmitter (continued)
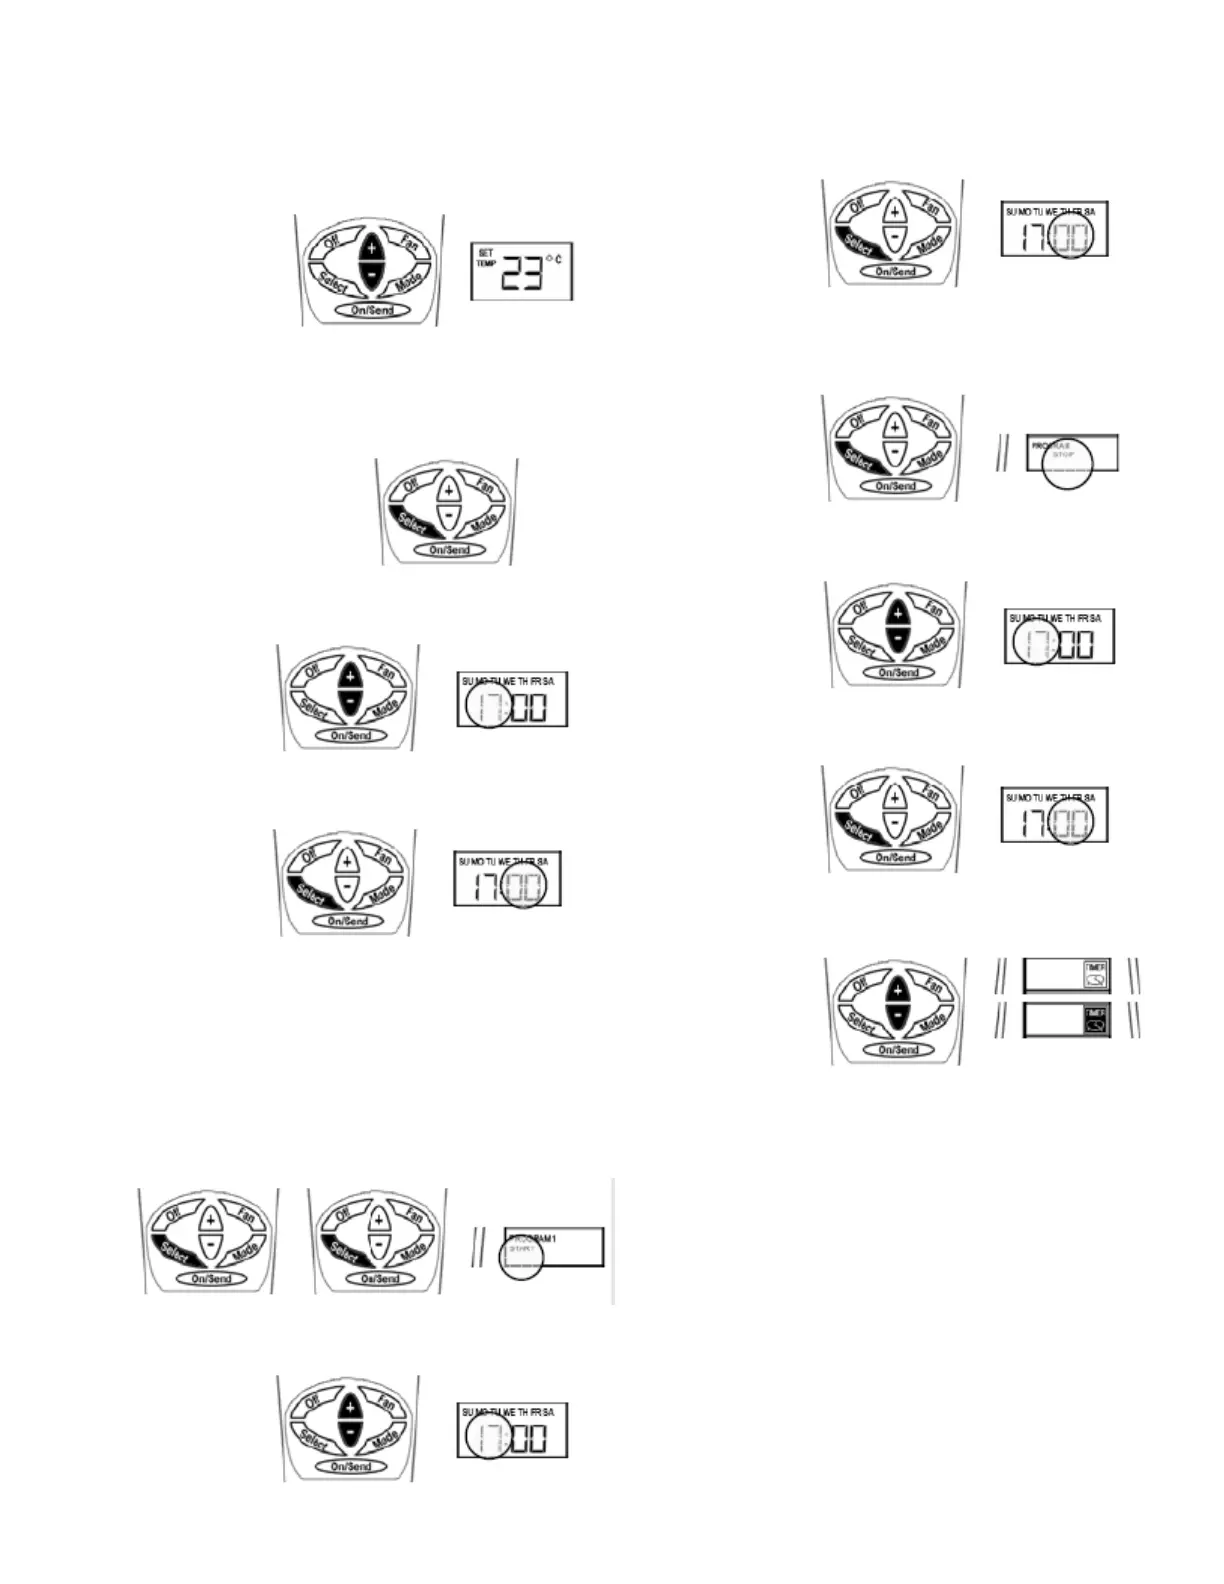
Temperature Set-Point
Adjust the desired temperature using the (+) or (-) buttons.
Press the ON/SEND button to send information to the cassette
unit.
Real Time Clock and Day
Press the SELECT button - CLOCK SET will ash.
Press the (+) or (-) buttons - the hour will ash. Adjust the hours
using the (+) or (-) buttons.
Press the SELECT button again - minutes will ash. Adjust the
minutes using the (+) or (-) buttons.
Press the SELECT again to return to normal display mode.
Press the ON/SEND button to send information to the cassette
unit.
Timer
IMPORTANT: If no button is pressed for 10 seconds the display
will return to normal display mode.
START TIME:
Press the SELECT button twice - PROGRAM & START
(ashing) will appear on display.
Press the (+) or (-) buttons - the hour will ash. Adjust the hours
using the (+) or (-) buttons.
Press the SELECT button again - minutes will ash. Adjust the
minutes using the (+) or (-) buttons.
STOP TIME:
Press the SELECT button twice - PROGRAM & STOP (ashing)
will appear on display.
Press the (+) or (-) buttons - the hour will ash. Adjust the hours
using the (+) or (-) buttons.
Press the SELECT button again - minutes will ash. Adjust the
minutes using the (+) or (-) buttons.
Press the SELECT button - the TIMER will ash. Select TIMER
ON (black icon) or OFF (white icon) using the (+) or (-) buttons.
Press the ON/SEND button to send information to the cassette
unit.
IMPORTANT: When the timer is active and there is power failure
to the cassette unit, the timer will be deactivated and the display
will ash “Aux”.
Batteries Replacement
When the batteries are low, the display of the remote control will
dim. If the batteries will not be replaced the display will turn o
completely.
1. Pull the batteries cover down to reveal the batteries.
2. Remove the old batteries.
3. Wait for 10 minutes before installing the new batteries.
4. Install two new AAA batteries - Pay attention to the polarity.
5. Return the batteries cover to it's place.
IMPORTANT: The remote control will not operate unless at
least 10 minutes pass between removing the old batteries and
installing the new ones.