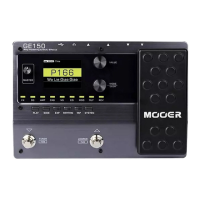
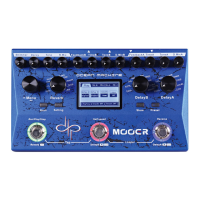
3
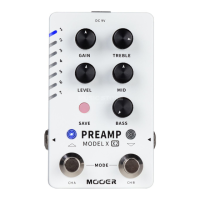
8. SAVE button: Press to save your settings in a Preset.
9. EXP button: Press to open the menu for expression pedal settings.
If this button is lit, the on-board EXP pedal works as an expression pedal to control module
parameters. If it is not lit, the EXP pedal can work as a volume pedal, if so configured in the EXP
menu.
10. MODE knob: Use this to select (rotate) and activate/deactivate (press) effect modules.
11. Effect module indicators: The LEDs indicate the on/off status of the effect modules in the effect
chain and their position in the chain. The individual LEDs will blink to indicate a module that was
selected for editing by using the MODE knob.
12. Footswitch A:
- in Preset mode: switches to Preset A in the selected bank
- in Looper mode: REC / PLAY / DUB (see Looper).
13. Footswitches A + B simultaneously:
- short press A+B: switches down to the previous bank
- long press A+B: activates TUNER mode (see Tuner).
14. Footswitch B:
- in Preset mode: switches to Preset B in the selected bank
- in Looper mode: STOP / CLEAR
15. Footswitch C:
- in Preset mode: switches to Preset C in the selected bank
- in Looper mode: Drum Machine PLAY / STOP
16. Footswitches C + D simultaneously:
- short press C+D: switches up to the next bank
- long press C+D: activates the LOOPER mode
17. Footswitch D:
- in Preset mode: switches to Preset D in the selected bank
- in Looper mode: exits the LOOPER mode
18. EXPRESSION pedal: Can be configured as volume pedal or as an expression pedal to control
module parameters (e.g. Wah) (see Expression Pedal). When properly configured, the pedal
function can be switched between VOLUME and EXPRESSION control by pressing the TOE
SWITCH (pressing on the front of the closed pedal.)
 Loading...