SAFETY
6
7
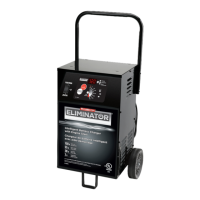
CHARGER LOCATION
Model no. 011-1973-2 l Questions? Contact us 1-88 8 -942 -6686
AC ELECTRICAL CONNECTIONS
PLUGGING CHARGER IN
Your charger requires a 120 V AC electrical wall outlet receptacle installed according to local codes and
ordinances.
USING AN EXTENSION CORD
MINIMUM RECOMMENDED EXTENSION CORD
An ext ension cord should not be used unless absolutely necessary. Use of an improper ext ension cord
could result in a risk of fire and electric shock. If an extension cord must be used, make sure:
Locat e charger as far away from batt ery as DC cables pemit .
Never place charger direct ly above bat t ery being charged; gases from batt ery will corrode and
damage charger.
Never allow batt ery acid to drip on charger when reading elect rolyt e specific gravity or filling batt ery.
Do not operat e charger in a closed-in area or restrict vent iation in any way.
Do not set a bat t ery on top of charger.
DC CONNECTION PRECAUTIONS
Connect and disconnect DC output clips only after removing AC cord from electric out let .
Never allow clips t o t ouch each ot her.
Attach clips t o bat tery and chassis as indicat ed in t he Connecting Your Bat tery section.
Position AC and DC cords t o reduce risk of damage by hood, door or moving engine part.
St ay clear of fan blades, belts, pulleys, and ot her parts that can cause injury t o persons.
Check polarit y of batt ery posts. POSITIVE (POS, P, +) bat t ery post usually has a larger diameter than
NEGATIVE (NEG, N, -) post .
Determine which post of batt ery is grounded (connected) t o the chassis.
If negative post is grounded to chassis (as in most vehicles), see step “ For negative-grounded
vehicle” . If positive post is grounded to t he chassis, see step “ For positive-grounded vehicle” .
For negative-grounded vehicle, connect POSITIVE (RED) clip from batt ery charger to POSITIVE (POS, P,
+) ungrounded post of battery. Connect NEGATIVE (BLACK) clip to vehicle chassis or engine block away
from batt ery. DO NOT connect clip t o carburetor, fuel lines, or sheet-metal body part s. Connect t o a
heavy-gauge met al part of the frame or engine block.
For positive-grounded vehicle, connect NEGATIVE (BLACK) clip from batt ery charger t o NEGATIVE
(NEG, N, -) ungrounded post of batt ery. Connect POSITIVE (RED) clip t o vehicle chassis or engine block
away from batt ery. Do not connect clip t o carburet or, fuel lines, or sheet -metal body parts. Connect t o
a heavy-gauge met al part of the frame or engine block.
When disconnecting charger, turn switches to off, disconnect AC cord, remove clip from vehicle
chassis, and t hen remove clip from bat tery t erminal.
The pins on plug of ext ension cord are the same number, size, and shape as t hose of plug on charger.
The extension cord is properly wired and in good elect rical condit ion.
The wire size is large enough for AC ampere rating of charger as specified in the chart below:
PREPARING TO CHARGE
If it is necessary t o remove bat t ery from vehicle t o charge, always remove grounded terminal from
batt ery first. Make sure all accessories in the vehicle are off so as not t o cause an arc.
Be sure area around batt ery is well ventilated while batt ery is being charged.
Clean battery t erminals. Be careful to keep corrosion from coming in contact with eyes.
Add distilled wat er in each cell unt il battery acid reaches level specified by batt ery manufacturer. Do
not overfill. For a batt ery wit hout removable cell caps, such as valve-regulat ed lead-acid batt eries,
carefully follow manufacturer's reacharging inst ructions.
St udy all bat tery manufacturer's specific precaut ions while charging and follow recommended rat es of
Determine voltage of batt ery by referring to car owner’s manual and make sure t hat output volt age
select or swit ch is set at correct volt age. If charger has adjust able charge rate, charge batt ery initially
at lowest rate.
CONNECTING YOUR BATTERY
7.6 (25) 18
15.2 (50) 16
30.5 (100) 12
45.6 (150) 10
* AWG= American Wire Gauge
Length of Cord, Metres (Feet)
AWG* Size of Cord
CONNECTING YOUR BATTERY
FOLLOW THESE STEPS WHEN BATTERY IS INSTALLED IN VEHICLE.
WARNING: A SPARK NEAR THE BATTERY MAY CAUSE A BATTERY EXPLOSION. TO REDUCE THE
RISK OF A SPARK NEAR THE BATTERY:
SAFETY
charge.
 Loading...