14
15
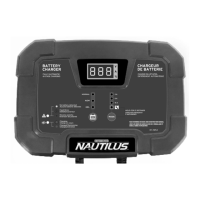
UNDERSTANDING THE MULTI-STAGE CHARGING PROCESS
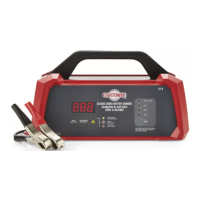
Model no. 011-1973-2 l Questions? Contact us 1-88 8 -942 -6686
MAINTENANCE AND CARE
UNDERSTANDING THE MULTI-STAGE CHARGING PROCESS
5. Charge Rate
The charge rate is measured in amperes (A). A bat tery charged at a lower rat e will take longer to fully
charge t han a batt ery charged at a higher rat e. This does not mean that one should always charge a
batt ery at t he highest ampere available as this can cause overheat ing and premature bat t ery failure.
A bat t ery should be charged at a rate appropriate for its size—a good, safe rule of thumb is about
1/ 10 it ’s Amp-hour capacit y (e.g., 100 Ah batt ery x1/ 10=10 A).
6. Cold Temperature
Cold t emperatures slow down t he chemical reaction that takes place inside a bat t ery when it is
charging. Charging a batt ery at a cold temperature can great ly increase the amount of t ime required
to charge the bat t ery. Ideal charging t emperature is between 10 to 25º C (50 t o 77ºF).
* *
* *
STAGE 1 DESULPHATION*
Pulses of volt age and current help recover sulphat ed or deeply discharged bat t eries.
STAGE 2 SOFT START*
Gent ly int roduces current t o condition deeply discharged bat t eries and prevent overheating that could
damage the bat t ery.
STAGE 3 BULK
Charging with maximum current t o bring the bat tery t o about 80% capacit y.
STAGE 4 ABSORPTION
Charging with const ant volt age while reducing current t o safely bring t he bat t ery to 100% capacity.
This st age is key t o maximizing bat tery performance and batt ery life.
STAGE 5 ANALYZE
Tests if batt ery is holding charge.
STAGE 6 MAINTENANCE
Monit ors batt ery voltage and provides top-up charging when necessary t o keep batt ery fully charged.
* If necessary
th
The charger does not
detect a battery
connect ed to it.
The bat t ery voltage is
less than 10 V aft er
some time charging.
Battery volt age is t oo
high.
The bat t ery is defect ive.
A load may be connected
to the batt ery.
Replace the batt ery.
Do not use the batt ery
during charging.
Battery is not a 12 V
battery.
Confirm that t he bat t ery is 12 V,
not 24 V.
Charger does not
recognize the battery.
Battery volt age is under
1.5 V (batt ery must have a
MINIMUM of 1.5 V to
activate charger).
Ensure batt ery post s are clean.
Rock clamps back and forth on
battery posts t o ensure a good
connect ion.
Connect bat t ery t o charger
BEFORE connecting charger to
AC power.
Check batt ery volt age wit h a
volt met er. If LESS t han 1.5 V,
replace batt ery. (A batt ery with
less than 1.5 V is likely beyond
salvage due t o ext reme
sulphat ion or some other
int ernal failure.) You may t ry t o
boost t he bat t ery using boost er
cables connected to anot her
vehicle. This may raise t he
battery volt age above 1.5 V
allowing t he bat tery charger t o
activate.
Poor clamp connection.
TROUBLESHOOTING/ FAULT CODES
Error Code Condition Cause Solution
MAINTENANCE AND CARE
• Wipe clean cords and clamps after each use.
• St ore the power and out put cables neat ly to prevent damage.
• The charger housing may be cleaned using a damp clot h and mild cleaning agent .
• Always unplug the charger when not in use.
• Keep t he charger stored in a cool, dry place.
TROUBLESHOOTING/ FAULT CODES