HLN6923A October 12, 2005
Standard Configurations: Radio Mounting 2-11
2.2.2.2 Control Head and Remote Mount Cabling
For radios equipped with optional remote mount control heads, see Figure 2-8 or Figure 2-9.
Choose a mounting location for the radio, considering accessibility, and control and antenna cable
lengths.
2.2.2.2.1 Remote Model Control Head Installation
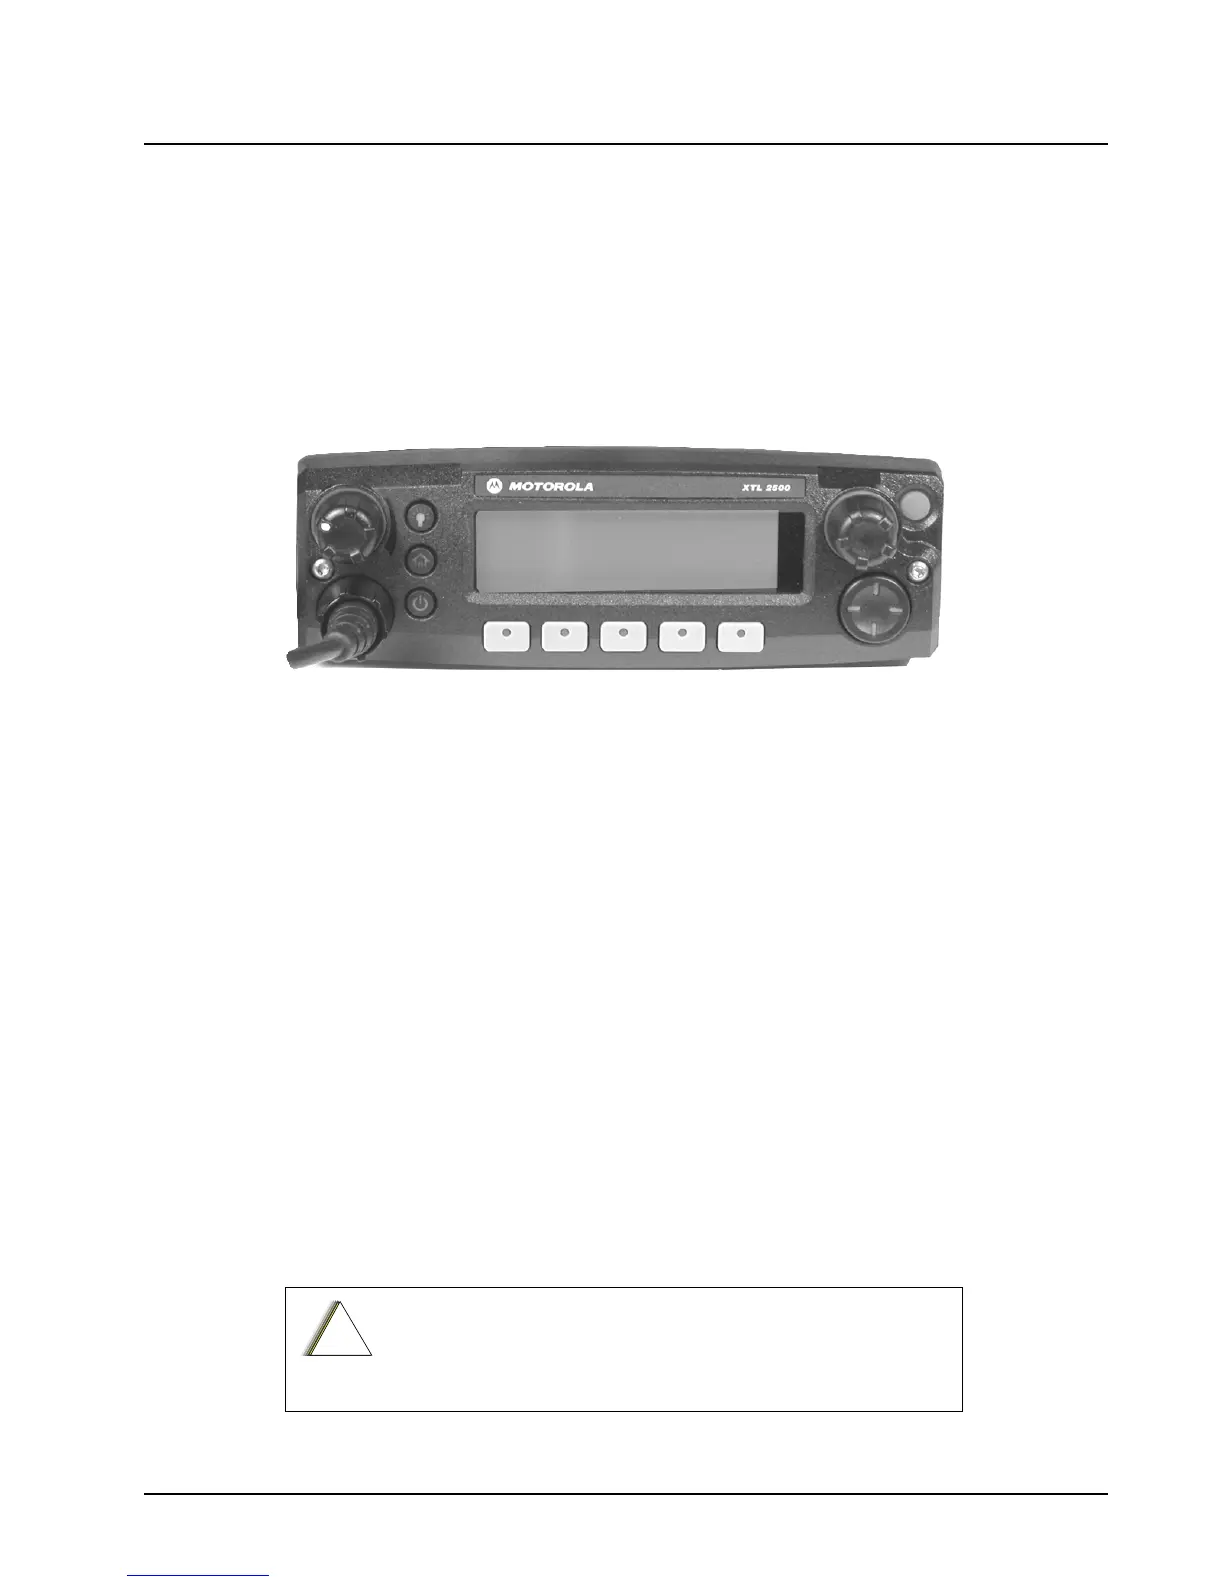
Figure 2-17 shows the control head model.
Figure 2-17. M5 Control Head
The recommended mounting surfaces for the control unit are under the dashboard, on the
transmission hump, or on the center console. Figure 2-18 shows how the trunnion, control head, and
cables should be installed for the M5 control head.
NOTE: Connector-protective covers are provided with the radio. They should be used for added
environmental robustness.
An adjustable trunnion, which allows a number of mounting positions, is supplied for mounting the
control unit. The installation must not interfere with the operation of the vehicle or its accessories, nor
disturb passenger seating or leg room. The control head must be within convenient reach and
viewing of the user.
If the trunnion is mounted on a plastic dashboard, all four mounting screws should penetrate the
dashboard’s supporting metal frame. If that is not possible, use a metal backing plate (not supplied)
to strengthen the installation. Install the control unit as follows:
1. Use the control unit trunnion as a template to mark the mounting holes; drill 5/32" holes. If
mounting on a plastic surface, use a metal backing plate.
2. Attach the trunnion bracket using all four 10-16" x 5/8" self-tapping screws provided.
3. Temporarily install the control head (adjusting for proper viewing angle) and fasten it to the
trunnion with two wing screws. Test the installation to be sure the unit does not wobble or feel
“spongy” when you press the buttons.
CAUTION: Care must be taken to shield the control head (front
and back) from direct exposure to pressurized water. The
pressurized water from a hose, in most cases, is more severe than
the stated test and conditions in typical environments.
!
C a u t i o n

 Loading...


