December, 2009 68009328001-A
7-4 Limited Keypad Model Disassembly and Re-assembly: Disassembling and Re-assembling the Radio — General
4. Pry off the volume and channel selector knobs from their shafts using the knob remover/chassis
opener tool (Motorola part # 6686533Z01) (Figure 7-2).
5. Separate the chassis from the front housing assembly by using the knob remover/chassis opener
tool. Place the broad side of the opener into the slots located at the base of the radio (Figure 7-3).
Press the handle of the opener downwards. This pressing action forces the thin inner plastic wall
toward the base of the radio, releasing the two chassis base tabs.
.
6. Pull the chassis assembly out of the front cover only until the volume and channel selectors shaft
just clear the top of the case. (Figure 7-4).
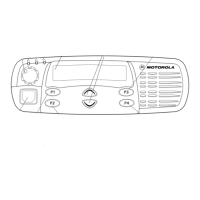
Figure 7-2. Antenna and Knob Removal
Note:
Both knobs slide on and off. However, the knobs are designed to fit very tightly on the shaft.
Figure 7-3. Chassis Removal
CAUTION: Marring the front cover O-ring sealing area will prevent the radio from sealing properly. If the
O-ring is damaged, replace it with a new one.
Radio Chassis
Knob Remover/
Chassis Opener
!
W A R N I N G
!
 Loading...