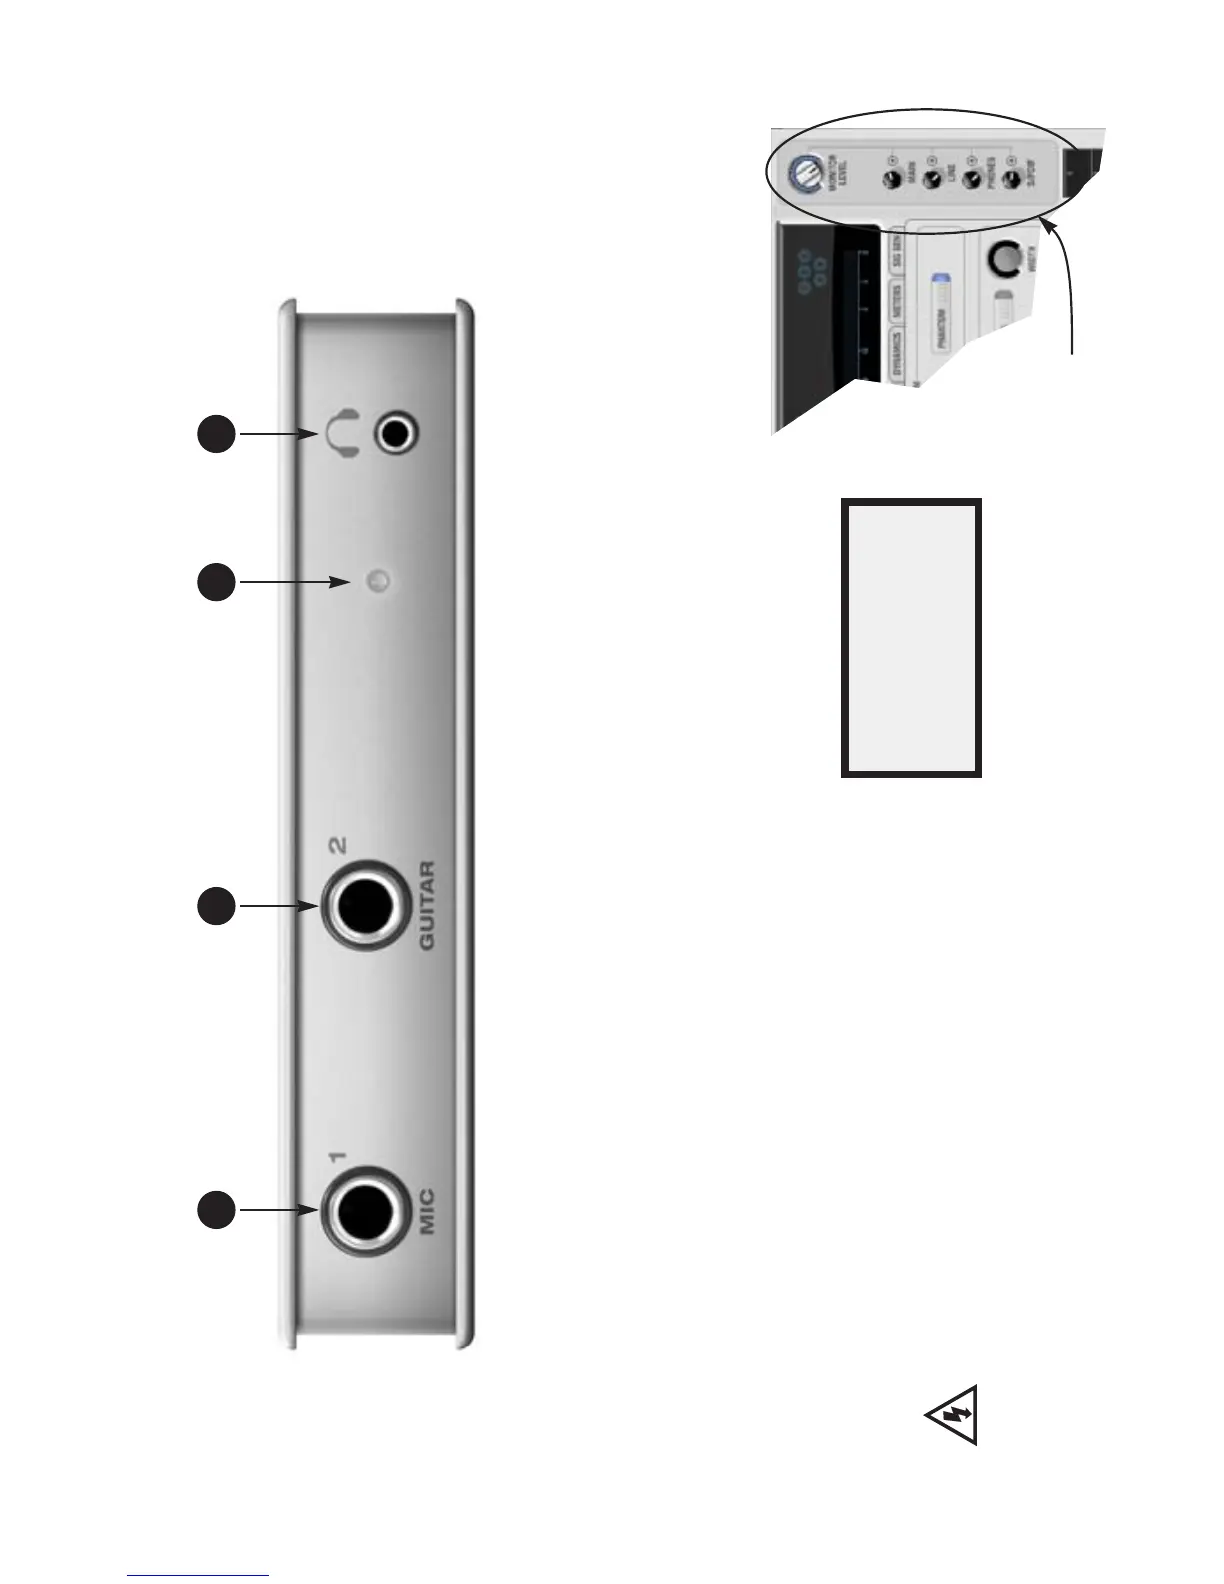
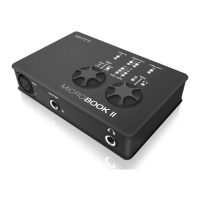
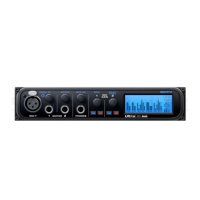
Quick Reference: MicroBook Front Panel
2 31 4
1. Plug in your dynamic or condenser
mic here. If your mic cable has a
standard male XLR connector, use
the female XLR-to-TRS adapter
included with your MicroBook.
IMPORTANT: be sure to use the
included adapter, or make sure
that the adapter you use is wired
as shown in Appendix B, “Mic
Adapter Pin-outs” page (51).
Use the on-screen CueMix FX
software to engage the 20 dB pad
and/or 48V phantom power (for a
condenser mic), if necessary.
Make sure 48V power is
turned OFF BEFORE plugging
anything in to the mic input. Only
engage 48V power when a device
that requires it is plugged in.
Never enable 48V power when a
tip/sleeve (unbalanced) plug is
connected to the mic input.
2. Plug in your guitar here using a
standard quarter-inch guitar
cable. This input is designed with
the high-impedance characteris-
tics necessary to properly handle
both passive and active guitar
pickups. To make your guitar
sound and “feel” even more like it
is plugged directly into a actual
guitar amplifier, consider using
MOTU’s ZBox guitar impedance
adapter (sold separately), which
simply goes between your guitar
cable and this input (no extra
cable needed).
3. When this power LED flashes, it
means that the MicroBook has
USB bus power and it is establish-
ing communication with the
computer. When the LED glows
steadily, the MicroBook is ready to
go. If the power LED continues to
flash and never goes solid, see
Appendix A, “Troubleshooting”
page (49).
4. This is a standard eighth-inch
“stereo mini” headphone jack. Use
the on-screen CueMix FX software
mixer to control its level, indepen-
dently from other output pairs.
For volume control, launch
CueMix on
your computer and use these
To obtain your product
serial number, see “Obtain-
ing your MicroBook serial
number” on page 14.