Fire-fighting Helmets / Preventive care, control
and maintenance
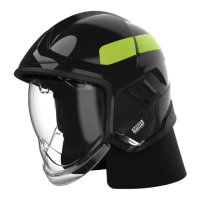
ASSEMBLY PROCEDURE FOR F1SF HELMET
Processing the operations in the correct sequence is necessary for a successful assembly of
the product.
Unassembling the helmet should be processed in the exact opposite order. All symetric parts
(chinstrap supports, accessory interfaces, kitfix) are marked D(Droite=Right) and G
(Gauche=Left).
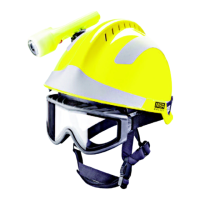
Assembly of visors
References GA1006 – Oculaire Screen EN166
GA1007 – Face shield 9% (or GA1007C or GA1007E)
GA1050 – Set of pins and knobs for visors for F1SF
Make sure the visor is free of scratches
Position the waterproof washers.
Position the face shield
Place a washer on the tightening nut side and put a visor clip on the opposite side
Place the ocular screen and slide through the threaded axle on the washer side
1. Screw the nut on the threaded axle
Using clamps, put the stainless steel spindle in the tightening nut
Place the square axle on the clip side, put the lever next to the clip and put a stainless steel
spindle in the lever using clamps.
Breakout view of the visor mecanism (pins, axles and knobs)
Assembly of inner shell, chinstrap and interfaces
It is recommended to assemble both sides one after the other.
Kit Fix assembly
Position the Kit Fix edge in the shell groove and slide the axle through the hole in the shell.
Repeat for the other side.
Version 7a/ May 2010 Page 26/36