Model 380 Two Stage Snow Thrower
7
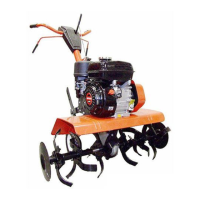
11.7. Remove the complete auger assembly from the
auger housing. See Figure 11.7.
11.8. Inspect the hex flange bearings and bearing
housings for any wear or damage
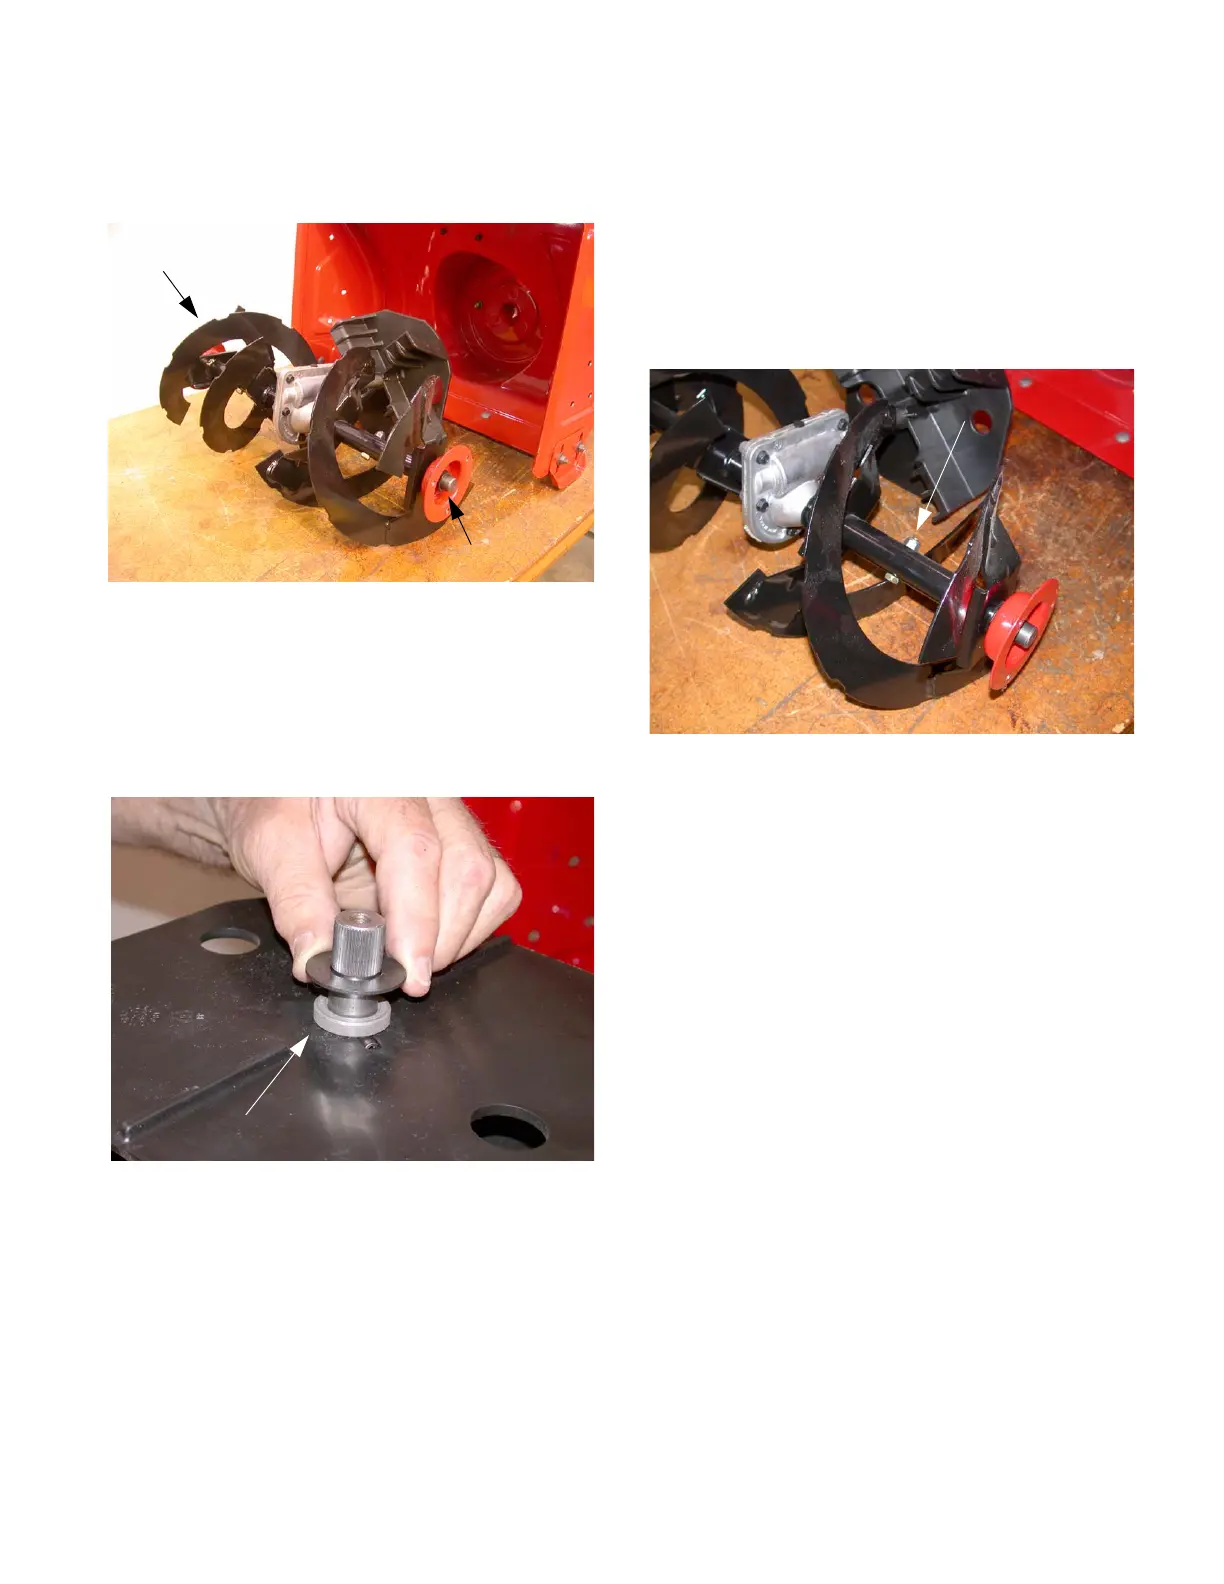
11.9. If not removed previously, remove the shim and
spacer from the worm shaft. See Figure 11.9.
NOTE: The auger housing holes are elongated
to allow auger alignment during reassembly.
NOTE: When reassembling be careful not to
over torque and strip the bearing hub housing
holes.
Figure 11.7
Auger Assembly
Hex Flange Bearing and Bearing Housing
Figure 11.9
Shim and Spacer on Worm Shaft
12. SPIRAL ASSEMBLY REMOVAL
12.1. Remove the auger and impeller assembly from
the housing. Refer to Section 11.
12.2. Using a 1/2” socket and a box end wrench,
remove the hex lock nut and shear bolt from the
spiral assembly and auger drive shaft. See Fig-
ure 12.2.
12.3. Slide the spiral augers off the shaft and mark the
spiral for left or right side.
NOTE: It is possible to install the auger spirals
backwards. If necessary, refer to the illustrated
parts diagram for proper orientation.
NOTE: During disassembly note the location of
the flat washer on the gearbox side of the spiral
and flange bushings on both ends of the spiral.
Figure 12.2
Hex Lock Nut and Shear Bolt
 Loading...