Clutch and Controls
11
Idler Pulley Bracket Removal
1. Remove the belt as described in the Belt Removal
section of this chapter.
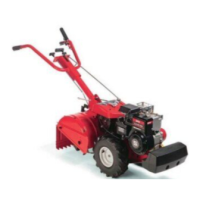
2. Remove the input pulley from the chain case input
shaft using a 7/16” wrench. Selecting one of the
gears that engages wheels and tines will help keep
the pulley from rotating. See Figure 2.9.
3. Remove the idler pulley and belt keeper using a pair
of 9/16” wrenches.
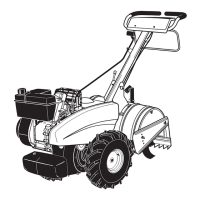
4. Remove the hairpin clip that connects the clutch/shift
interlock rod to the idler pulley arm, and remove the
interlock rod.
5. The spring on the end of the clutch cable can be
unhooked from the arm. See Figure 2.10.
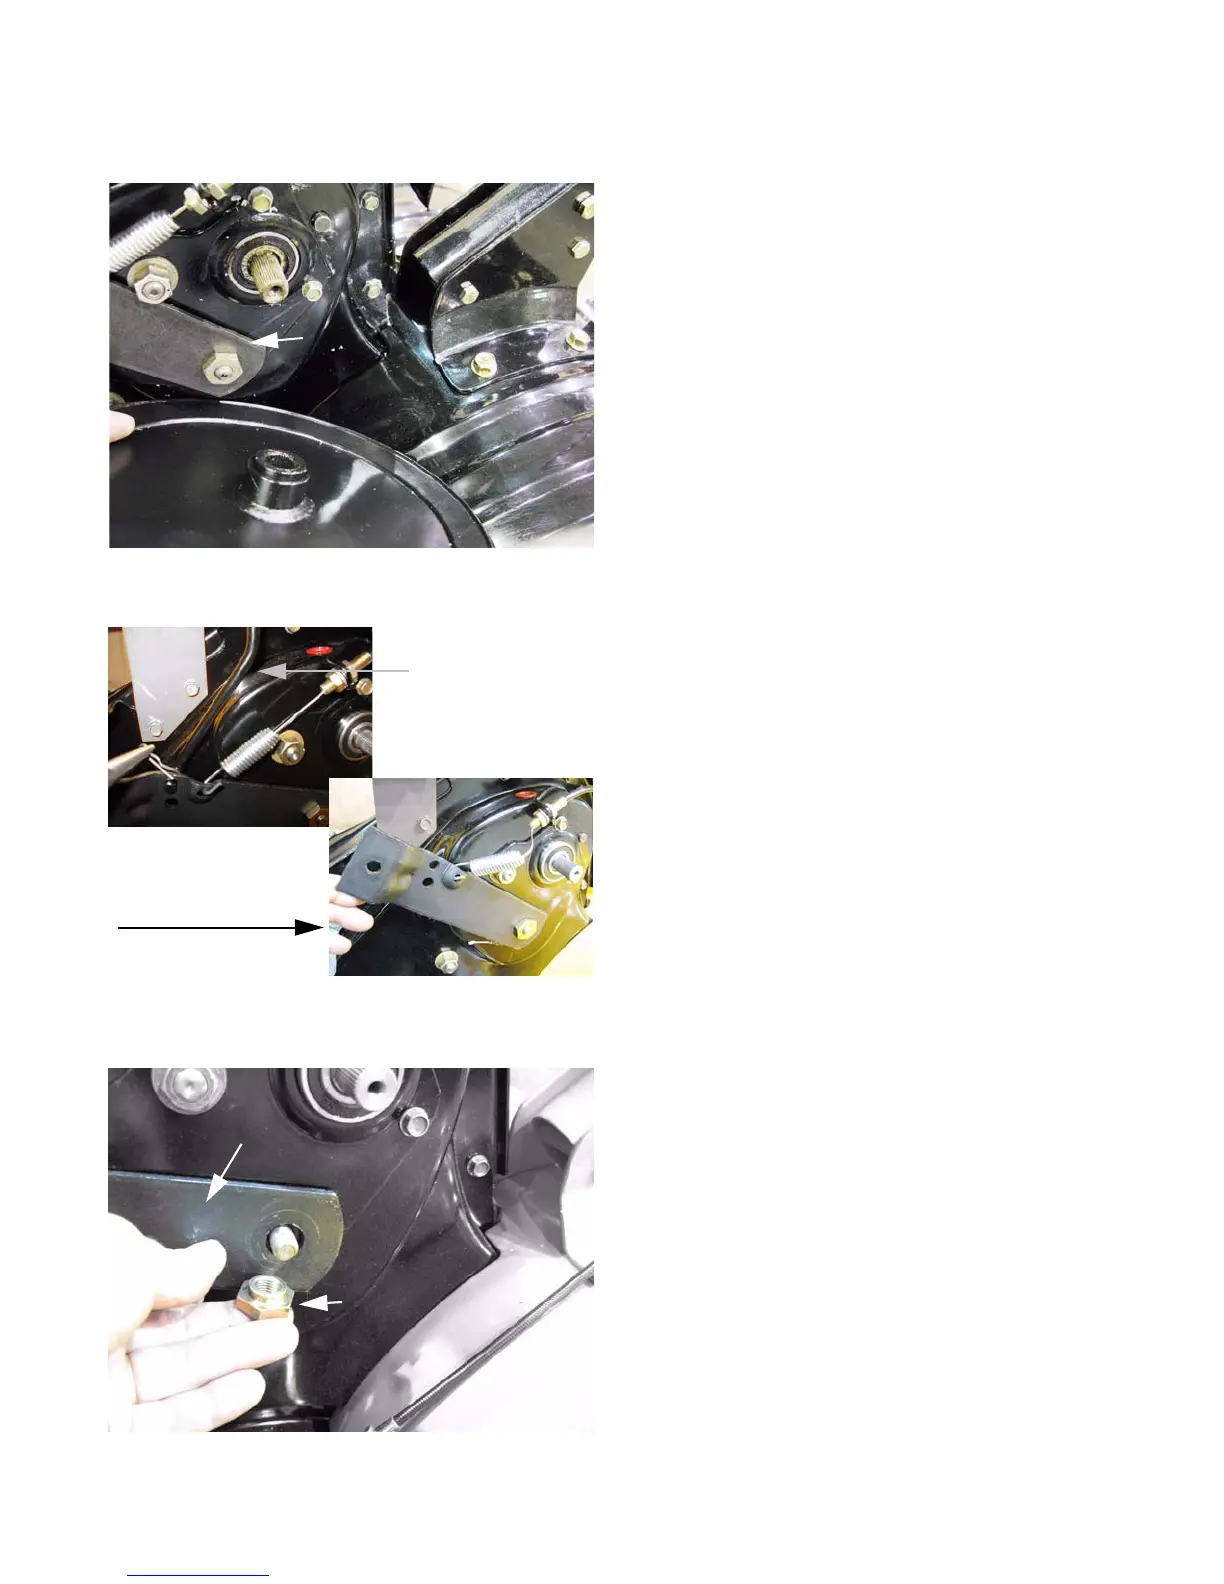
6. Remove the shoulder nut that holds the arm to the
chain case using a 3/4” wrench. See Figure 2.11.
7. Reverse the removal process to install the idler pulley
arm.
• Tighten the shoulder nut to a torque of 41 ft-lbs.
(56 N-m).
• Tighten the input pulley bolt to a torque of 72 in-
lbs. (8 N-m)
• Run and test the tiller in a safe area, checking the
operation of the clutch.
Figure 2.9
Idler pulley
bracket
Figure 2.10
Disconnect the
interlock rod
Unhook the clutch
cable spring
Figure 2.11
Idler pulley bracket
Shoulder
nut
For Parts Call 606-678-9623 or 606-561-4983
www.mymowerparts.com
 Loading...