PAGE 38 — LD6 RIDE-ON POWER TROWEL • OPERATION MANUAL — REV. #0 (02/10/20)
4. Repeat steps 1–3 for the remaining grease fittings on
both spider assemblies.
BLADE PITCH ADJUSTMENT
Perform maintenance adjustment of blade pitch using a
bolt on the trowel arm lever (Figure 41). This bolt is the
contact point of the trowel arm with the lower wear plate
on the thrust collar. The goal of adjustment is consistent
blade pitch and finishing quality.
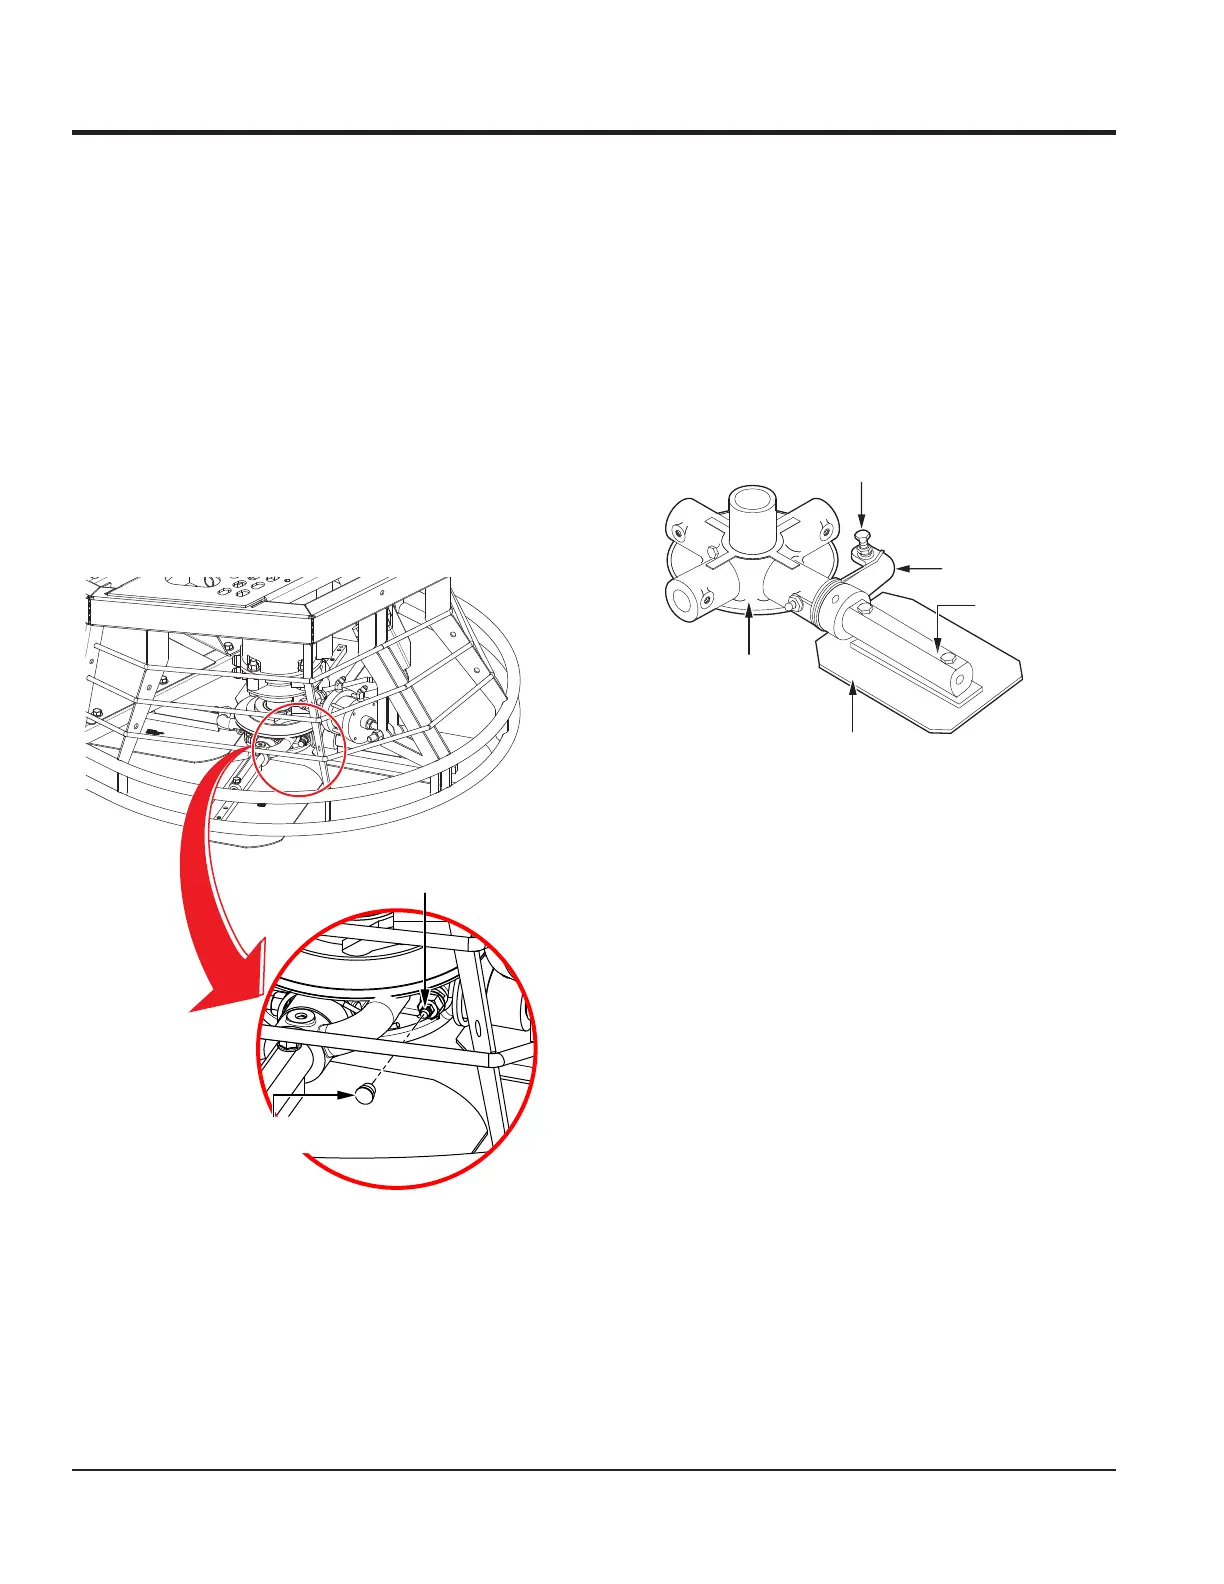
Figure 41. Blade Pitch Adjustment Bolt
Look for the following indications when determining if blade
pitch adjustment is necessary:
Are the blades wearing out unevenly (e.g. one blade is
completely worn out while the others look new)?
Does the machine have a perceptible rolling or bouncing
motion while in use?
Does the guard ring rock up and down while the machine
is in use?
Once it has been determined that blade pitch adjustment
is necessary, do the following:
1. Place the trowel on a flat, level surface, with blocks
under the main guard ring for support. Any uneven
spots in the floor or debris under the trowel blades will
cause an incorrect perception of adjustment. Ideally,
a 5 ft. × 5 ft. (1.5 m × 1.5 m), 3/4 inch-thick, flat steel
plate should be used.
SPIDER
PLATE
BLADE PITCH
ADJUSTMENT
BOLT
TROWEL
ARM
TROWEL ARM
LEVER
TROWEL
BLADE
MAINTENANCE
CLEANUP
NEVER allow concrete to harden on the trowel. Wash any
concrete off the trowel with water immediately after use.
Be careful to not spray a hot engine or muffler. An old paint
brush or broom may help loosen any concrete that has
started to harden.
TROWEL LUBRICATION
Regular lubrication is required to maintain your trowel in
optimal working condition. Perform the following lubrication
procedure after every 8 hours of operation.
1. Locate one of the Zerk grease fittings on either spider
assembly (Figure 40). Remove the Zerk fitting cap and
set it aside.
Figure 40. Spider Lubrication
2. Wipe the Zerk grease fitting clean to prevent abrasive
material from entering the fitting during lubrication.
3. Lubricate the Zerk grease fitting with 1–1½ shots of
multipurpose grade grease. Replace the Zerk grease
fitting cap when finished.
ZERK GREASE
FITTING
ZERK
FITTING CAP