EasyManua.ls Logo

Munters HC-300 User Manual

Munters HC-300
41 pages
To Next Page IconTo Next Page
Page #1 background imageLoading...
Page #1 background image
OPERATING AND MAINTENANCE MANUAL
MODEL: HC-300 / DEW-300
Section 1
a) Operating and Maintenance Text
Section 2
a) General Arrangement Drawing ................................................................................... 74119
b) Wiring Diagram 208-240 /1/ 50/60 .............................................................................. 50339
c) Wiring Diagram 208-240 /3/ 50/60 .............................................................................. 50340
d) Wiring Diagram 380-415 /3/ 50/60 .............................................................................. 50341
e) Wiring Diagram 460 /3/ 50/60 ..................................................................................... 50342
f) Wiring Diagram 208-240 /3/ 50/60 .............................................................................. 50344
Section 3
a) Replacing Fusible Links
b) Humidistat Field Connections ..................................................................................... 26992
c) Blastgate Installation Instructions ............................................................................... 27110
d) Recommended Spare Parts List ................................................................................ 21239
Question and Answer IconNeed help?

Do you have a question about the Munters HC-300 and is the answer not in the manual?

Munters HC-300 Specifications

General IconGeneral
BrandMunters
ModelHC-300
CategoryDehumidifier
LanguageEnglish

Summary

Section 1 - Introduction

Dehumidifier Operating Principle

Explains how the HC-300 removes moisture using the HoneyCombe® wheel and desiccant.

About the HC-300

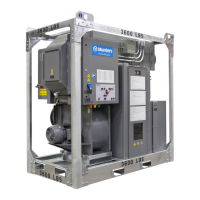
Details the HC-300's components, including the HoneyCombe® wheel, seals, blowers, and sensors.

Controls and Indicators

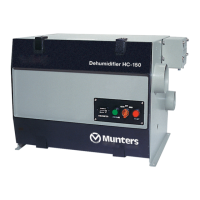
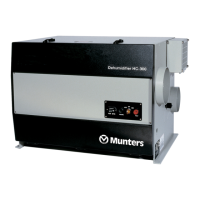
Describes the unit's control panel, including the Auto/Off/Manual switch, running light, fault light, and time meter.

Protective Circuits

Explains safety features like temperature switches, fusible links, and motor overload protection.

Section 3 - Installation and Start-Up

Inspection

Instructions for checking the unit for shipping damage and verifying component installation upon arrival.

Positioning the Unit

Details required clearances around the unit for proper operation and access.

Connecting the Ductwork

Guidelines for connecting process and reactivation air ductwork, including placement and insulation.

Electrical Connections

Procedures for making electrical connections to the unit, emphasizing safety and proper grounding.

Connecting the Remote Humidistat

Instructions for wiring and mounting a remote humidistat for automatic control.

Adjusting the Dampers

Steps for adjusting process and reactivation dampers to achieve optimal operating temperatures.

Section 4 - Preventive Maintenance

Clean the Air Filters

Steps for cleaning or replacing the process and reactivation air filters.

Check the Honeycombe® Wheel

Guidance on inspecting the HoneyCombe® wheel for correct rotation and signs of wear or contamination.

Check the Upper and Lower Air Seals

Instructions for inspecting the air seals that run along the HoneyCombe® wheel for wear.

Check the Reactivation Outlet Temperature

How to verify the reactivation air outlet temperature is within the specified range.

Section 5 - Troubleshooting

Possible Trouble Conditions

General advice on preparing the unit for troubleshooting, especially with remote humidistats.

Auto/Off/Manual Switch is Set to Auto, Running Light Does Not Come On

Steps to diagnose why the unit does not start when in automatic mode.

Fault Light is On, and Machine Should Be Running

Troubleshooting steps when the fault light is illuminated but the unit should be operating.

Reactivation Outlet Temperature is Too Low

Diagnosing and resolving low temperatures at the reactivation air outlet.

Poor Dehumidifying Performance

Identifying causes for reduced dehumidification, such as dirty filters or incorrect air volumes.

Honeycombe® Wheel is Stopped, Running Light is On

Troubleshooting steps when the HoneyCombe® wheel is not rotating despite the running light being on.

Checking the Heating Elements

Procedures for testing the resistance and continuity of the heating elements.

Checking the Thermistor

Guidance on testing the thermistor that controls heating element operation.

Checking the Humidistat

Steps to verify the proper operation and wiring of the humidistat.

Checking the Drive Motor, Wheel and Seals

Instructions for inspecting and maintaining the drive motor, HoneyCombe® wheel, and seals.

Related product manuals