Correcting paper feed 25
[3]
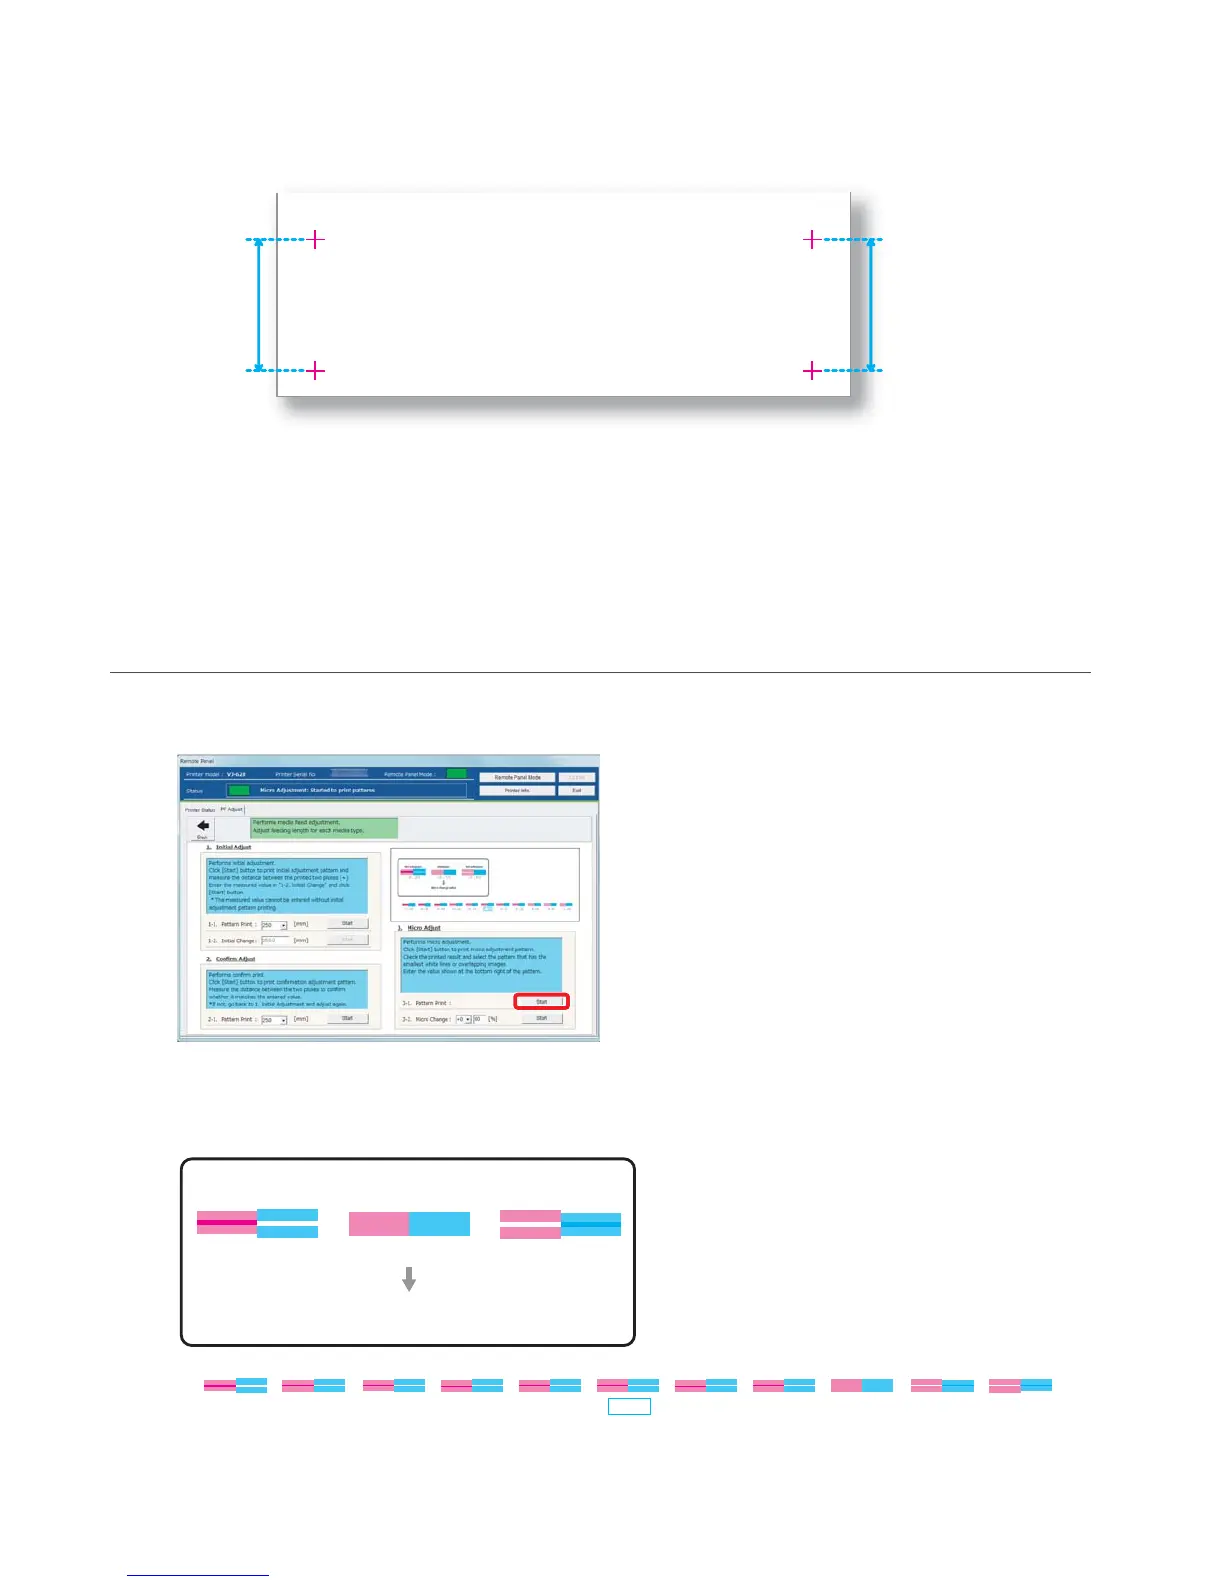
Using a ruler, measure the length between “+” in the pattern.
• In the example below, the measured place is shown in blue dotted lines and arrows (the blue parts are not actually
printed).
[4]
Confirm the measured length.
• If the measured length matches the length selected in Step 1, proceed to "Micro adjustment" on page 21.
• If the measured length does not match the selected length, re-correct with "Checking picture quality" on page 19.
3. Micro adjustment
[1]
Click [Start] in [3-1. Pattern Print] of [3. Micro Adjust].
• A pattern is printed.
[2]
Observe the pattern and verify the micro change value.
• In the pattern, look for a place that has least white lines or overlapping in images.
• The number printed below the pattern is the micro change value.
-0.50-0.20-0.100.00+0.10+0.20+0.50+0.80+1.20 -1.20-0.80
Micro change value
-0.80-0.20 -0.50
Not adequate Adequate Not adequate