45 Choosing the car color
Each player can select from one of four car colors. This is done by plugging in
different connectors (included with the game) into the car-color connector located
on the cabinet wall by the PCB enclosures, and accessed through the Front
Control Panel
The game, as shipped, has one connector plugged into the car-color harness and
the other two connectors attached to it.
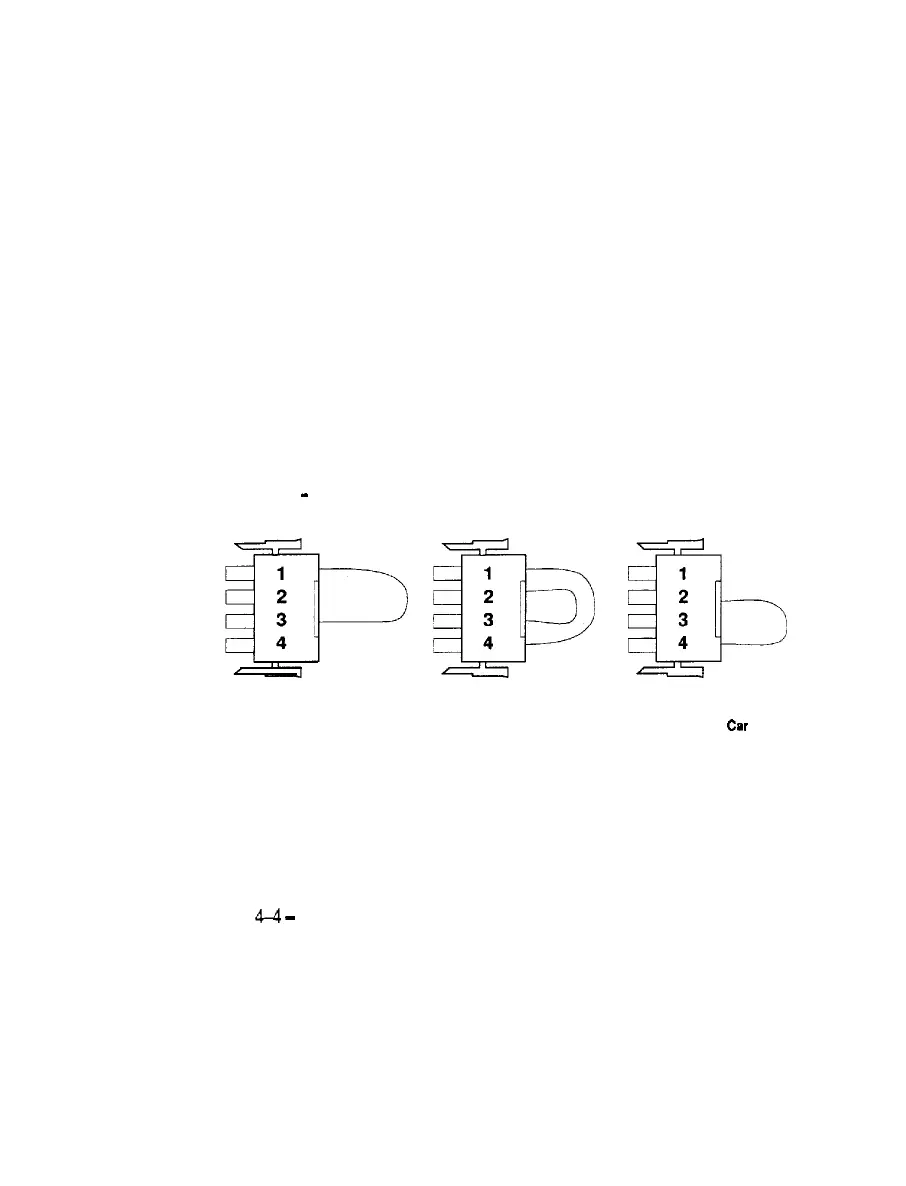
The following are the car colors and their connectors:
l Light blue car. Plug in the connector with wires at all 4 pins.
l Blue and white car. Plug in the connector with wires at pins 2 and 4.
l Yellow car. Use NO connector.
l Red car. Plug in the connector with wires at pins 1 and 3.
YELLOW Car
-
USE NO CONNECTOR
1
2
B
3
4
1
2
icb
3
4
RED Car LIGHT BLUE Car
BLUE and WHITE
Car
Illustration 4-4, CAR-COLOR CONNECTORS
5. ADJUSTMENTS
5-l
Power on
When installation is complete, connect power cord to outlet and turn power on.
(Ref. 4-4
-
Power on/off Switch location)
5-2 Adjustment switches on the Service Panel
There are switches on the Service Panel located inside the coin door for adjust-
ment of the speaker volume, and for accessing the test mode.
6
 Loading...