(1) Open Control Panel by removing three (3) screws.
(2) Remove the two (2) screws that hold the potentiometer brackets.
(3) Take out the entire potentiometer bracket including the gear.
NOTE: * Since the potentiometer has a built-in stop, be sure that
the stop won’t over travel when reassembled.
*
When replacing, set the potentiometer to have a value of
2.5K
R (mid range).
* When the potentiometer and the Steering Assembly are
replaced, initialization is required. (Ref. 5-5)
7-2
HAPP
CONTROLS Gas Pedal Assembly
Illustration 7-5, GAS PEDAL ASSEMBLY
(1) Open the rear door and remove the connector to the pedal assembly.
(2) The Pedal Assembly may now be accessed from the back for removal.
(3) Remove the three (3) screws that secure the pedal assembly to the
cabinet, then the pedal assembly can be taken out from the back.
7-3
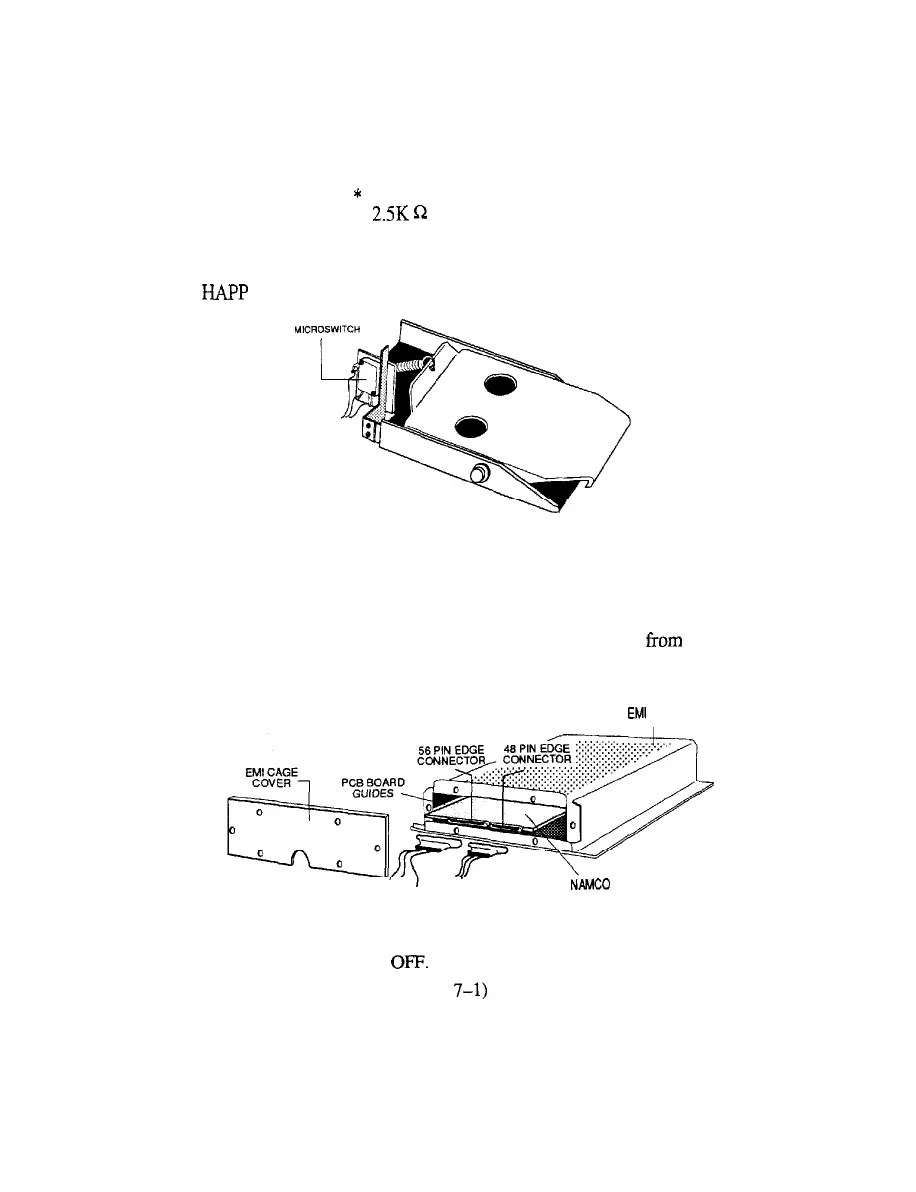
Removing the game PCB
EMI
CAGE
NAMCO
PCB BOARD
Illustration 7-6, REPLACING GAME PCB
(1) Turn the game power
OFF.
(2) Open the Control Panel. (Ref.
7-l)
(3) Remove six (6) screws that hold the steel end panel on the EM1 Cage.
(4) Carefully remove all the connectors from the game PCB to be taken out.
(5) Carefully slide out the game PCB to remove.
15
 Loading...