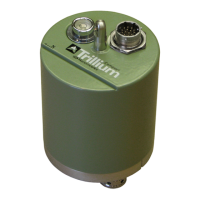
Chapter 2 - Installing a Trillium Compact Posthole
Seismometer
The contents of this chapter are applicable to Trillium Compact Posthole, model
numbers TC120-PH2, TC120-PH2-XC, TC20-PH2 and TC20-PH2-XC.
2.1 Installing a Trillium Compact Posthole
1. "Selecting a Site for a Trillium Compact Posthole seismometer" below
2. "Pre-Installation Preparation" on the next page
3. "Preventative Maintenance of Connectors" on the next page
4. "Grounding guidelines " on page89
5. "Connecting the Centaur digital recorder and the Trillium Compact" on page20
6. "Verifying connection with the Centaur digital recorder" on page21
7. Installing a Trillium Compact either by:
a. "Installing a Trillium Compact Posthole in an Uncased Hole (Direct Burial)" on
page22 or by
b. "Installing a Trillium Compact Posthole in a Cased Hole" on page24
Once you have completed the installation of your Trillium Compact Posthole, you can proceed
to configure the digital recorder. Refer to the Centaur User Guide (17935).
2.2 Selecting a Site for a Trillium Compact Posthole
seismometer
There is no substitute for a geological survey when it comes to site selection. A survey provides
knowledge of the structures over which the seismometer seismometer will be installed.
Where possible, seismometers should be installed on bedrock and as far away as possible
from sources of cultural noise such as roads, dwellings, and tall structures.
Use the worksheet "Site Record" on page87 to record information about the structure,
cultural environs, and climatic conditions of the site; as well as information about the type and
length of the installation.
Chapter 2 - Installing a Trillium Compact Posthole Seismometer
16889R10 • 2020-11-12 Page 18