l See also "Aligning and Leveling a Trillium Compact in a Vault Installation" on page39
and "Insulating a Trillium Compact Vault with a Rigid Foam Box" on page45 for other
methods of leveling and insulating the seismometer.
See "Performing a temporary installation on Rock" below.
3.4.2 Performing a Vault Installation
To perform this type of deployment,
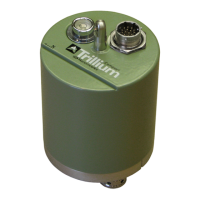
1. Connect the cable to the seismometer.
2. Follow "Aligning and Leveling a Trillium Compact in a Vault Installation" on page39 to
properly align and level the seismometer.
3. Place the insulating cover over the seismometer, fitting the cable exit slot over the
cable. For more detailed instructions, see "Insulating a Trillium Compact Vault with the
Insulating Cover" on page42.
4. Power the seismometer, and using a digitizer (see "Configuring Your System" on
page58) or the Trillium Compact Web interface (see "Configuring Serial
Communications" on page60 and "Using the Web Interface" on page62 verify a level
installation by checking that the mass positions are within an acceptable range (at or
very close to zero).
3.4.3 Performing a temporary installation on Rock
To perform this type of deployment,
1. Locate the flattest available surface for your installation.
2. Connect the cable to the seismometer and secure it to the side of the unit using a tie
wrap.
3. Remove the feet from the seismometer and retain for future deployments.
4. Follow "Aligning and Leveling a Trillium Compact in a Vault Installation" on page39 and
"Using the Leveling Cradle" on page96 to properly align and level the seismometer in
the leveling cradle.
5. Lay sand in a ring around the leveling cradle to create a flat and level sealing surface for
the insulating cover.
Chapter 3 - Installing a Trillium Compact Vault Seismometer
16889R10 • 2020-11-12 Page 34