Chapter 3 - Installing a Trillium Compact Vault
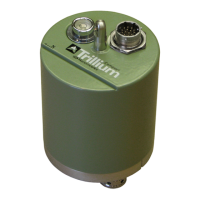
Seismometer
The contents of this chapter are applicable to Trillium Compact, model numbers
TC120-SV1, TC20-SV1, TC120-PH2, TC120-PH2-XC, TC20-PH2 and TC20-PH2-XC.
For model numbers TC120-PH2, TC120-PH2-XC, TC20-PH2 and TC20-PH2-XC, the
optional bubble level will be required and the optional adjustable locking feet kit may
be required when performing a surface vault installation. See "Cables and
Accessories" on page12.
3.1 Installing a Trillium Compact surface vault seismometer
The following steps for installing a Trillium Compact in a vault are described throughout this
guide:
1. "Preparing for a Vault Installation" below
2. "Selecting a Site for the Trillium Compact Vault " on the next page
3. "Preparing the Site for a Vault Installation" on page32
4. "Grounding guidelines " on page89
5. "Alignment, Leveling, and Placement Features" on page36
6. "Aligning and Leveling a Trillium Compact in a Vault Installation" on page39
7. "Insulation Options" on page42
8. "Connecting the Centaur digital recorder and the Trillium Compact" on page46
9. "Verifying connection with the Centaur digital recorder" on page47
10. Configuring the Centaur for use with the Trillium Compact, see "Configuring Your
System" on page58
3.2 Preparing for a Vault Installation
Advanced planning and preparation for the installation of your Trillium Compact Vault
seismometer will ensure that you have a properly prepared site and the tools and materials
you need readily available. Follow these recommendations when preparing for your
installation:
Chapter 3 - Installing a Trillium Compact Vault Seismometer
16889R10 • 2020-11-12 Page 30