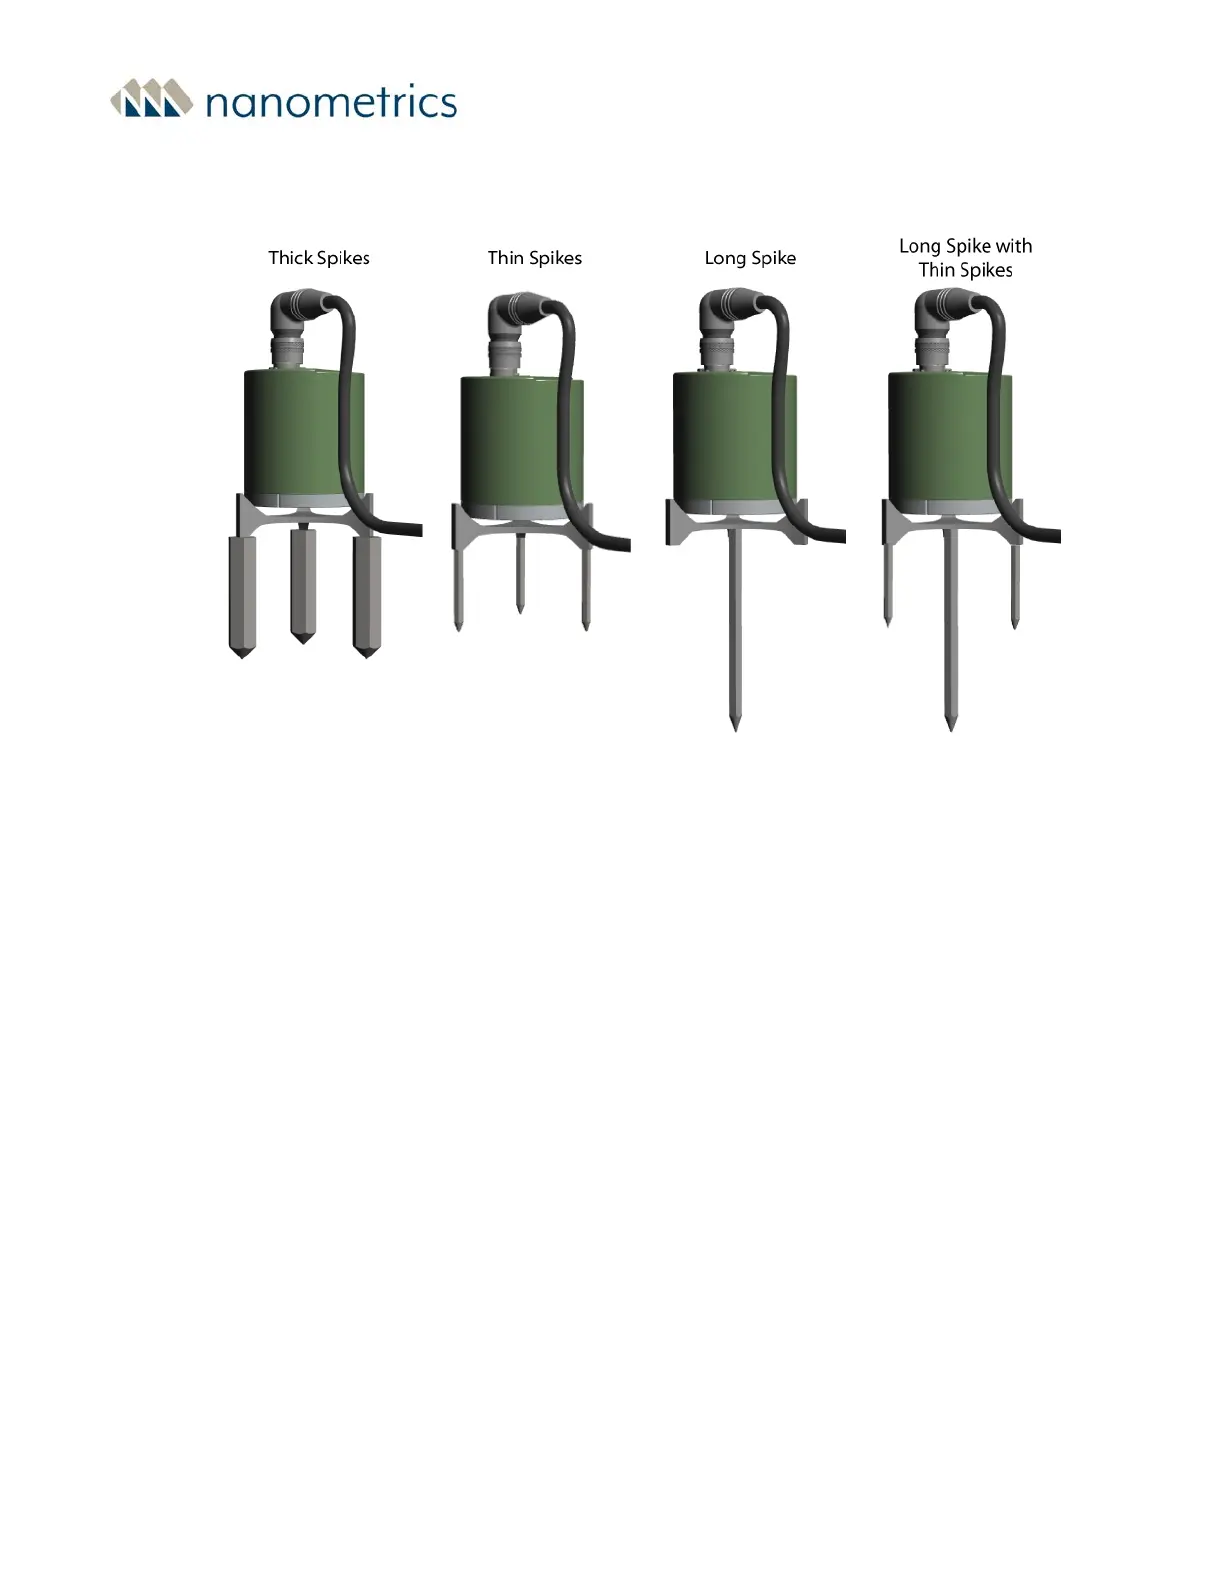
Figure D-2 - Leveling cradle and spike kit assembly configurations
To use the spike kit:
1. Select the appropriate spikes or spike for the installation surface and thread these
tightly into the appropriate threaded holes on the shallow side of the leveling cradle:
l For sand; dry, loose soil; or snow, thread the three thick spikes into the threaded
holes in the feet of the cradle.
l For dense wet soil or clay, thread the three thin spikes into the threaded holes in
the feet of the cradle.
l For rocky or frozen soil or ice, thread the single long spike into the threaded hole
in the center of the cradle. If more support is needed, also thread the three thin
spikes into the feet of the cradle.
2. Push the spikes into the earth, firmly securing the assembly and making it as level as
possible.
3. Place the Trillium Compact on the cradle, aligning it to your alignment line (see "Aligning
and Leveling a Trillium Compact in a Vault Installation" on page39).
4. Level the Trillium Compact by adjusting it on the cradle until the leveling bubble is
centered in the black ring.
Appendix D - Leveling Cradle and Spike Kit
16889R10 • 2020-11-12 Page 98