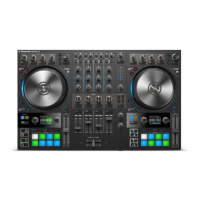
(2) MASTER knob: Adjusts the MASTER signal level. For more information, refer to Adjusting
Levels.
(3) QUANT (Snap) button: Allows you to enable or disable Quantize mode and Snap mode. For
more information, refer to Snap Mode and Quantize Mode.
(4) Master Level Meter: Gives you visual feedback on the current Master Output volume level.
The blue LEDs indicate if the signal is below Headroom area. The red LED indicates if the signal is
clipping. The yellow LEDs indicate if the audio signal is currently within the Headroom area before
the audio signal starts clipping.
(5) BOOTH knob: Adjusts the Volume of the Booth output signal for the DJ monitors. For more
information, refer to Adjusting Levels.
(6) MIXER FX SELECT buttons: Select the MIXER FX to be controlled by the individual MIXER
FX controls in the Mixer channels. For more information, refer to Playing with MIXER Effects.
(7) MIX knob: Adjusts the signal mix between MASTER signal and the CUE channel signal in the
headphones. For more information, refer to Using CUE Channel.
(8) VOL knob: Adjusts the level for the CUE channel. For more information, refer to Using CUE
Channel.
(9) Crossfader: Controls the mix between the Mixer channels’ signals that are assigned to the left
crossfader side and the right crossfader side. At each crossfader’s end, the opposite signals are
totally silent. Moving the crossfader gradually fades in and fades out the relevant audio signal in
the master output. At the center position, both audio signals are fully audible. For more informa-
tion, refer to Assigning Mixer Channels to the Crossfader.
TRAKTOR KONTROL S4 Overview
22

 Loading...