25
To reduce the risk of electrical shock or unsupervised usage of the equipment, always unplug the power cord from the wall outlet
and the machine and wait 5 minutes before cleaning, maintaining or repairing the machine. Place the power cord in a secure
location.
Note: Your machine may not match the image. Model Year 2014 (MY14) is
shown. For reference only.
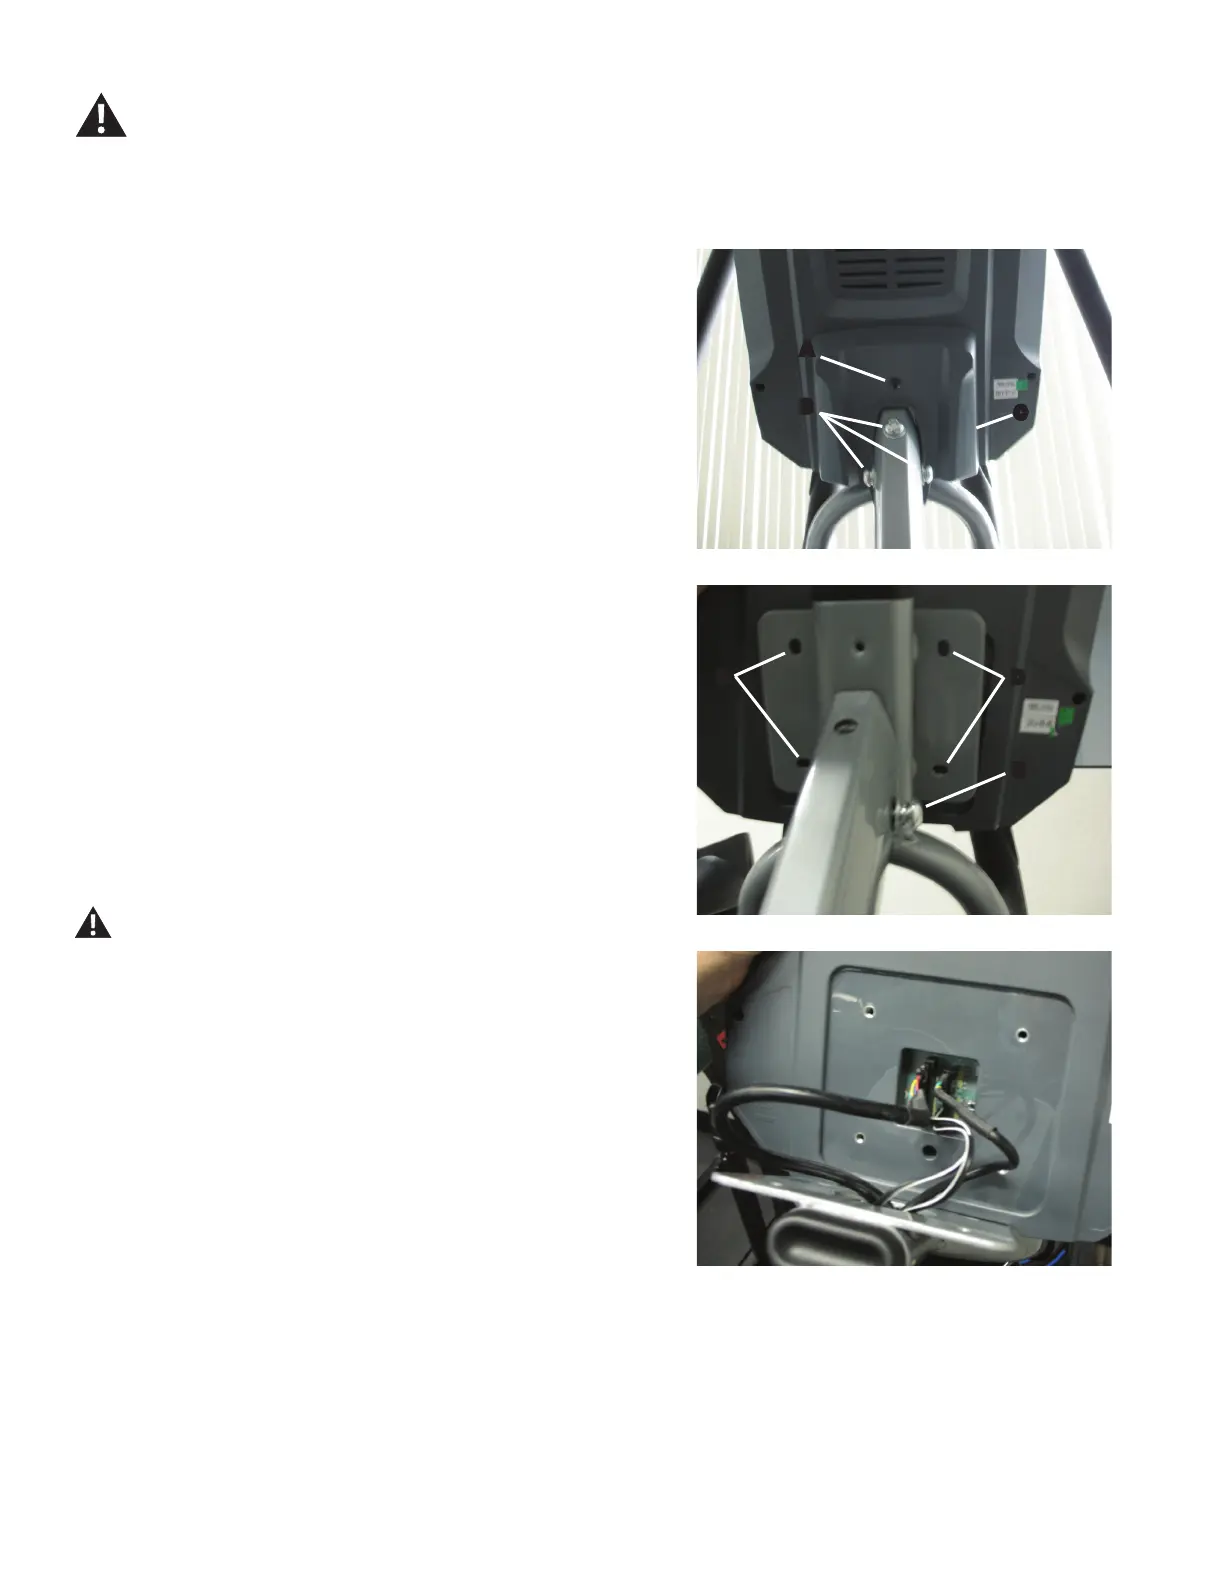
1. MY14 model only—Loosen and remove the screw (A) that attaches
the Console Junction Cover (C) to the Console. Set the screw safely aside
for reassembly.
2. MY14 model only—To get access to the mount plate, carefully loosen
and remove the hardware (B) that attaches the Static Handlebar Assembly
to the Mast using a 6mm hex key. Slide the Console Junction Cover (C)
down the Mast. Reinstall 1 bolt to hold the Static Handlebar Assembly in
position on the Mast. Set the other hardware safely aside for reassembly.
NOTICE: 'RQRWOHWWKH&RQVROHDQG6WDWLF+DQGOHEDU$VVHPEO\IDOO
This step may require two people.
3.5HPRYHVFUHZV'WKDWDWWDFKWKH&RQVROHWRWKH6WDWLF+DQGOHEDU
Assembly. Carefully lift the Console off the Mast.
4.'LVFRQQHFWWKH'DWD&DEOH/LIW0RWRU&DEOHDQG+HDUW5DWH&DEOHIURP
the back of the Console. Set the Console and screws safely aside.
Note:'RQRWOHWWKHFDEOHVIDOOGRZQLQVLGHWKH0DVW7KLVVWHSPD\
require two people.
5. Installation is the reverse procedure.
6. Inspect your machine to ensure that all hardware is tight and
components are properly assembled.
Do not use until the machine has been fully assembled and
inspected for correct performance in accordance with the
Owner’s Manual.
Initial Setup
'XULQJWKH¿UVWSRZHUXSWKH&RQVROHVKRXOGEHVHWXSZLWKWKHGDWHWLPH
and your preferred measurement units.
'DWH3XVKWKH,QFUHDVH'HFUHDVHEXWWRQVWRDGMXVWWKHFXUUHQWO\DFWLYH
YDOXHÀDVKLQJ3XVKWKH/HIW5LJKWEXWWRQVWRFKDQJHZKLFKVHJPHQWLV
the currently active value (month / day / year).
2. Push OK to set.
7LPH3XVKWKH,QFUHDVH'HFUHDVHEXWWRQVWRDGMXVWWKHFXUUHQWO\DFWLYH
YDOXHÀDVKLQJ3XVKWKH/HIW5LJKWEXWWRQVWRFKDQJHZKLFKVHJPHQWLV
the currently active value (hour / minute / AM or PM).
4. Push OK to set.
8QLWVRI0HDVXUHPHQW3XVKWKH,QFUHDVH'HFUHDVHEXWWRQVWRDGMXVW
between “MILES” (Imperial English) or “KM” (metric).
6. Push OK to set. The Console goes back to the Power-Up / Idle Mode
screen.
Note: To adjust these selections, consult the “Console Service
Mode” section.
A
B
C
D D
B

 Loading...