87
!
To reduce the risk of electrical shock or unsupervised usage of the equipment, always unplug the power cord from the
wall outlet and the machine and wait 5 minutes before cleaning, maintaining or repairing the machine. Place the
power cord in a secure location.
A
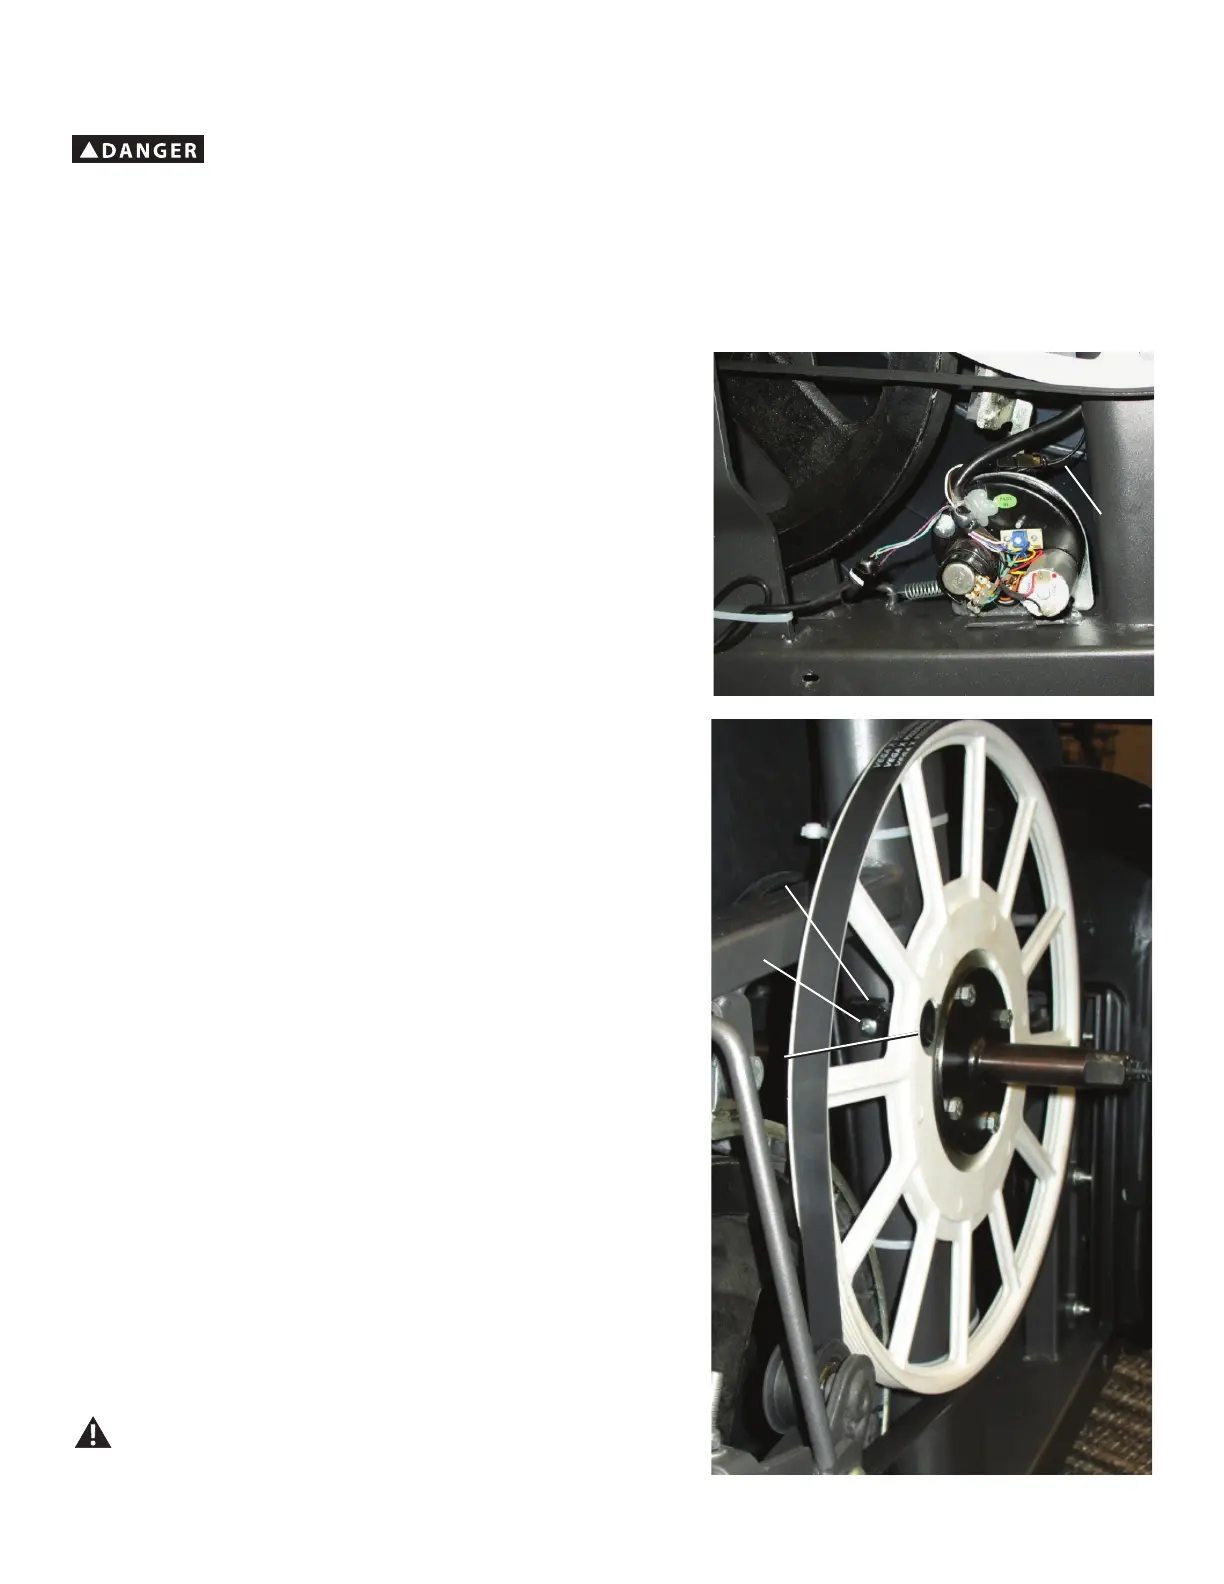
NOTICE: It is necessary to remove the Shrouds for this procedure. Refer to the “Replace the Shrouds” procedure.
C
B
D
Note: Your machine may not match the image. For reference only.
1. Carefully remove the Shrouds. Refer to the “Replace the Shrouds”
procedure.
2. 'LVFRQQHFWWKH6SHHG6HQVRU&DEOH$
NOTICE:'RQRWFULPSWKHFDEOHV
3. Using a #2 Phillips screwdriver, remove the indicated bolt (B) from
the RPM Sensor Assembly (C).
Note:7KH6SHHG6HQVRU0DJQHW'LVRQWKH'ULYH3XOOH\
Assembly.
4. Remove the RPM Sensor Assembly (C) and replace with the new
assembly.
5. Installation is the reverse procedure.
NOTICE:'RQRWFULPSDQ\FDEOHV%HVXUHWKHURXWLQJIRUWKHQHZ
RPM Sensor cable (A) and other wiring is correct to prevent interference
from moving parts.
Note: Before fully attaching the Shrouds, verify that the RPM Sensor
&DQG6SHHG6HQVRU0DJQHW'RQWKH'ULYH3XOOH\GRQRW
touch.
6. 'LVSRVHRIWKHROGSDUWV
7. Inspect your machine to ensure that all hardware is tight and
components are properly assembled.
Do not use until the machine has been fully assembled and
inspected for correct performance in accordance with the
Owner’s Manual.

 Loading...