58
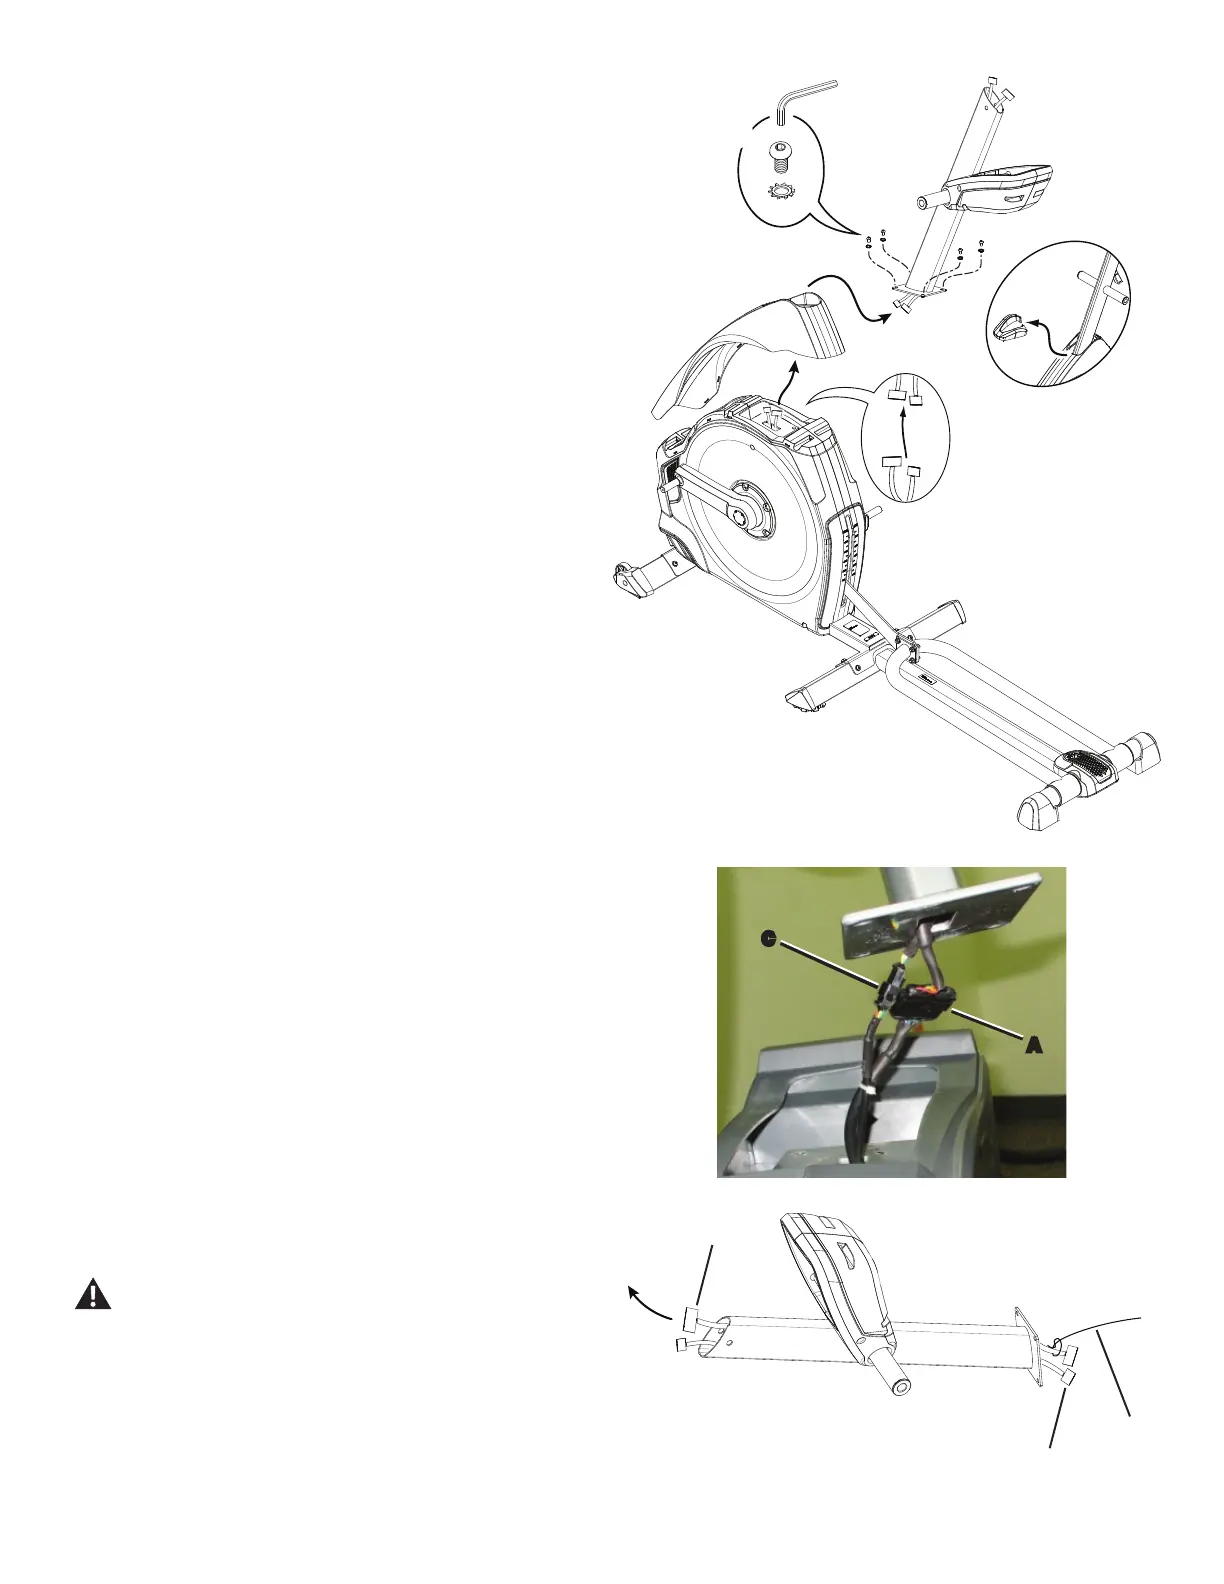
A
B
C
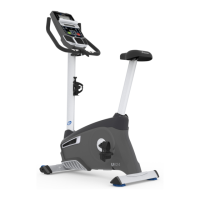
9. Bend the edges of the Top Shroud to disengage the inside tabs from
the Main Assembly, and slide the Shroud Cap and Top Shroud up the
Mast.
10. Remove the hardware (indicated) from the Mast. Gently pull the Mast
out and disconnect the cables. Set the hardware and Top Shroud safely
aside for reassembly.
NOTICE:'RQRWFULPSWKHFDEOHV'RQRWDOORZWKHFDEOHVWRIDOO
down into the Main Unit. This step may require two people.
11. 7LHWKHOHQJWKRIVWULQJWRWKHHQG$RIWKH'DWD&DEOHDWWKHEDVHRI
WKH0DVW+ROGWKHRWKHUHQGRIWKH'DWD&DEOH%DQGFDUHIXOO\SXOOLWRXW
of the Mast so that the string extends through the length of the Mast.
NOTICE: Hold the Lift Motor Wire (C) so that you do not pull it out of
WKH0DVW'RQRWFULPSWKH/LIW0RWRU:LUH
12. 8QWLHWKHVWULQJIURPWKHROG'DWD&DEOHDQGGLVFDUGWKHROGFDEOH
13. Tie the end of the string at the base of the Mast to one end of the
UHSODFHPHQW'DWD&DEOH+ROGWKHRWKHUHQGRIWKHVWULQJDQGFDUHIXOO\SXOO
WKHQHZ'DWD&DEOHWKURXJKWKH0DVW
NOTICE: Hold the Lift Motor Wire (C) so that you do not pull it out of
WKH0DVW'RQRWFULPSWKHFDEOHV
14. &RQQHFWWKHQHZ'DWD&DEOHWRWKH'DWD&DEOHIURPWKH0DLQ)UDPH
Reconnect the Lift Motor Wires from the Mast and the Main Frame.
NOTICE:'RQRWFULPSWKHFDEOHV7KLVVWHSPD\UHTXLUHWZRSHRSOH
15. Reassembly is the reverse procedure.
NOTICE:'RQRWFULPSWKHFDEOHV8QWLHWKHVWULQJIURPWKH'DWD
&DEOH'RQRWDOORZWKHFDEOHVWRIDOOGRZQLQWRWKH&RQ-
sole Mast.
Be sure the tabs in the Top Shroud snap into the Main
Assembly.
16. Inspect your machine to ensure that all hardware is tight and
components are properly assembled.
Do not use until the machine has been fully assembled and
inspected for correct performance in accordance with the
Owner’s Manual.
A
C
6mm
X4

 Loading...