64
To reduce the risk of electrical shock or unsupervised usage of the equipment, always unplug the power cord from the wall out-
let and the machine and wait 5 minutes before cleaning, maintaining or repairing the machine. Place the power cord in a secure
location.
NOTICE: It is necessary to remove the Shrouds for this procedure. Refer to the “Replace the Shrouds” procedure.
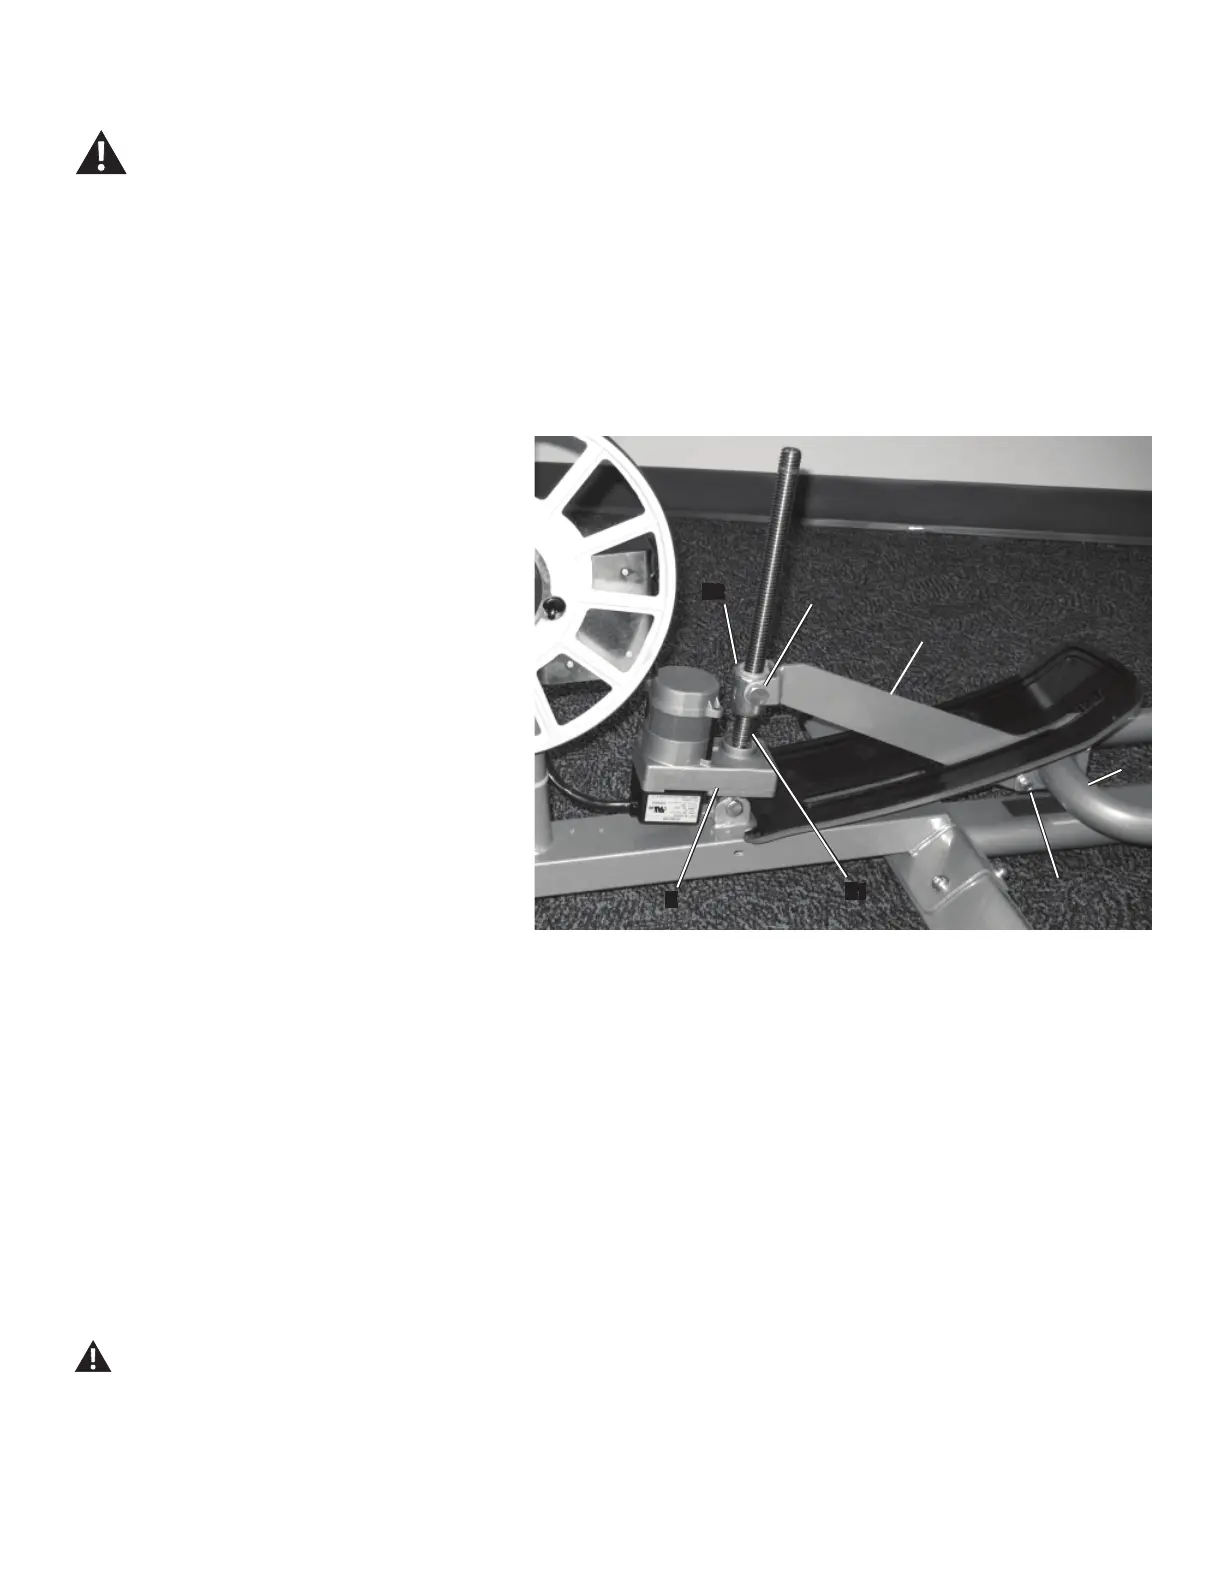
Note: Your machine may not match the image. For reference only.
1. Remove the Left Shroud. Refer to the “Replace the Shrouds”
Procedure.
Note: It may also be necessary to remove the Right Shroud to get
DFFHVVWRWKH,QFOLQH$GMXVWHUKDUGZDUH'
2. Count the number of threads showing on the Lift Motor
shaft (E1) between the collar nut (E2) and the Lift Motor base
(E), and record the number.
3. Using the 6mm hex key, loosen and remove the
hardware (B) that attaches the Incline Adjuster Assembly (A)
to the Rail Assembly (C).
4. Using the 18mm socket and wrench and 18mm open
HQGZUHQFKORRVHQDQGUHPRYHWKHKH[KHDGEROWV'WKDW
attach the Incline Adjuster Assembly (A) to the Lift Motor
shaft (E1). Set the bolts aside for reassembly.
5. Carefully remove the old Incline Adjuster Assembly (A)
and discard.
Note:'RQRWURWDWHWKH/LIW0RWRUFROODUQXW(RQWKH
shaft (E1) while the Incline Adjuster Assembly is
not installed.
NOTICE:'RQRWFULPSDQ\FDEOHV
6. Installation is the reverse procedure.
Note: Be sure the number of threads showing on the Lift Motor shaft
(E1) between the collar nut (E2) and the Lift Motor base (E) is
the same as the number recorded in Step 2. If the number is
different, turn the collar nut until the thread count is the same.
NOTICE:'RQRWFULPSDQ\FDEOHV
7. Inspect your machine to ensure that all hardware is tight and
components are properly assembled.
Do not use until the machine has been fully assembled and
inspected for correct performance in accordance with the
Owner’s Manual.
A
B (X4)
C
D (X2)
E1
E
E2

 Loading...