Display User Interface | 5
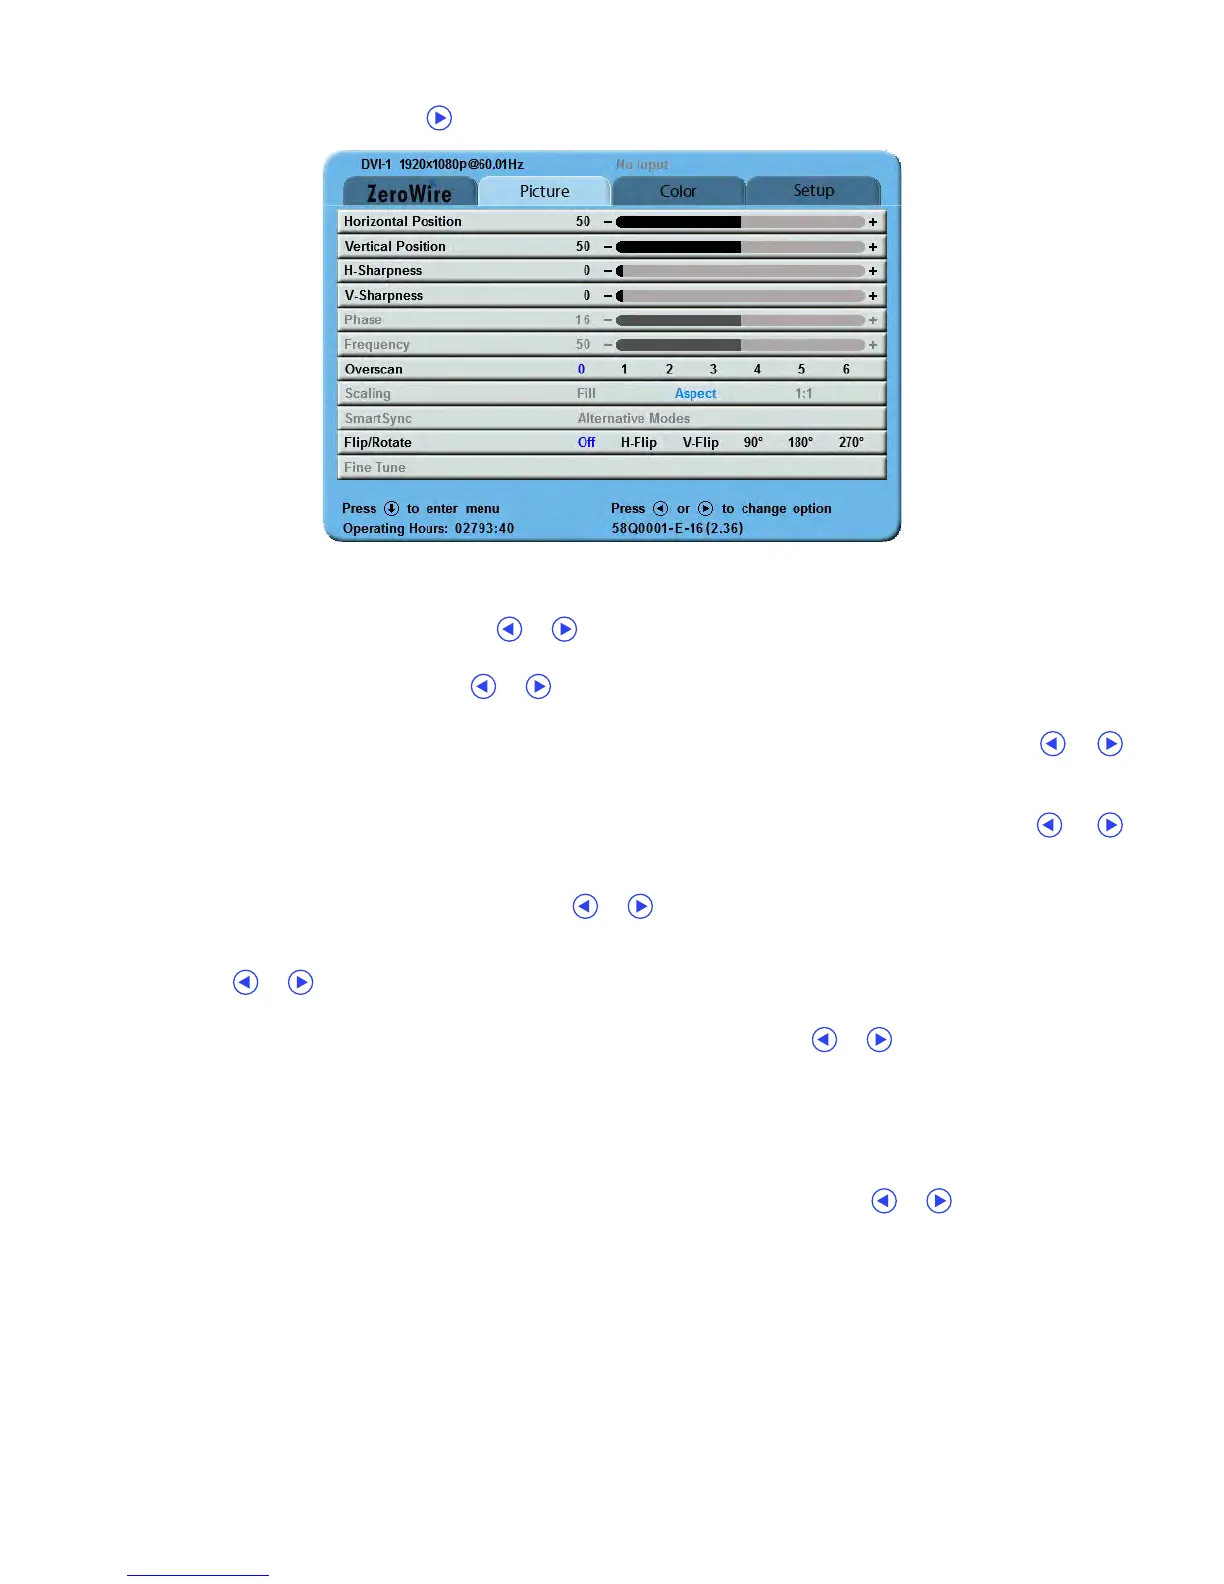
Picture Menu
To access the Picture Menu, tap the button once after opening the Display Menu.
Picture Menu Parameters
Horizontal Position
To horizontally center the image, tap the or buttons.
Vertical Position
To vertically center the image, tap the or buttons.
H-Sharpness
To increase sharpness (edge enhancement) of the displayed image in the Horizontal plane, tap the or
buttons.
V-Sharpness
To increase sharpness (edge enhancement) of the displayed image in the Vertical plane, tap the or
buttons.
Phase (VGA, RGBS, YPbPr, and SOG only)
To adjust phase of the display pixel clock, tap the or buttons.
Frequency (VGA, RGBS, YPbPr, and SOG only)
To adjust frequency of the display pixel clock until the image fills the screen horizontally, first set Scaling to Fill,
and tap the or buttons.
Overscan (Video)
Parameter enabled when the input is 16:9, 480P, 576P, or interlaced. Tap the or buttons to select.
0: The image is displayed at a size that fills the screen without losing any video information. Image could be
displayed as letterboxed, with black bars top and bottom or left and right.
1, 2, 3, 4, 5 or 6: Incrementally enlarges and crops the centered image. As the image becomes larger, video
information is lost on all sides.
Scaling (Graphics)
Parameter enabled when input signal is not 16:9, 480P, 576P, or interlaced. Tap the or buttons to select.
Fill: Expands the video image to fill the entire screen. The aspect ratio may not be accurately displayed.
Aspect: Expands the video image until its largest dimension fills the screen while retaining the aspect ratio.
The image may be displayed as letterboxed, with black bars top and bottom or left and right.
1:1: Displays the video data in its native size and aspect ratio. Image with aspect ratios different from that of
the display are letterboxed, with black bars top and bottom or left and right.
 Loading...