xi
Important Information
Clearance for Installing the Projector
Allowampleclearancebetweentheprojectoranditssurroundingsasshownbelow.
Thehightemperatureexhaustcomingoutofthedevicemaybesuckedintothedeviceagain.
AvoidinstallingtheprojectorinaplacewhereairmovementfromtheHVACisdirectedattheprojector.
HeatedairfromtheHVACcanbetakeninbytheprojector’sintakevent.Ifthishappens,thetemperatureinsidethe
projectorwillrisetoohighcausingtheover-temperatureprotectortoautomaticallyturnofftheprojectorspower.
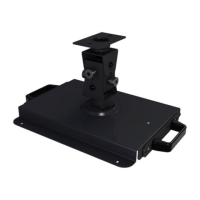
• Concerningtotheportraitprojection,pleaserefer“Portraitprojection”onpage154.
Example 1 – If there are walls on both sides of the projector.
30cm/11.8"orgreater 30cm/11.8"orgreater
Intakevent
NOTE:
The drawing shows the proper clearance required for the front, back and top of the projector.
Example 2 – If there is a wall behind the projector.
50cm/19.7"orgreater
Lens
Exhaustvent
NOTE:
The drawing shows the proper clearance required for the right, left, and top of the projector.
 Loading...