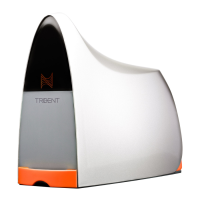
Install Reagent C
Turn the Trident around so the front is accessible and open the reagent
drawer.
Find the reagent C bottle and give it a good shake.
Place the bottle in the drawer and connect the reagent C intake assembly
(green) to the bottle.
Make sure the intake assembly tubing is pointed towards the back left corner
of the reagent drawer — this prevents the tubing from kinking when the
drawer closes.
Install Reagent B
Find the reagent B bottle and give it a good shake.
Place the bottle in the drawer and connect the reagent B intake assembly
(blue) to the bottle.
Make sure the intake assembly tubing is pointed towards the right side of
the reagent drawer — this prevents the tubing from kinking when the drawer
closes.
Install Reagent A
Find the reagent A bottle and give it a good shake.
Place the bottle in the drawer and connect the reagent A intake assembly
(red) to the bottle.
Make sure the intake assembly tubing is pointed towards the right side of
the reagent drawer — this prevents the tubing from kinking when the drawer
closes.
NOTE: It is recommended that you keep a set of three caps for reagent
bottles just in case you need to reseal the bottles. Rinse with tap water, let
dry, then store in a suitable spot, such as in the Trident box.
Close the drawer and keep the packaging
Close the Trident reagent drawer taking special care to guide the intake
assembly line tubing appropriately.
Please be sure to keep the Trident packaging. Later this packaging may
need to be re-used for the Trident’s routine service interval (NEEDS LINK)

 Loading...