GS748T Smart Switch Hardware Installation Guide
Installation 4-3
v1.1, September 2007
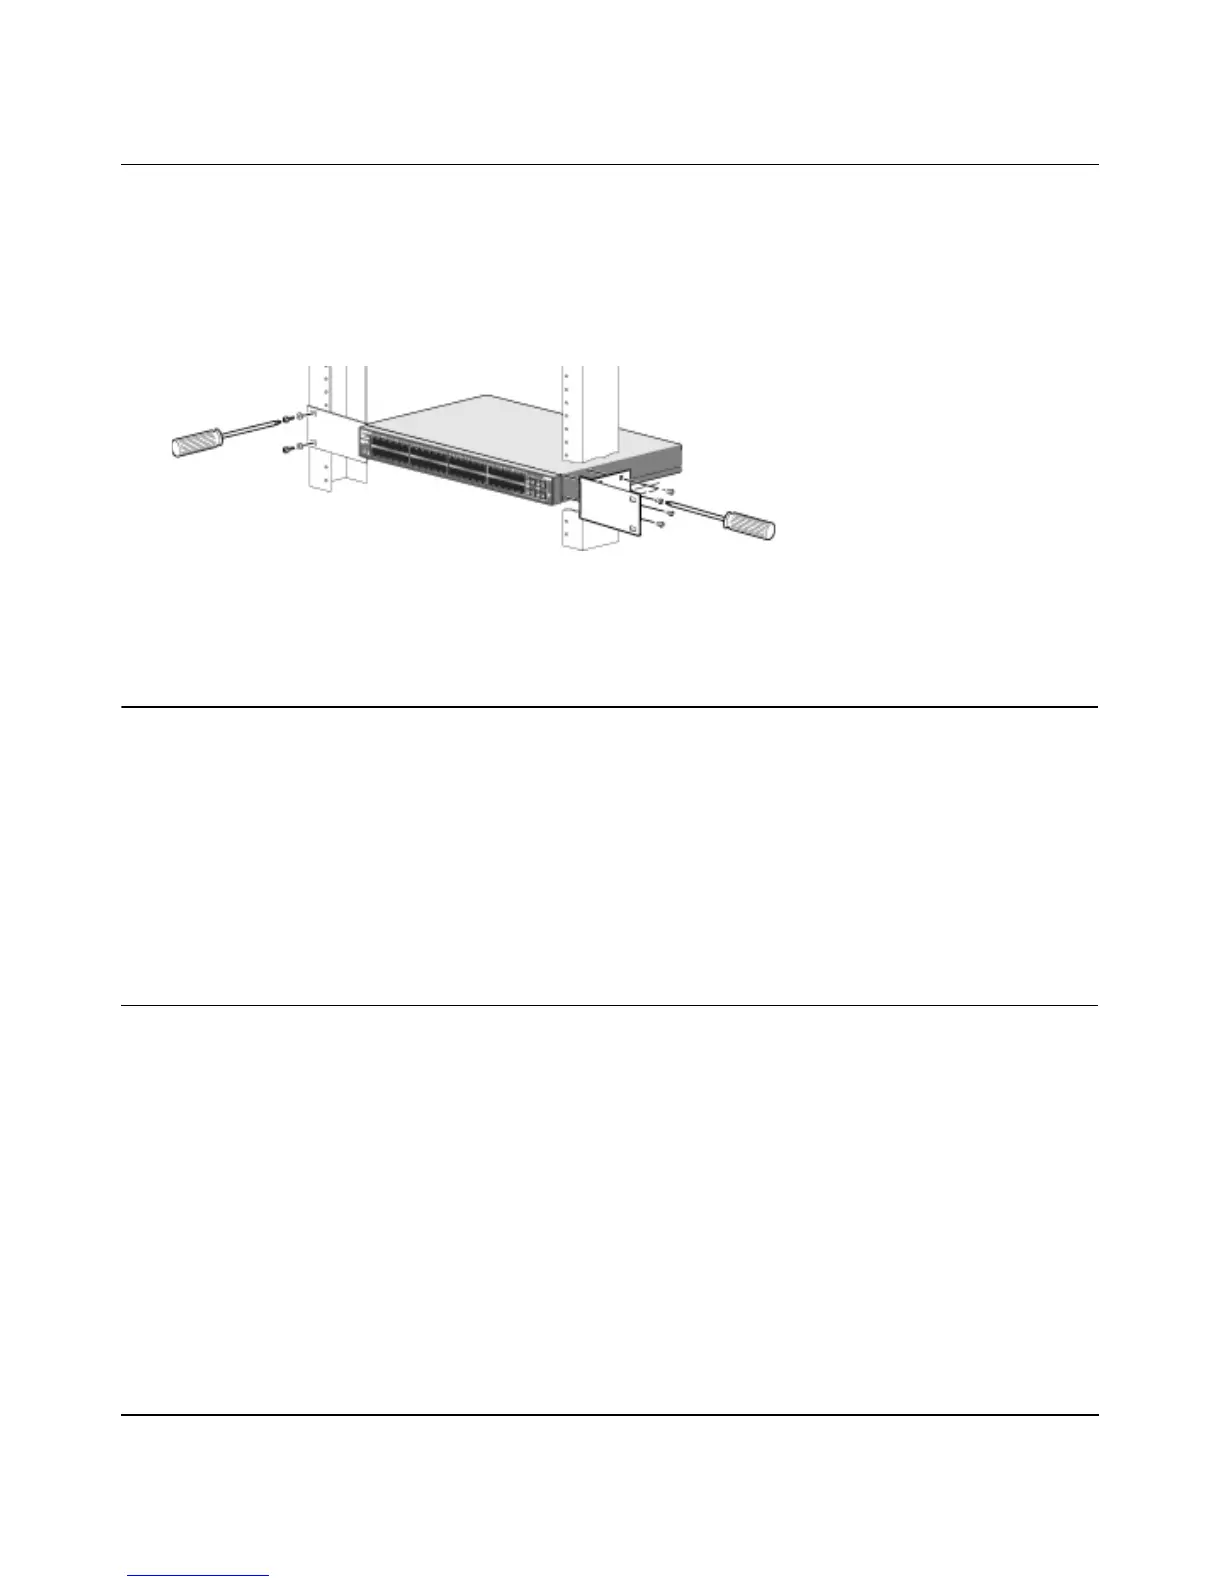
3. Orient the switch to align the unused mounting holes in the brackets with appropriate holes in
the rack.
4. Support the weight of the switch and use four pan-head screws with nylon washers to attach it
to the rack; use a #2 Phillips screwdriver to tighten the screws.
Step 3: Checking the Installation
Before you apply power, inspect the equipment thoroughly to:
• Verify that all cables are installed correctly.
• Check that cables are not damaged and that cable routing does not interfere with equipment to
create a safety hazard.
• Ensure that all equipment is mounted properly and securely.
Step 4: Connecting Devices to the Switch
The following procedure describes how to connect devices to the switch’s RJ-45 ports. Your
NETGEAR GS748T Gigabit Smart Switch contains Auto Uplink technology, which enables you
to attach devices using either straight-through or crossover cables.
Figure 4-1
 Loading...