9
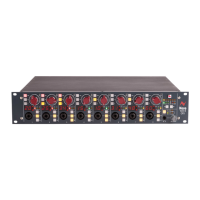
Configuring the 1073OPX 1
To operate the 1073OPX, configure as follows:
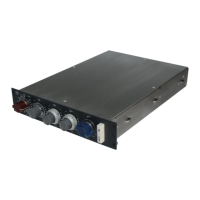
Ensure the unit is switched off.
Connect the PSU to the mains supply.
Connect the supplied power adaptor (PS12221) to the rear 5-pin DIN
input.
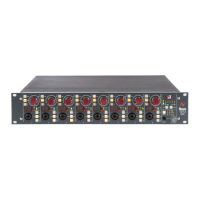
Connect your mic/line or DI input source/s to the front of the unit. Separate
mic/line inputs MIC I/Ps 1-8 and LINE I/Ps 1-8 are available on the rear of the
unit on D-sub connectors. These inputs follow the DB-25 standard pin
configuration. Monitor inputs MONITOR IN L and MONITOR IN R are available
on the rear XLRs of the unit. On the front of the unit, Mic inputs use the XLR
combo connectors; Line and DI inputs both use the 6.35mm jack on the combo
connectors.
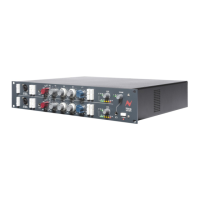
Connect the line output/s O/Ps 1-8 into your system. The outputs are
available on the rear D-sub connector. This uses the DB-25 standard pin
configuration.
Connect monitor outs if required via XLR cables at the rear of the unit
labelled MONITOR OUT L and MONITOR OUT R
Connect headphones to the front ¼’’ jack connector at the front of the
unit.
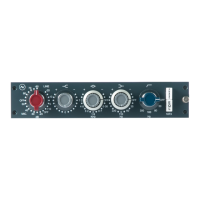
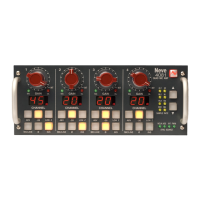
Switch on the unit. it will default to the last-used setting. Set front panel
controls as required.
Select front or rear input source by pressing the FNT button.
Select Input MIC/LINE/DI by pressing the IP button.
Set the phantom power +48v, 80Hz high pass filter, -25dB PAD and LoZ
impedance as required for each preamplifier.
Set phase by pressing and holding the IP button, it will illuminate red to
indicate 180° phase flip.
The DI circuit within the 1073OPX is a transformer-less class-A design. This uses an
FET transistor to increase the impedance to 650Kohms, perfect for guitars, basses
and keyboards. When connecting an instrument directly to the unit using the DI,
set the level at +40db gain and adjust gain levels from this point. If the signal is
distorted at 40dB then use the -25dB pad to reduce the incoming signal and then
add preamplifier gain to get the desired tone and level.