74 Chapter 7 Calibration
7.2.2 Drive Current Load Resistor Selection
Laser Drive Current
Resistor
200 mA
30 Ω, 2 W
500 mA
10 Ω, 5 W
1,000 mA
5 Ω, 10 W
3,000 mA
2 Ω, 25 W
6,000 mA
1 Ω, 50 W
Table 10 - Drive Current Load Resistor Selection
7.2.3 Local Operation Current Source Calibration
a. With the output off, connect a load resistor, as selected Table 10, and a
calibrated ammeter in series across the laser output terminals. If an
ammeter with the appropriate current ratings is unavailable, connect a
calibrated DMM across the laser output terminals to measure the
voltage across the resistor. Calculate the current in the following steps
by using Ohm's Law:
I = V / R
where V is the measured voltage across the resistor, and R is the
measured load resistance.
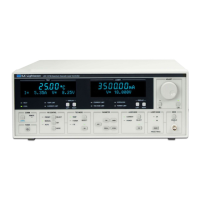
b. Go to the single module display by first pressing the
MENU
button,
then the
Modules
soft key, then the slot soft key that corresponds to the
module to be calibrated.
c. Press the
Setup
soft key and set the laser current limit (
Io Lim
) to one-
half scale plus 100 mA and output bandwidth as desired. Press the
soft key to return to the single display.
d. Press the
LDD ON
key to turn the laser output on, if it is not on
already. If a laser on delay has been set, wait that amount of time to
allow the laser output to engage.
b. Go to the calibration display by first pressing the
MENU
button, then
the
Config
soft key, then the
Cal
soft key, then the channel to be
calibrated. At the calibration screen, press the
Io
soft key. Follow the
on-screen instructions to complete the calibration. The calibration can
be terminated without affecting the stored constants if the
Term
soft
key is pressed at any point prior to completing the calibration.
 Loading...