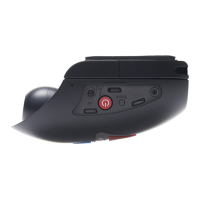
Wi-Fi Button & Indicator
Press and hold the Wi-Fi button for 2 seconds to turn on the Dash Cam's Wi-Fi function.
Once turned on, the button will flash slowly blue in colour, awaiting a connection from a
smartphone / tablet etc.
Once a device has been successfully connected the button will become solid blue. If no
connection is established within 2 minutes, then the Wi-Fi function turns off automatically and
the blue flashing light will extinguish.
See pages 32 - 39 for details on how to connect your mobile device to the Dash Cam and
how to use the Cam Viewer App.
Note:
- The Protect button can also be used to format the SD card, when recording is stopped.
Press and hold the Protect button for 6 seconds, the yellow LED will flash quickly during
the SD card formatting process.
Speaker
Used for the two types of ‘notification’ sounds.
Sounds:
There are two sounds, these are used to identify when recording starts and stops.
1. Start recording
A three-tone beep sound (ascending) will be heard when recording starts.
2. Stop recording
A three-tone beep sound (descending) will be heard when recording stops.
Announcements:
There are two spoken announcements, these are used to identify there is a SD card
issue that needs attention before recording can start.
i. Please insert Class 10 SD card
This is heard when there is either no SD card inserted, the inserted SD card is not of
the Class 10 type or the SD card is defective and cannot be successfully formatted.
ii. Card error, format SD card
The inserted card has previously been formatted to an incompatible standard for use
with the Dash Cam, this is usually resolved by simply re-formatting the SD card within
the Dash Cam.
See page 38 for details on how format the SD card.
Note:
- Should formatting the SD card not resolve the issue, please try another quality
branded SD card, making sure that is a Class 10 (48MB/s minimum) type.
- T he Sounds and Announcements can be turned On / Off from the Cam Viewer
Protect Button & Indicator
Press the protect button whilst recording to protect the current file, the button will illuminate,
red in colour indicating the file is protected.
Depending on at which point during the current recording the file is protected, the camera
will also save the previous or subsequent recordings, as follows:-
If the protection takes place during the first 3rd of the recording, the previous recording will
also be protected.
If the protection takes place during the final 3rd of a recording, the next recording will also be
protected.
Note:
- The protect button is also used when connecting the camera to a computer using the
USB cable. Press and hold the protect button when connecting the camera to a computer
and the Dash Cam will power on in Update Mode.
2
3
4
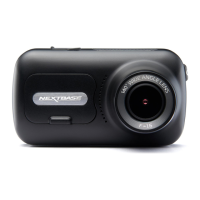
Front Facing Camera - Parts and Controls (contd.)
14
 Loading...