26
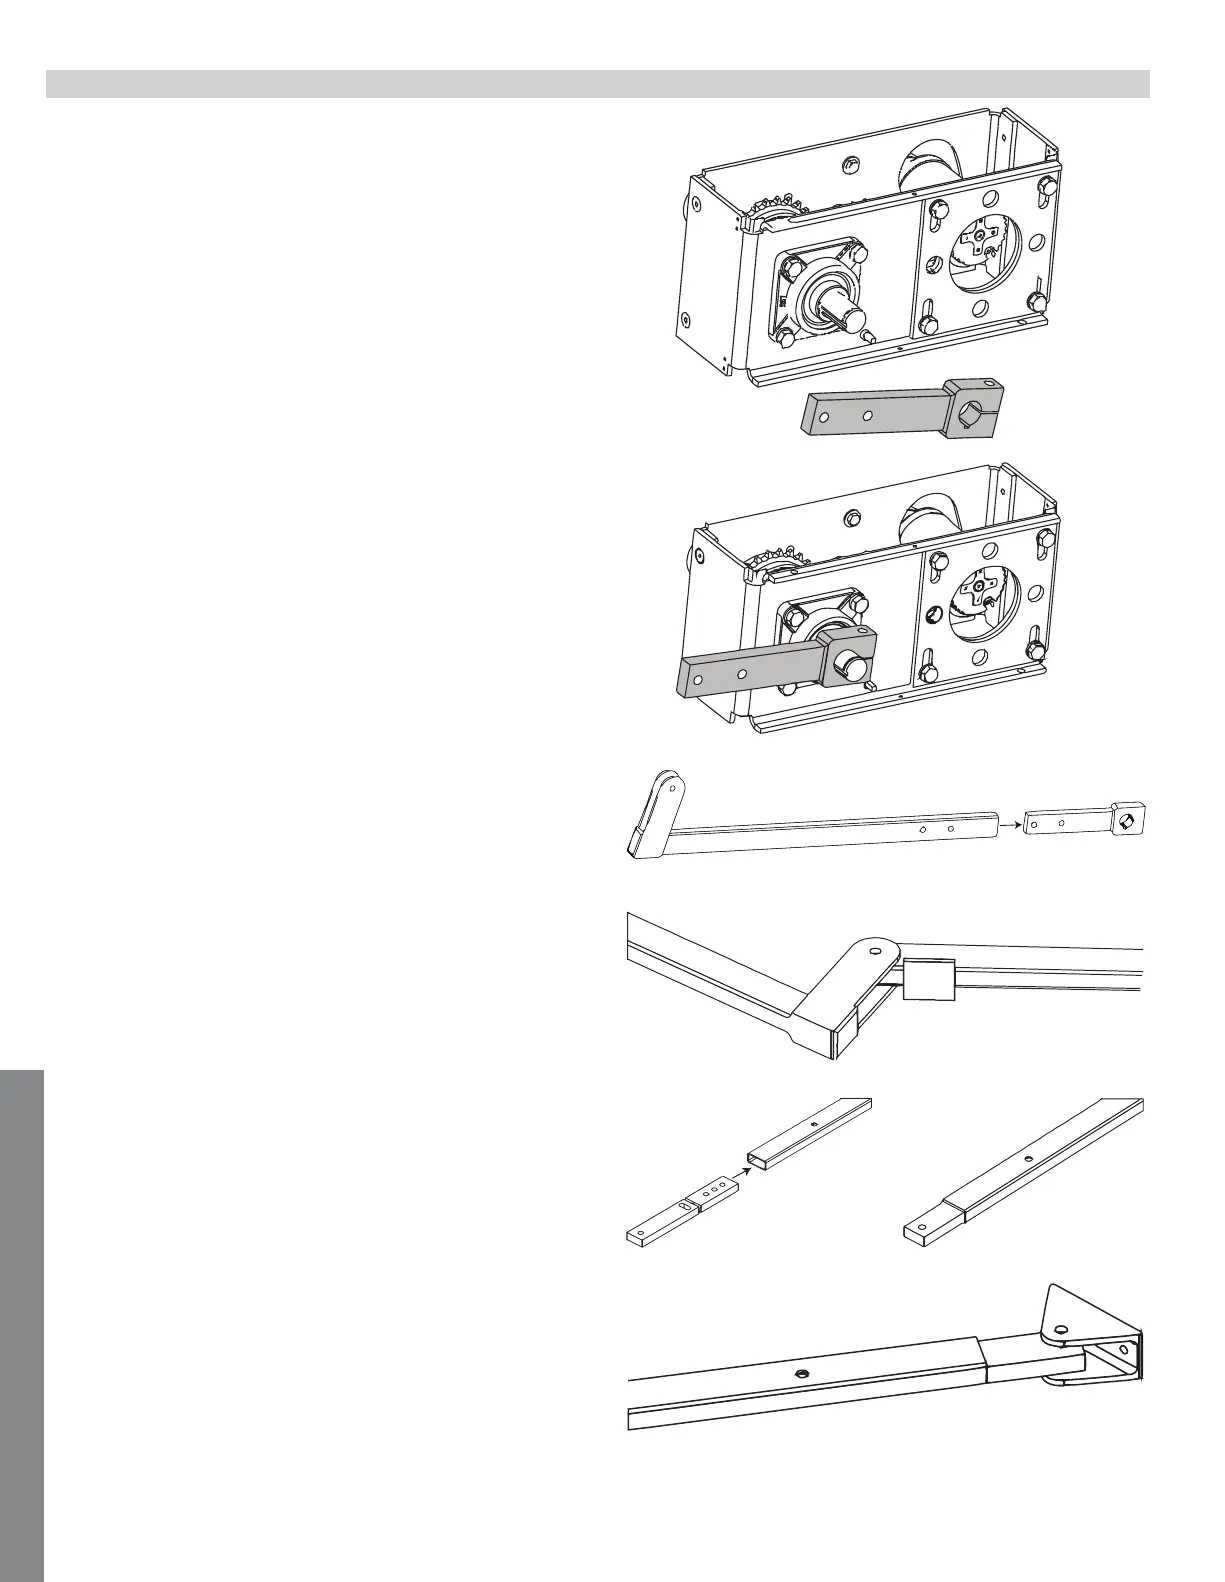
10.4 - CONTROL ARM ASSEMBLY
Install the primary arm collar to the main drive shaft using the
1/4” key stock and set screws.
The collar should be installed on the shaft as far up as
possible. Tighten set screws in place
Install the gate attach bracket to the adjustable arm using the
1/2” x 2-1/2” hex bolt, washers, and lock nut
Attach the secondary arm to the primary arm using a 1/2” x
2-1/4” hex bolt, brass washers and lock nut. The stop tab
should be positioned away from the gate.
Install the aluminum adjustable arm to the secondary arm
using the 1/2” x 1-1/2” hex bolt and nut. Use the middle hole
in the adjustable arm.
Note: Once limits are set and the board has been
programmed, this aluminum arm can be adusted to ne tune
the closed gate position.
Attach the primary arm to the collar, the two ears on the
primary arm should point toward the direction the gate will
close.
35001K & 36001K INSTALLATION