24
HMI Control panel
Moving the control panel
The control panel is from the factory mounted in the front of the unit. It is important that the control panel is located in a visible place
so that the user can follow the unit operation and become aware of any alarms. Therefore, it may be necessary to move the control
panel to another location. It is also possible to follow the operation via the Nilan User App.
A cover plate can be purchased for mounting in the hole in the front of the unit where the control panel is located from the factory.
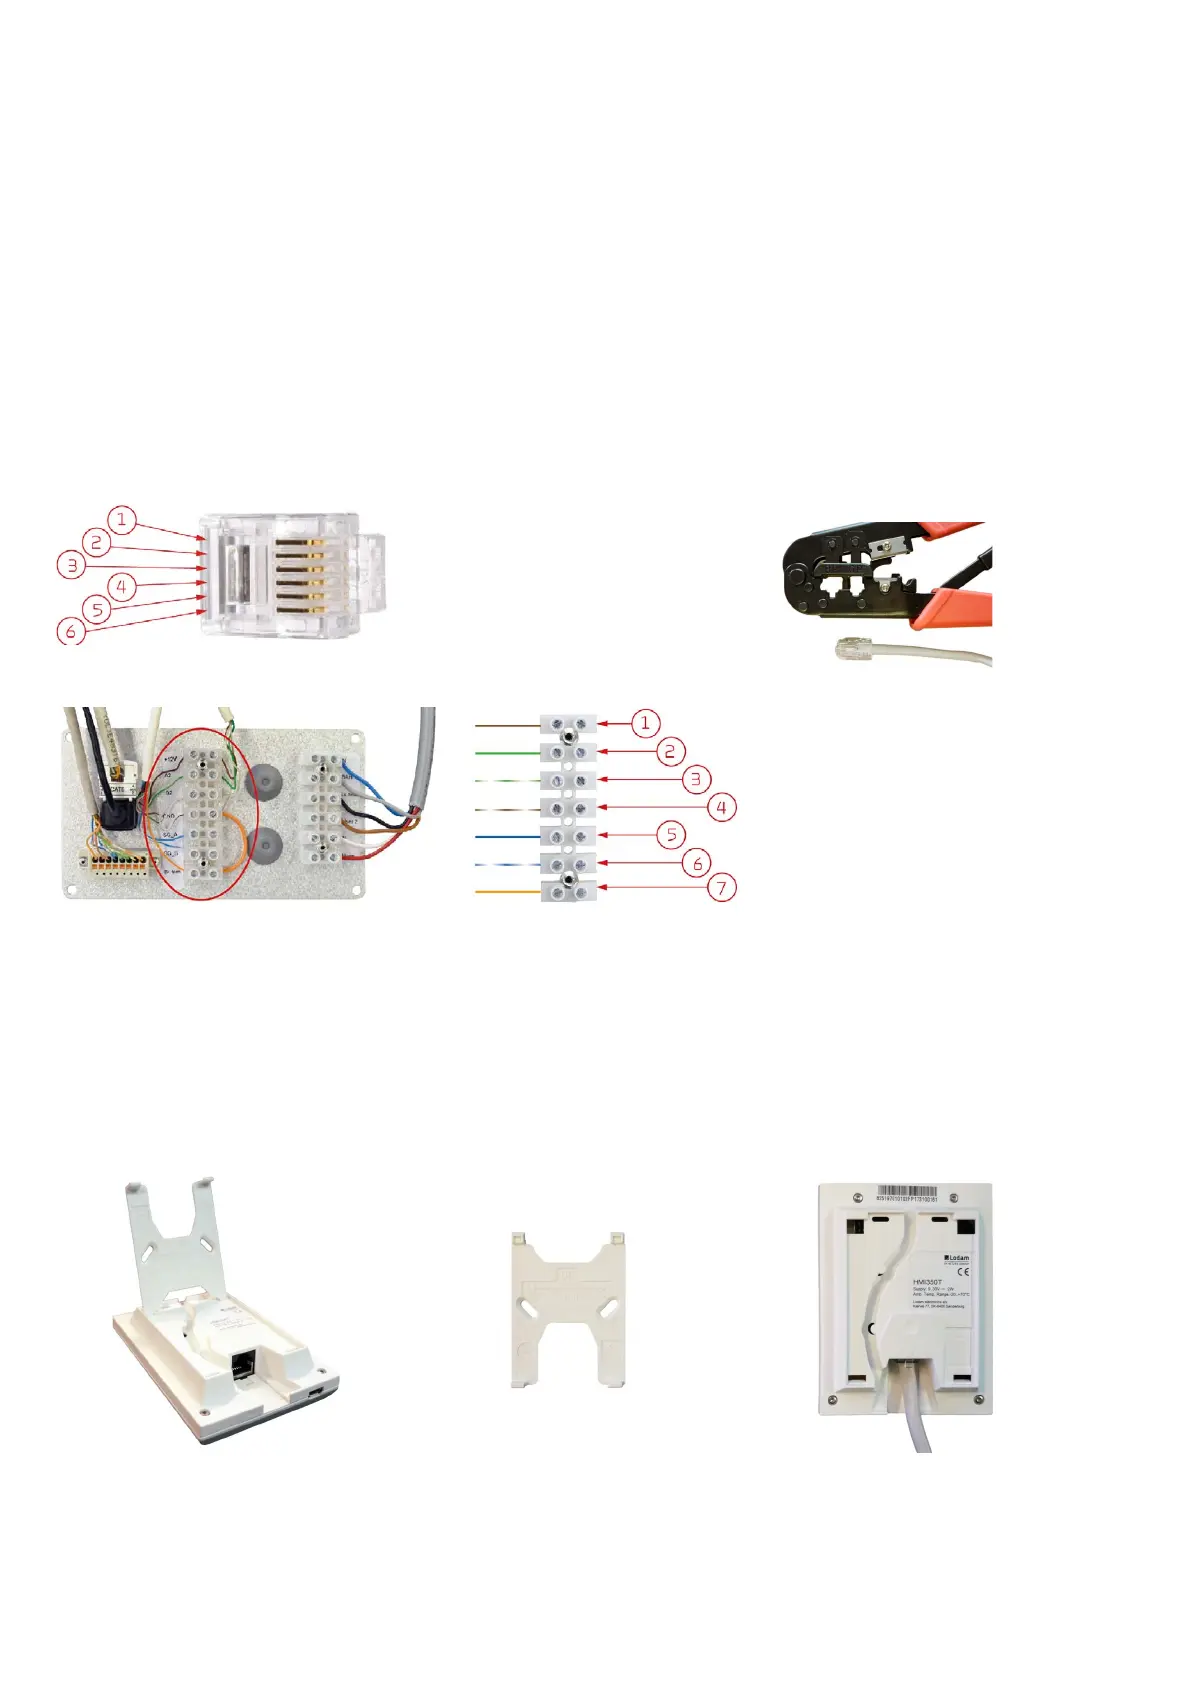
The panel is moved out of the unit and the wires are routed through the wire bushing and connected to the terminal block, as shown
below.
Nilan offers a connection cable with RJ12 plugs of 15 m. It is also possible to customize a cable up to 50 m in length. A standard LAN
cable is used for this.
Wall bracket
Mount the HMI panel on the wall using the integrated wall bracket.
The panel should be placed in a visible spot so it is possible to change settings and to monitor warnings or alarms regarding operation
of the unit.
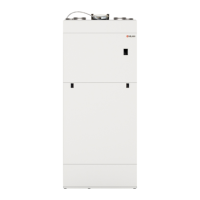
Mounting the RJ12 plug
Pin 3: Green (A2)
Pin 4: Green/white(B2)
Pin 5: Brown (12V)
Pin 6: Brown/white (GND)
Use a RJ12 crimping tool
Connection in the 7-pole terminal block
Terminal 1: Brown (12V)
Terminal 2: Green (A2)
Terminal 3: Green/white (B2)
Terminal 4: Brown/white (GND)
The wall bracket is located at the back of
the panel. You can detach it by loosening
the bracket at the bottom of the panel.
You can then remove it.
Mount the wall bracket on the wall using
2 screws.
Click the RJ12 plug into place at the bot-
tom of the HMI panel. The wire can run
down along the wall, into the wall or
through the groove at the back of the
panel.
 Loading...