Cu-330/Cu-450 splitt
English
Evaporator element CU-330 Split. Wall mounted
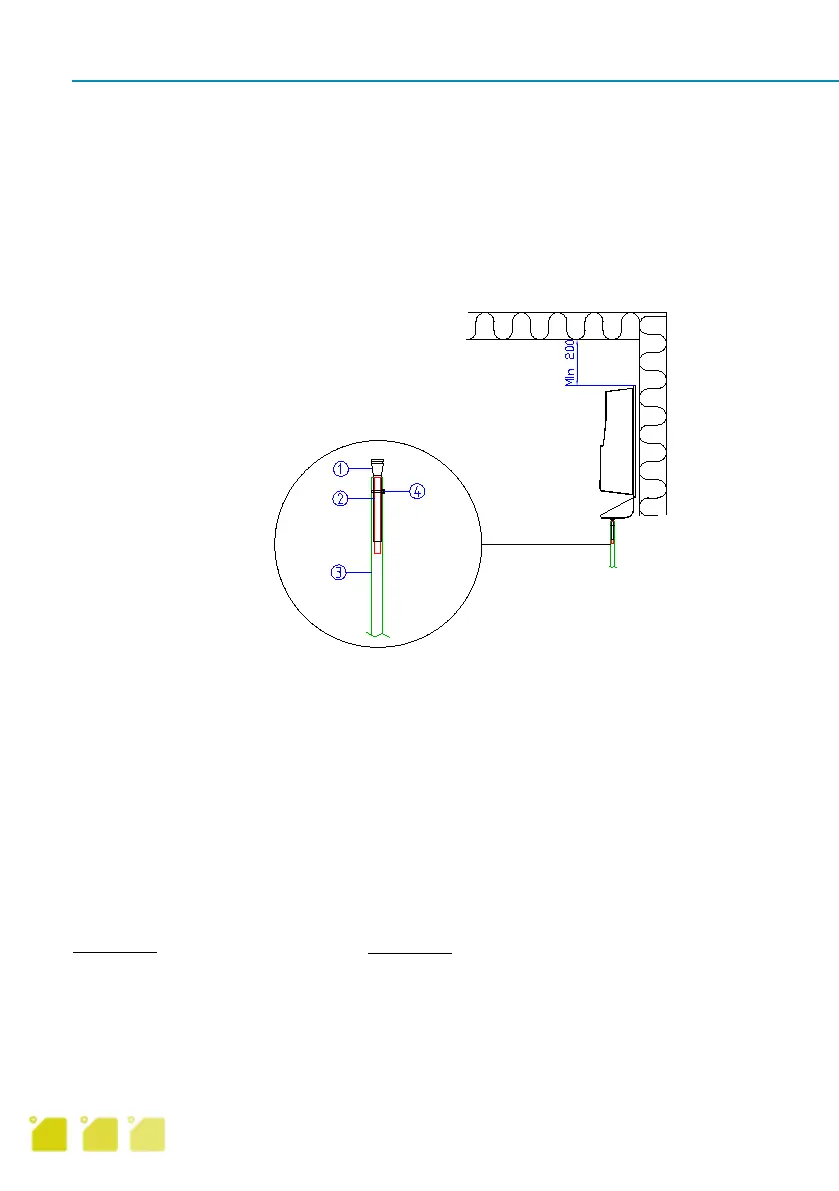
1. Install evaporator element using 4 x 3.9x32mm screws on wall 200 – 300mm down from ceiling
and with space at sides for pipe installation.
2. Do not locate the unit directly opposite the door as this can cause condensation on the magnetic
seals around the door.
3. Pipe connection is on right side of evaporator. Prepare appropriate piping. Install dry filter.
4. Prepare for electric connection between units.
5. Fit cover using 4 x 3.9x32mm screws.
6. Connect plastic hose to drain nozzle NOTE: Reinforce join with copper tube. See diagram
below.
1. Rubber drainpipe
2. Copper tube
3. Plastic hose
4. Strips
Evaporator element CU-330 Split.
1. Mount hanging brackets on wall using (4 screws 4.2x65mm for wooden walls)
2. Locate condenser element on hanging brackets and secure unit both sides using 2 screws.
Refrigeration installation
Suction pipe (8mm) and fluid pipe (6mm) connected (braised) to nozzles on condenser and evapora-
tor element.
NOTE: Remember lter. Pipes should be insulated.
Pressure test unit. Evacuate and fill with R-134A coolant.
Evaporation temperature -10 °C
NOTE: An oil lock may be required
Alternative1
Pipes can be installed with
a fall towards the evaporator
element all the way from where
they go down to the machine
element.
Alternative2
Oil lock must be fitted so that
the entire height difference is
a vertical pipe with oil lock up
and down.
NOTE: It is vital to avoid
oil pockets, i.e. a completely
level horizontal stretch.
5