Cu-450:
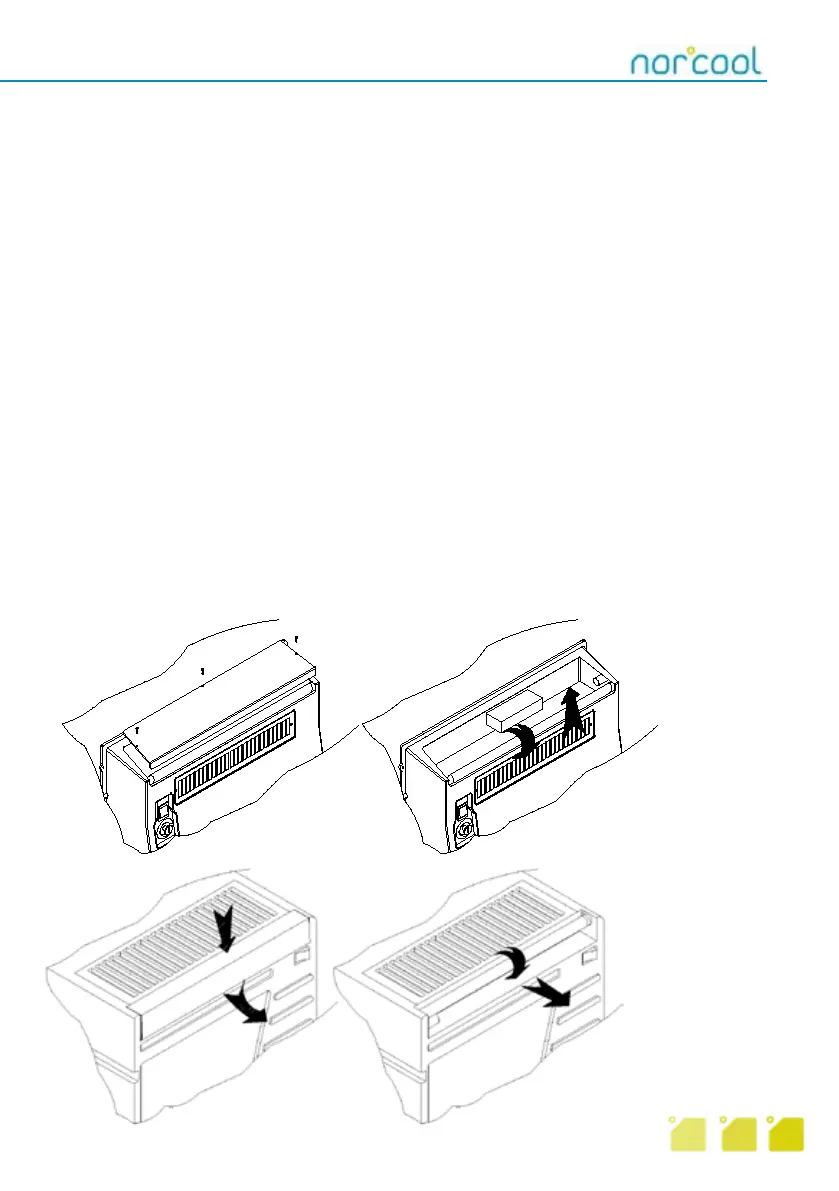
Press cover down and pull
out. Turn light tube a quarter
turn and pull out.
Cu-330:
Remove one of the three
screws and lift cover off. Turn
light tube a quarter turn and
pull upwards and out.
Cleaning and maintenance
Cleaning
To achieve optimum operation (longer service life) it is important that the condenser is cleaned to
remove dust and dirt regularly, at least four times per year, in addition to other requirements.
To access condenser, remove the 4 screws on the cover of the condenser element.
Remember! Disconnect mains plug before removal.
Cleaning the condenser is best performed by vacuum cleaning the condenser fins. For Cu-330
Split, you find the fins on the left side. On Cu-450 Split they are placed on the underside of the con-
densor. Exercise caution. The fins are thin and easily damaged. Replace cover after cleaning.
Check drain on cold side to ensure the water can run freely to the collection tank, drum or the like,
on the cold room side.
To avoid mould forming, bad smells etc, regular cleaning (including inside the cold room) is essen-
tial. We recommend mild, warm soapy water for cleaning inside the cold room.
Setting temperature
The thermostat on the refrigeration unit has a range of 3 ºC – 15 ºC but the default setting
set by the factory is approx. 5 ºC. The thermostat is located on the front of the evaporator element.
To increase temperature (warmer) turn thermostat dial anticlockwise. To decrease temperature
(colder), turn the thermostat dial clockwise.
Replacing light tube
The unit has a built-in light (15W tube) which is switched on and off using the red switch on the
front of the evaporator element. NOTE: Remember to switch light off when leaving the cold room.
10