EasyManua.ls Logo

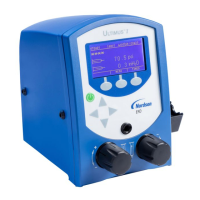
Nordson Ultimus II User Manual

Nordson Ultimus II
32 pages
To Next Page IconTo Next Page
Page #1 background imageLoading...
Page #1 background image
Ultimus
I–II High Precision Fluid Dispensers
Operating Manual
Electronic pdf les of Nordson EFD
manuals are also available at
www.nordsonefd.com

Questions and Answers:

Nordson Ultimus II Specifications

General IconGeneral
Frequency50/60 Hz
Dispensing Repeatability± 0.5%
Dispensing TechnologyPneumatic
Dispensing PressureUp to 100 psi
Operating Air Pressure Range60-100 psi
ControlDigital
Vacuum RangeUp to 25 in Hg
Maximum Pressure100 psi
Dispensing Valve OptionsCompatible with a wide range of dispensing valves (not included)

Summary

Nordson EFD Product Safety Statement

General Warnings & Precautions

Covers electrical hazards, reading instructions, release of pressure, and burn risks.

Air Pressure Safety

Details safe operating limits for air pressure and regulator requirements.

Nordson EFD Product Safety Statement (continued)

Chemical and Fluid Hazards

Warns against specific solvent use and hazards of high-pressure fluids.

Personnel Qualification

Defines qualified personnel for operation and service.

Nordson EFD Product Safety Statement (continued)

Usage, Regulations, and Personal Safety

Outlines proper usage, regulatory compliance, and personal safety measures.

Nordson EFD Product Safety Statement (continued)

Fire Safety and Maintenance

Provides guidance on fire prevention and routine maintenance.

Nordson EFD Product Safety Statement (continued)

Component Safety and Malfunctions

Covers safety for disposable parts, handling malfunctions, and disposal procedures.

Getting Started

Initial Setup Steps

Guides users through the initial placement, connection, and programming of the unit.

Specifications

Technical Specifications Overview

Details key technical data including cabinet size, weight, power, and cycle rate.

Dimensional Data

Provides physical dimensions for Ultimus I and Ultimus II models.

Specifications (continued)

RoHS Hazardous Material Declaration

Declares hazardous substance content according to China RoHS standards.

WEEE Directive Information

Provides information regarding the disposal of electronic equipment under WEEE.

Features & Controls: Front Panel

Dispense Mode Overview

Explains the different dispense modes: TIMED, TEACH, STEADY, and MEMORY.

Setting Dispense Time

Details the procedure for adjusting the dispense time setting.

Features & Controls: Front Panel (continued)

Air Pressure Adjustment

Guides users on how to set and adjust air pressure using the regulator knob.

Vacuum Adjustment

Details the process for setting and adjusting vacuum levels.

Power Button Operation

Explains how to turn the unit on and its sleep mode functionality.

Features & Controls: Front Panel (continued)

Menu Navigation and Functions

Describes accessing and using the device's menu options.

Shot Count Management

Instructions on how to view and reset the shot count.

Dispense Mode Details

Further explanation of TIMED, STEADY, and TEACH modes.

Output Air Port Connection

Details on connecting the air output port for dispensing.

Features & Controls: Back Panel

Power and Communication Ports

Identifies and describes the power input and communication ports.

Input/Output (I/O) Interface

Explains the 8-pin interface connector for external control circuits.

Features & Controls: Back Panel (continued)

Foot Pedal/Finger Switch Port

Details the connection for the foot pedal or finger switch.

Exhaust and Air Input Ports

Describes the pneumatic fittings for exhaust and air supply.

Initial Test Procedures

Setup for Testing

Step-by-step instructions for preparing the unit for initial testing.

Testing in Steady Mode

Procedure for testing the dispenser in Steady Mode.

Initial Test Procedures (continued)

Testing in Timed Mode

Procedure for testing the dispenser in Timed Mode.

Testing in Teach Mode

Procedure for testing the dispenser in Teach Mode.

Initial Test Procedures (continued)

Helpful Hints for Setup

Provides tips for optimizing dispense time, pressure, and vacuum settings.

Suggestions on Settings

Offers advice on ideal settings for accuracy and cost-effectiveness.

Advanced Features (Memory)

Saving a Job Program

Instructions on how to save dispense time, pressure, and vacuum settings.

Working with Saved Job Programs

Guidance on loading and using previously saved job programs.

Advanced Features (Memory) (continued)

Editing or Clearing Saved Jobs

Steps to modify or delete existing job programs.

Menu Functions

Units of Pressure and Vacuum

How to change the display units for pressure and vacuum.

Language Selection

Procedure for changing the display language.

Information Screen Access

How to view model, part, and contact information.

Menu Functions (continued)

Security Code Setup

Setting a 4-digit password to protect functions from unauthorized access.

Changing the Security Password

Instructions for modifying the existing security password.

Input / Output Connection

Voltage Initiate Circuit

Explains how to initiate dispense cycles using a voltage signal.

Mechanical Contact Initiate

Describes initiation using mechanical contacts like relays or switches.

End-of-Cycle Feedback Circuit

Details the feedback signal indicating the completion of a dispense cycle.

Input / Output Connection (continued)

Back Panel Pin Function Details

Table outlining the function of each pin on the I/O connector.

Vacuum Calibration Procedure

Instructions for calibrating the vacuum function using provided software.

Pressure and Time Verification

Guidance on verifying pressure and time settings against standards.

Filling the Syringe Barrel

Syringe Barrel Filling Guidelines

Recommendations for optimal fill levels and piston usage.

Filling Pourable Fluids

Procedure for filling syringe barrels with low to medium viscosity fluids.

Filling Thick Fluids

Procedure for filling syringe barrels with viscous or non-leveling fluids.

Filling the Syringe Barrel (continued)

Filling Watery Fluids and Vacuum Control

Steps for filling watery fluids and using vacuum for drip prevention.

Syringe Barrel Loading Alternatives

Atlas Filling System

Description of the Atlas system for efficient barrel filling.

Caulking Tube Filling Method

Using a system to fill barrels from caulking type cartridges.

Luer-to-Luer Fitting for Syringes

Utilizing a fitting to transfer material from medical syringes.

Part Numbers

Dispenser Model Part Numbers

Lists part numbers for different Ultimus I and II dispenser models.

Replacement Parts List

Identifies common replacement parts like foot pedals and sleeves.

Optional Accessories

Refers to additional accessories for enhancing dispenser performance.

Troubleshooting

Common Troubleshooting Guide

Addresses common issues like power, inconsistent dots, timer, suck-back, and air leaks.

Nordson EFD Ten Year No-Fault Warranty

Warranty Terms and Conditions

Details the 10-year no-fault warranty, including repair, replacement, and limitations.

Related product manuals