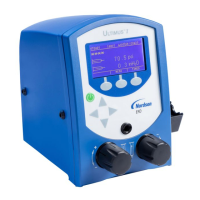
Do you have a question about the Nordson FoamMelt 200 and is the answer not in the manual?
General safety recommendations for unit operation.
Explanation of safety symbols used throughout the manual.
Definition and requirements for qualified personnel.
Procedures for safe installation and electrical connections.
Guidelines for safe operation of the unit.
Steps to take if the unit malfunctions.
Precautions and actions related to burns from hot materials.
Guidelines for performing maintenance and repairs safely.
Description of the Vista control panel.
Explanation of the FoamMelt process theory.
Procedures for making electrical connections.
Procedure to program SYSTEM SETTINGS features.
Controlling the temperature of heated zones.
Log for recording system faults.
Log for recording system warnings.
Procedures for setting up temperature controls.
Procedures for starting up the processor.
Procedure for adjusting pump speed.
Charts showing system output at various pump speeds.
Adjusting the density control.
Determining and adjusting density reduction.
Procedure for adjusting system pressure.
Procedures for monitoring system parameters.
Procedure for checking the fault log.
Procedures for changing adhesives in the system.
Procedures for shutting down the processor.
Procedure to relieve system hydraulic pressure.
Recommended maintenance schedule for the processor.
Procedures for checking and cleaning the filter assembly.
Procedures for cleaning and replacing the filter screen.
Steps for installing the density controller and filter.
Procedure for testing the pressure relief valve.
Procedures for flushing the system.
Procedure for checking the drive belt for signs of wear.
Troubleshooting common mechanical problems.
Troubleshooting pump outlet pressure issues.
Electrical wiring diagrams for the processor.
Steps for replacing the drive belt.
Procedure to replace the drive shaft face seals.
Procedures to install the drive assembly.
Procedures to install the motor plate and motor.
Procedures for pulley installation and alignment.
Procedures for replacing the pressure control valve.
Procedure for rebuilding the pressure control valve.
Procedure for rebuilding the density controller.
Procedure for replacing the pressure relief valve.
Procedure for replacing the drain valve.
Procedure for replacing hose connector O-rings.
Procedures for making repairs to gas components.
Procedures for removing and installing the gas pressure control panel.
Procedure for replacing the gas pressure regulator.
Procedure for replacing the gas pressure gauge.
Procedure for replacing the Reedex valve.
Procedure for replacing the gas pressure switch.
Procedure for replacing the gas pressure check valve.
Procedure for replacing the pressure transducer assembly.
Procedure for replacing the I/O board.
Parts list for the pressure control valve.
Parts list for the density controller/filter assembly.
Parts list for the electrical panel assembly.
Parts list for the control panel assembly.
Parts list for the gas panel assembly.
Technical data for the FM-200 processor.
Physical dimensions of the FM-200 processor.
Charts showing system output vs. pump speed.
Electrical safety precautions for troubleshooting.
Tables for troubleshooting common issues.
Troubleshooting steps for a non-powering processor.
Interpreting system warnings and faults.
General troubleshooting procedures.
Procedures to replace control boards.
Procedures for replacing the control board.
Procedures to replace the entire control assembly.
Procedure for replacing RTD or thermostat.
List of parts for the drive assembly.


