20
!
WARNING:
To avoid personal injury or property
damage, make certain that the motor
leads cannot come into contact with
non-insulated metal components of the
unit.
Blower Installation:
1. Turn off all electrical supply circuits to the
furnace at the main service panel.
2. Remove furnace front door and switch
furnace circuit breaker(s) to “OFF”.
3. Disconnect the motor plug from the control
panel receptacle.
4. Remove one screw from left side of blower
and three screws from right side of blower;
slide blower forward and remove.
5. Install new blower ensuring the side flanges
engage under side mounting tabs (three on
one side, one on the other) and the long tab
in the rear.
6. Replace screws previously removed from
blower.
7. Connect the motor plug to the control panel
receptacle.
8. Switch circuit breaker(s) to “ON”, reinstall
furnace front door, and turn on electrical
supply circuits to the furnace.
Selecting Blower Speed
See Table 5 for the lowest speed approved for
the heating output of the unit. Since the blower
leads connect to the control box, blower speed
selection is accomplished through use of the
proper color-coded blower lead located inside
the control box. The speed(s) set by the factory
may be different from that shown on the wiring
diagrams. See the unit control box for blower
speed(s) set at factory.
Table 5. Furnace Blower Speed Data
!
IMPORTANT:
If a relay box is installed, blower speeds
for heating and cooling are set inside
the relay box (see instructions
included with relay box). The blower
speed inside the furnace control box
must
be set to low or medium-low.
Never change to a heating speed lower
than that shown in Table 5.
Changing Blower Speed
E3EH: The selected heating blower lead is
attached to the wire lead attached to terminal 2
of the blower selector switch.
a. Remove blower lead from the wire lead off
of terminal 2.
b. Choose desired speed.
c. Attach new blower lead to wire lead off
terminal 2 of blower selector switch.
E2EB: The selected heating blower lead is
attached to terminal 6 on blower relay. The
selected cooling blower lead is attached to
terminal 4 on blower relay.
a. Remove heating blower lead from terminal
6 on blower relay.
b. Choose desired speed and install new
blower lead onto terminal 6 of blower relay
for new heating speed.
c. Remove cooling blower lead from terminal
4 on blower relay.
d. Install new blower lead onto terminal 4 of
blower relay for new cooling speed.
E3EX: The selected heating blower lead is
attached to terminal 6 on blower relay and is the
red wire attached to the motor pin terminals 1-
3. The selected cooling blower lead is attached
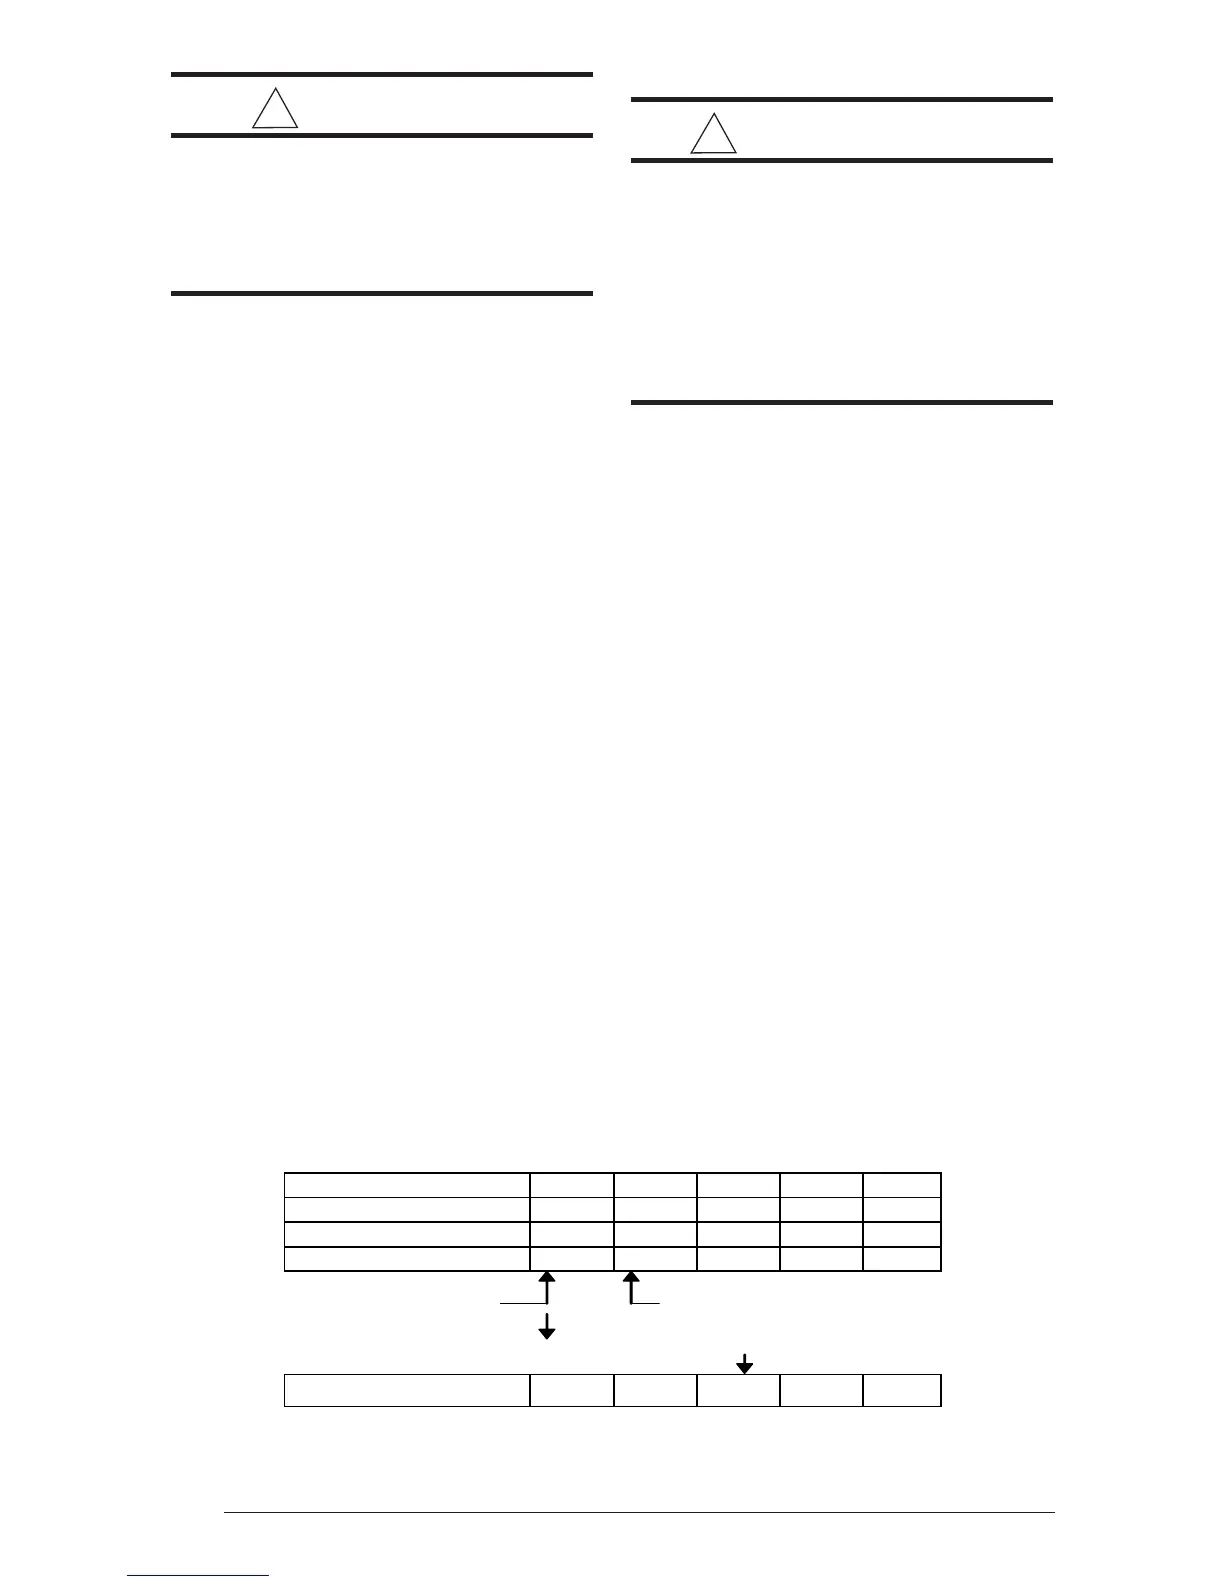
Plug/Receptacle Position Pin1 Pin2 Pin3 Pin4 Pin5
2 Speed Blower Low High - - -
4 Speed Blower Low Med-Lo Med-Hi High -
Control Box Blower Lead Red Yellow Blue Black -
Multi-Speed, E3EX Low Med-Lo Med Med-Hi High
Minimum approved
speed for 015, 017,
020, 023 models.
Minimum approved Speed
for 010 and 012 models
 Loading...