Disk Replacement Procedure 31
BMC II BISYNC Quick Reference Guide
5 Return the processor to PRIME mode. On the status panel push
the P rocker switch down and turn the MODE SWITCH key.
The ONL lamp should go out.
6 Reinitialize the new disk.
CAUTION
These disk commands may cause a loss of data. Make sure
the operational disk drive is in an ONLY mode before enter-
ing the following commands.
Enter: (at the terminal)
>DSK INIT 1x (cr)
where: x - A for newly installed disk A
- B for newly installed disk B.
Proper response:
0 BAD TRACKS
INIT COMPLETE
If the response is NO DISK PARAMETERS, go to step 9.
7 Enter in the defective track(s) from the disk manufacturer's
defect (bad track) list. Enter: (at the terminal)
>DSK DEFMAP x (cr)
where: x - A for newly installed disk A
- B for newly installed disk B.
System response is a prompt:
ENTER HEAD AND CYLINDER # FROM DEFECT MAP.
ENTER Q TO EXIT
HEAD>
Obtain the disk manufacturer's bad track map. Enter the HEAD
No. xx (1 to 2 digits), from the disk manufacturer's bad track
map.
Note 1: The defect map is located on a paper that accompanies each new
disk. If this document is not with the disk, the information is printed on a
label located under the PCA mounted on top of the disk drive. If the
label contains no defect information, the disk has no defects to be
mapped. After entering any available defect map data, the paper should
be folded and kept with the newly installed disk drive.
System response:
CYLINDER>
Enter the CYLINDER No. xxx (1 to 3 digits), from the disk
manufacturer's bad track map. System response:
xx BAD TRACKS
HEAD>
(xx - number of bad tracks masked out.)
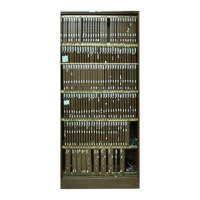
Procedure 3
Install replacement disk drive
Step Description