customizing MIDI controls, or any other troubleshooting.
Let’s look at how you might start using the Launchpad Pro
with Logic X, but the methods shown here will apply to most
other music software.
With the unit properly connected, Logic X should by default
receive MIDI from the Launchpad Pro (in Note layout) if
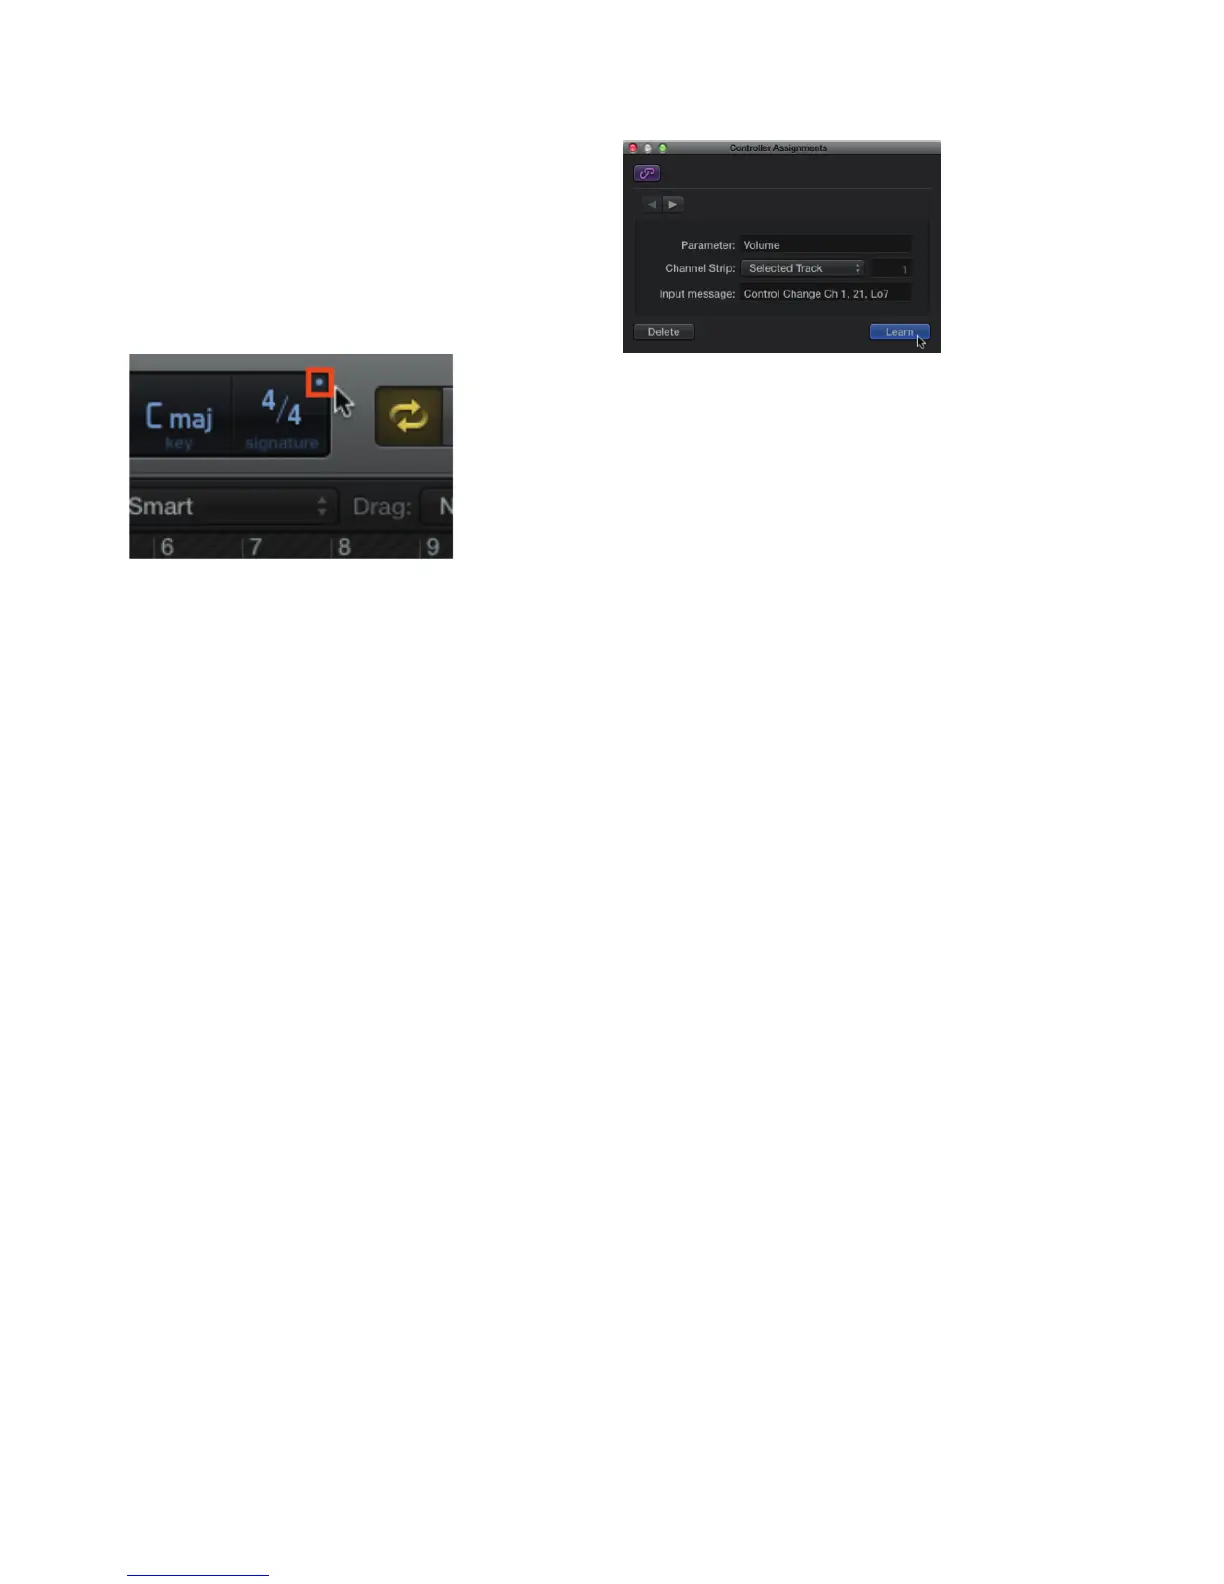
you press its pads. This tiny circle above the time signature
confi rms that Logic is receiving MIDI when lit.
Logic’s ‘MIDI In’ indicator
Assuming Logic X is receiving MIDI, simply record arm a
MIDI track that contains an instrument. The Launchpad Pro
will then be able to make melodies and chords in Logic,
using the chromatic note grid in Note layout, or 4x4 pad
areas in Drum layout. Just like in Ableton Live, you can use
the Up and Down arrow buttons to shift octaves, and the
Left and Right arrow buttons to transpose the pad layout
in semitones.
For more in depth control of Logic from the Launchpad Pro
we will have to set it up ourselves. One possibility is to use
Fader layout (see ‘Setup’) to mimic a traditional mixer, and
control selected tracks in Logic.
First, change the Launchpad Pro to the Fader layout on the
Setup page. Once in Fader, you are now ready to ‘learn’
Logic’s parameters to the Launchpad Pro’s virtual faders.
This is be done by fi nding ‘Control Surfaces’ under the
Logic menu, and then selecting ‘Controller Assignments’.
Follow these steps in the pop-up window:
• First, click the ‘Learn’ button
• Next, click the Logic parameter you want to map to
the Launchpad Pro (e.g., Track Stack volume sliders)
• Then, touch the Launchpad Pro’s pads
• Finally, click ‘Learn’ again to exit
You now have convenient, hands-on control of your
Logic X session.
Logic X’s ‘Controller Assignments’ window.
Troubleshooting
For all troubleshooting queries, please visit the Novation
Answerbase at www.novationmusic.com/answerbase where
you will fi nd articles covering numerous troubleshooting
examples.
18


![Preview: Novation Launchpad Mini [MK3]](https://data.easymanua.ls/products/284351/200x200/novation-launchpad-mini-mk3.webp)